Quick repair of the apartment with your own hands. Stages of repair in an apartment - how to make a good repair and not overpay? Instructions, with photos and recommendations from the pros! Where to start repairing a separate room and what is the sequence of work
The issue of repairing a room almost always rests on the budget for future work. Most often, the owners of an apartment or house are faced with a choice - to do a cosmetic renovation of the room with their own hands, without putting it off indefinitely, or to plan a major restructuring with redevelopment and a major design update for an indefinite future. Most masters in such a situation recommend a redecoration of the room, during which the vast majority of problems with the interior of the room can be solved.
How to approach the organization of repairs in one room
Starting repairs in a room is always inconvenient and even scary, especially if there is not enough experience, and of the assistants at hand, there is only a cheat sheet on doing a do-it-yourself room renovation for beginners. But, as a rule, uncertainty and doubts pass when the scope of future work becomes clear and the question is resolved in what sequence to make repairs in the room.
Therefore, the first step is to draw up a master plan for cosmetic repairs, and most importantly, before trying to make repairs in the room, it is necessary to draw up a detailed estimate for the purchased materials and consumables. This is a prerequisite, even for repairs in a small room you will need to make a list of several dozen items.

Where to start repairs in the room is not important, you can carry out repairs in the sequence that seems more convenient in these specific conditions. Traditionally, do-it-yourself room repairs begin with the most “dirty” or rough work and end with fine finishing procedures.
A typical list of work or a sequence of repairs in a room is as follows:
- The old finish is removed from the walls, ceiling and floor. Removal floor covering gives the largest percentage of dust and dirt, so it is removed first;
- A rough preparation of the floor is being carried out for further laying of a new floor covering;
- Wiring is being repaired, lamps, switches are being moved and hung, corrugations are laid out for television and Internet cables;
- Walls and ceilings are cleaned and plastered. If the plans for cosmetic repairs involve changing the wallpaper to a more modern type of finish, then you will need to level the walls gypsum plaster;
- The ceiling surface is leveled in a similar way. For whitewashing or painting with a water-based emulsion, the ceiling is overwritten, plastered with a lime-gypsum mixture and a decorative coating is laid;
- Decorative wall decoration is being carried out, glued ceiling plinths, the lining of interior doors is changing;
- A new floor covering is laid, skirting boards are installed, lamps are hung, switches are being installed.
Of course, at each stage of repairing a room, a photo, a large amount of debris and dust will be generated. Not only will you have to regularly clean the room and take out rubbish blockages, you will need to try to cover areas with already completed repairs with a protective plastic film to avoid dusting the surface.

What should not be included in redecorating rooms
Master finishers often call redecoration work "for three days", in order to update the interior in a room, more, as a rule, is not required. The list of repair measures does not include the most expensive work:
- Redevelopment of premises with the transfer of interior partitions;
- Replacement of the heating system;
- Installation of expensive multi-tiered suspended ceilings;
- Balcony glazing and replacement of windows with double-glazed windows;
- Underfloor heating equipment in the room.
It is clear that all of the listed components of the repair require serious financial costs and the involvement of qualified specialists in the work. It will take more than a day or two to carry out such serious events. In addition, such is the specificity of the repair in the room that, willy-nilly, dust and construction debris spread throughout the apartment. Therefore, the situation is regulated in this way - either cosmetic repairs are made in a single room, or the entire apartment “gets up” for major repairs.
In general, the redecoration plan includes everything that can be done in a couple of days with your own hands for relatively little money.

The main task of cosmetic repair
The main purpose of the repair work It consists in refreshing the interior of the room, removing minor defects and damage accumulated over the years, which are insanely annoying and interfere with everyday life.
In rare cases, cosmetic repairs are the result of force majeure, for example, the flooding of the room by the neighbors on the floor above or the preparation of the premises for rent. There can be many reasons, but the main thing is still maintaining the premises in a comfortable condition for living.

Properly performed cosmetic repairs make it possible to save on the volume of future overhauls. For example, performing a floor base screed and leveling the walls will at least reduce the time and effort spent on preparing for a major overhaul, of course, provided that the repair of the room with your own hands is done as conscientiously and efficiently as possible. .

The next stage of repair, distribution of costs and loads
One of the most difficult stages of redecoration is fairly considered to be budget planning and material procurement. Especially if you plan to do most of the repair procedures yourself. The reason is simple - amateurs and novice craftsmen have no idea at all how much specific material is required for a particular area of work.
In this case, the problem is solved in two ways:
- Compiled List works and estimates can be shown to an experienced craftsman who will help calculate the expense by squaring the room;
- Calculate flow on the basis of standard recommendations of building materials manufacturers, increasing the stock of glue, plaster mixtures, wallpaper, flooring by 10% of the calculated indicators.
In the latter case, the cost of purchasing materials will increase significantly, but in the end, the remains of cement, dry plaster and glue can be used to redecorate other rooms in the apartment. In addition, having a list often helps to get a wholesale discount, so there should not be significant gaps in the budget for a future cosmetic renovation of a room with a competent organization of the purchase.

Preparatory stages of repair in the room
The first, most time-consuming stage has always been and remains the rough peeling of the walls and ceiling. Usually repairs in a room begin with the removal of furniture and embedding front door protective awning. You can use thick plastic wrap or an old blanket. An impromptu curtain will protect the rest of the apartment from noise and dust, which, even with very careful work, the use of a vacuum cleaner and wet cleaning of floors, always accumulates in considerable quantities in the room.
Before repair, lamps must be removed, instead of a chandelier, a cartridge with a light bulb is left in the room. If double-glazed windows are installed in the room, then it will be useful to tighten the window opening with foil before repair. It is clear that the floor covering is also covered with a film, it is easier to roll up the laid polyethylene than to wash out the dirt in the room every evening.
Removing old finishes from walls
It takes about a third of the planned time to prepare for cosmetic repairs. During this time, you will need to remove the whitewash and wallpaper from the walls of the room. If there are areas with damaged plaster, it will take another day to knock the plaster off the walls.
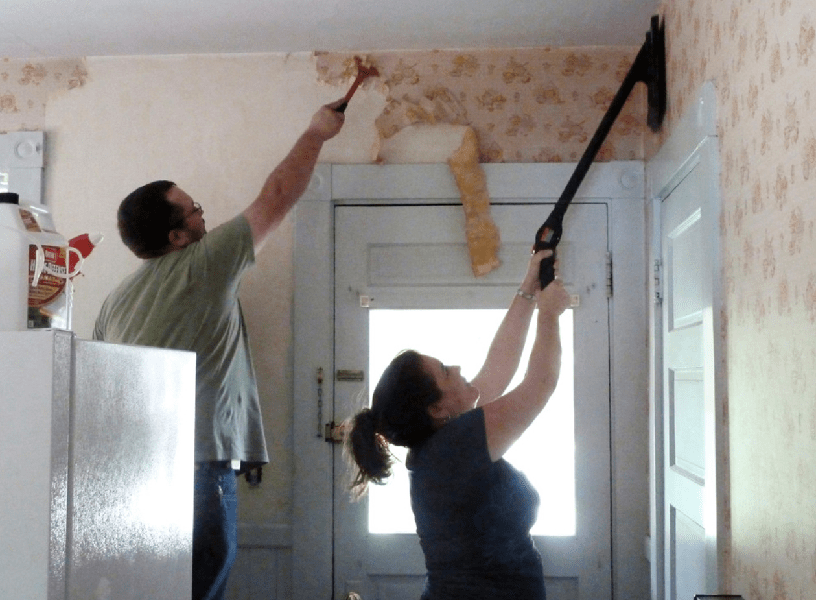
Old wallpaper is removed either with one panel or scraped off in small pieces for a long time, it all depends on the glue used. Before removing the wallpaper, the surface is moistened with a spray bottle with a small amount of water. After 20-30 minutes, the tapestries can be removed in patches. For particularly strong adhesives, boiling water and steam are used. In any case, after peeling off the old trellises, you will need to go through with a vacuum cleaner and a stiff brush to remove dust and glue residue.
Stripping and restoration of the ceiling surface
The ceiling is free decorative coating much faster and lighter than walls. If the plans for cosmetic repairs include the sticker of polystyrene plates or laying plastic panels, it will suffice to remove upper layer whitewashing.
The situation is more complicated if the ceiling in the room is painted water-based paint or whitened with lime. In this case, it will take at least a day to remove the durable layer of the old finish.
The most common option for restoring the ceiling during cosmetic repairs involves leveling the plane ceiling. In any room of any apartment, floor slabs lie with a trim of several degrees, which leads to a difference in ceiling height near the opposing walls of the room from 2 to 5 cm.
If the time and budget for cosmetic repairs allow, then it is best to level the ceiling with high-quality gypsum plaster.

To do this, plastic slats are sewn onto the ceiling and the plane is tightened with a plaster mesh. Reiki-lighthouses are glued with alabaster, guided by pre-stretched marking horizontal cords. The mesh is sewn on dowels. The total time required for the final leveling of the ceiling in the room is 5-6 hours of work.
In one working day, you can complete a complete ceiling repair. The next day, you can rub, prime and paint the surface.
Cosmetic repairs to the walls of the room
During cosmetic repairs, the walls are leveled and plastered only in exceptional situations when the situation requires it, for example, the appearance of a large number of cracks or chipping of the plaster. In addition, the total area of the walls of the room, as a rule, is three times the area of \u200b\u200bthe ceiling, which in itself requires high costs time and materials.
Therefore, during cosmetic repairs, the preparation process is limited to cutting small cracks, followed by puttying and grinding the surface. Sometimes, in order to level the plane of a single wall, especially problematic areas are subjected to grinding with an electric grinder.
In addition, at this stage of the repair work, it is not difficult to change the profile and configuration of the electrical wiring in the room. It is enough to drill channels in the lower part of the walls to the installation site of new electrical sockets, break through the "glasses" for the sockets and install the sockets themselves. Corrugations with wiring laid in channels can be rubbed with gypsum or alabaster mass. All work will take a maximum of 2-3 hours. At the end of the preparation for finishing, the surface is vacuumed and primed.
Rough floor preparation
After the completion of the most time-consuming work with the preparation of the ceiling and walls, you can proceed to cleaning and preparing the floor. If the floors are concrete, with laminate-based flooring, then cosmetic repairs may be limited to re-laying laminate boards, with or without replacement of the lining material. Most often, damaged plates are changed in the room, after which the coating is polished using wax mastic.

During cosmetic repairs, linoleum coatings are cut out, the base is cleaned to concrete, primed and covered with a heat-insulating lining based on polyethylene foam.
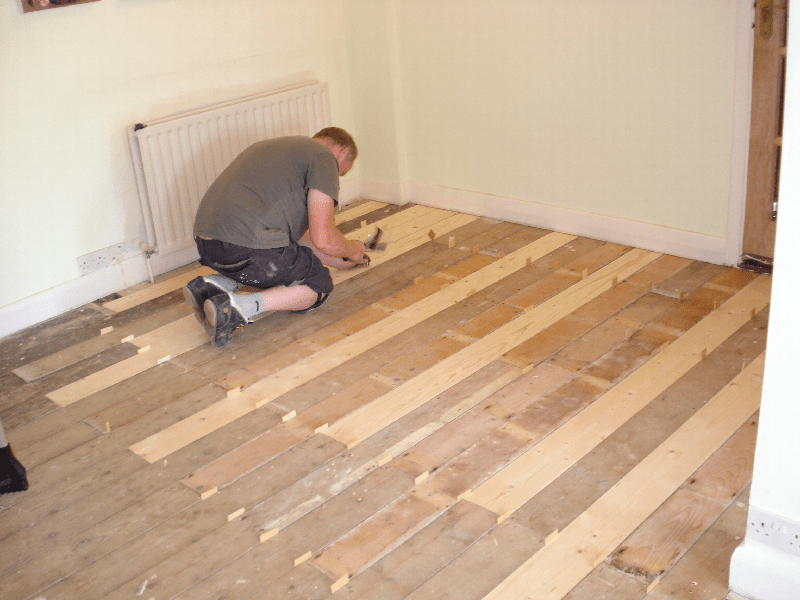
If the room has wooden floors, then first of all the floorboards themselves are cleaned and repaired, then the joints are clogged and minted, after which the surface is polished and prepared for painting.
Don't forget about debris and dust
Any repair work, even the most simple and superficial, is always accompanied by the formation of a large amount of debris and dust. Before repair, you need to prepare two or three polypropylene bags, in which all the garbage from the room will be collected daily. At the end of the day, after each finishing operation, the walls and floor are cleaned of crumbling crumbs and plaster residues, and before finishing, the walls are vacuumed or wet brushed.
If it is supposed to level the walls of the room with gypsum plaster, then the amount of garbage will increase by five to six times. It will be necessary to think in advance and find a way to collect and remove from the premises 150-200 kg of cement-sand garbage screenings. Send it to the garbage chute or garbage bins not possible, you will need to order a special service for the removal of construction waste.
Fine cosmetic repairs in the room
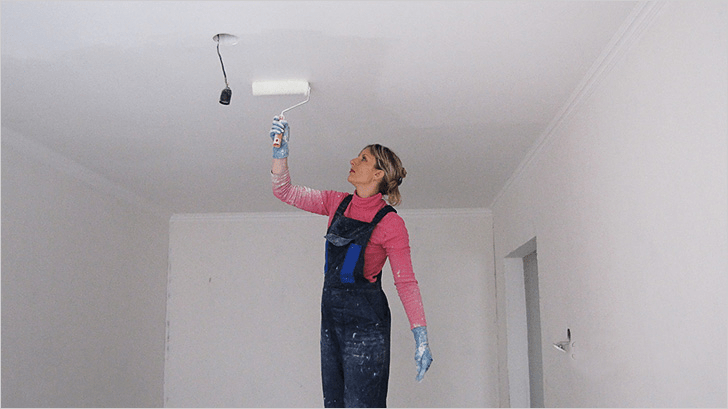
The first is the finishing of the ceilings. Usually the repaired and sanded surface is primed and painted acrylic paint light tones.
If wallpaper is used in the interior of the room, the ceilings can be decorated with non-woven or vinyl wallpaper to match the future wall decoration. A common practice for decorating lamps and chandeliers is the use of imitation styrofoam moldings and decorative ceiling plinths.

The fine finishing of the walls in the room is considered one of the most responsible and at the same time time-consuming cosmetic operations. Even taking into account the fact that half of the walls in the room will be covered with furniture, a certain part of the walls will still be clearly visible to everyone in the room. If during the cosmetic repairs it was not possible to qualitatively level the surface of the walls, you can hide the flaws only under the wallpaper. Best of all, tapestries on a fabric basis or with a pronounced embossed textured surface. It will take 7-8 hours or a full day to paste over the room.

Repair of doors and floor in a small room
The wooden plank floor of the old layout often has to be hidden under linoleum or laminate. In this case, the surface of the floorboards is polished with a sander, and the joints are sewn together with nails hammered at an angle to the board. At the next stage of the repair, the floor surface is sewn up OSB boards, after which you can lay linoleum or any other type of flooring in the room.

The situation becomes more complicated if the concrete floors are aligned with the level of the screed throughout the apartment. In this case, any floor covering in the room will lead to the appearance of a threshold, so the laying of laminate or parquet must be planned simultaneously in all rooms.
The final stage is the restoration of interior doors. The hatch and the door itself, if they are in good condition, can not be changed, but restored with cleaning and polishing of the surface. The outer lining of the door frame during the repair is traditionally replaced with a new one. The replacement of doors with a carrier frame is planned for a major overhaul, usually so that the entire apartment or house has doors of the same style and design.

Conclusion
Repair of a room, even in a cosmetic version, requires careful preparation, first of all, in the details of the future interior of the room, the method of decorating walls and floors. Any attempt to postpone the decision to the future, to do it randomly, as it happens, will lead to a significant increase in costs and increase the time required to restore the room by two to three times.
Do-it-yourself apartment renovation where to start - this question was asked at least once in a lifetime by every homeowner. As a rule, this upcoming event evokes positive emotions among those who have received or purchased their own housing for the first time. Those who have already dealt with the work of bringing the apartment in order know how much trouble they bring, and how much effort they will have to put in to achieve the desired result.
But, if it's time to start updating the apartment, then you will have to be patient and a decent amount, the amount of which depends on what type of repair it was decided to carry out.
Types of repairs in the apartment
Repairs can be major or cosmetic, covering the entire apartment or its individual premises. But you should be aware that repairs in some rooms can become more time-consuming and require more effort and effort than work in other rooms.
Overhaul
Capital works involve repairs "from scratch" in new apartment or redevelopment with the replacement or transfer of installed elements in the old housing. The amount of work will depend on what changes it is decided to make in the apartment.
The total scope of work may consist of the following activities:
- It may include demolition or installation of partitions, merging or dividing rooms, moving or expanding doorways. If at least one of the listed actions is planned, then it is imperative to consult with a specialist who will determine whether this process is possible. All repair work related to the dismantling or installation of walls in a multi-storey building must be confirmed by the permission of the commission of the managing organization.
- Replacement and relocation of plumbing fixtures, radiators, electrical outlets, additional lighting.
- Replacement of windows and doors.
- Replacing old wall and floor ceiling finishes.
- Embedding furniture, if this process is included in the plans.
A major alteration in an apartment is a lengthy process that cannot be done in two days or a week, while you will have to free the rooms from furniture and all things, as they will interfere with work or may be damaged by building materials. You may have to carry out repairs in turn in each of the living rooms, in this case, you will have to take care of buying a dense plastic film to curtain the doors from construction dust and dirt. But, as a rule, overhaul still assumes that the family will have to live elsewhere for this time.
Redecorating
Cosmetic repairs usually involve replacing decorative finishes in one, several or all rooms. Perhaps, having removed the old coating, you will have to adjust the corners, surfaces of the ceiling, walls and floor.

When performing a cosmetic repair option, preparing surfaces for new decorative materials can be called one of the most important processes. No matter how expensive the chosen wallpaper, linoleum or paint may be, if they are laid or applied on uneven surfaces with cracks, the expected effect will not come from them. Therefore, in order for the decorative finish to look properly, it is impossible to do without leveling the surfaces with putty or self-leveling floor.
Having chosen the repair option that is suitable for a particular apartment, you can proceed to further work.
Drawing up a repair plan
The first thing to do is to draw up an apartment plan, which will display exact data on the area and height of the ceilings of each of the rooms, with or without partitions, in a word - in the form that the apartment should appear after repair work.

General rules for repair planning
The design project should show the desired color of flooring, wallpaper, as well as at least an approximate arrangement of furniture. Using this project plan, it will be easy to calculate the necessary building materials and accessories for each of the premises of the apartment. Of course, it will not be possible to take everything into account, but this will save you from some mistakes that are typical for non-professional craftsmen:
- Given the arrangement of furniture and various household appliances, you immediately need to determine the location and number of electrical outlets and switches.
- Efforts should be made to avoid a lack of finishing materials, since if you have to buy them in addition, it will be very difficult to perfectly match the shades of the same tile or wallpaper.
- Having made a project in color, you can visually verify the correctness of the decorative coatings selected by color, and how they will harmonize with the shades of the furniture.
In the process of drawing up such a plan, many ideas for decorating the premises may appear, so it is recommended to make a project in several colors, and then choose the one you like best.
The plan can be drawn up using a computer program or on a regular A4 sheet. It must be carried out in compliance with the dimensions corresponding to the present, but on a reduced scale.
If the plan is drawn up by hand, then having drawn it once, then you need to make several photocopies on which you can apply different shades or different arrangements of furniture.
 The presence of a graphic plan will allow you to "play" with the styles of decoration and furniture arrangement
 You can make a plan of the whole apartment to see it color solution completely or make a design project for each of the rooms.
In addition, it is very convenient to put down the stage number on each of the plans, and plan a certain work on each of them. For example, in one of the drawings you can show the redevelopment of the walls, in the other - electrical wiring and the placement of sockets, as well as the connection of various appliances, in the third - the future arrangement of furniture and color scheme.
Dividing a room into zones
To know where to start repairing each room, you need to determine what will be located in it.
- In the children's room, it is desirable to separate, if the area allows, a sleeping place from the play area or from the place for the child's activities.
- The kitchen should be spacious, so it must also be properly divided into zones, defining a working and dining place, as well as installing various appliances.
- If you plan to separate or combine a bathroom, then on the very first drawing it is worth measuring and indicating its dimensions and the arrangement of accessories.

- If it is started with the desire to divide it into two separate rooms, you need to measure everything very carefully both on the drawing and on the spot. In this case, you need to immediately determine the thickness of the partitions, since they also occupy a certain area.
Sometimes such a redevelopment can also affect the hallway, since in some apartments it occupies a fairly large area. Here it is important to determine what design the partition has that separates the hallway from the rest of the rooms. If it is capital, then you cannot touch it without permits.
- If it is not possible to divide the room with a partition for some reason, you can install a closet or shelving as a "barrier". It should also be noted on the plan.
Selection of materials for decorative finishing
In the next plan-drawing, it is worthwhile to deal with the finishing material and its color, since the comfort of being in the room will depend on these factors. Deciding on the finish, you need to choose it wisely. Naturally, the safest for human health is natural material, such as cork, wood, paper, ceramics and the like, however, some types cannot always be applied due to the high price or inconsistency with the chosen design. So, what materials can be used for different rooms:

- Children's room and bedroom for adults. For premises of this purpose, it is necessary to use as much as possible a natural finish that does not cause allergic reactions, “breathes” and has soundproofing qualities. If a major overhaul is being carried out, then before installing the decorative finish, the walls can be provided with a soundproof layer - materials such as texound, acoustic drywall, cork and others are suitable for this. As a finish for walls and ceilings, it is best to use plastering and coating with water-based paints or pasting with paper or cork wallpaper. Today, in building stores, these materials can be found for every taste and color.

- Living room. For this room, you can choose from a wider range of finishes. Here, linoleum, laminate, parquet, carpet, cork and other modern materials can be laid on the floors.
What you need to know about linoleum
Despite the fact that many new floor coverings have appeared, linoleum is not going to give up its popularity at all. Useful information about is available in a special publication of our portal.
Plastering and painting, pasting with cork, paper, non-woven, vinyl, textile, glass and other options can be used to decorate the walls.
The ceiling can be plastered, covered with a stretch ceiling, single- or multi-tiered suspended structure, or also covered with wallpaper.
The modern solution suspended ceiling!
In this matter, perhaps, there are no boundaries for the imagination of creative owners. In a special portal article dedicated to, you can find out a lot of useful information and even, perhaps, choose one of the options for decorating your own apartment.
- Hallway. Materials for the walls and floor of the hallway must have a pronounced resistance to abrasion, and be easy to clean, since dirt and dust from the street first gets into this room.
The floors can be laid with linoleum or laid ceramic tile.

The walls are pasted over with vinyl wallpaper or sheathed with plastic, wooden or laminated clapboard.
The ceiling in the hallway should be made light, as this room is most often missing daylight. Therefore, a light-colored suspended ceiling with built-in lighting is perfect here.
- Bathroom. or a separate bathroom should have a moisture-resistant finish that is easy to wet cleaning and is not afraid of means household chemicals. The traditional material for these rooms is ceramic tiles - it does not hide the already small area of the rooms, and is also a durable, non-abrasion and easy to clean material. Ceramic tiles are perfect for both walls and floors.

In addition to tiles, plastic panels have been increasingly used for cladding the walls of the bathroom, especially since today a wide range of this material is presented in hardware stores.
The ceiling in the bathroom can be made of the same plastic panels, moisture-resistant plasterboard for painting, but the most the best option for a bathroom or a combined bathroom there will be a stretch ceiling.
Special requirements - to the ceiling in the bathroom!
High humidity, high probability of direct water jets - all this imposes specific requirements for finishing. How to decide on the type - read in a special article of our portal.
Color spectrum
An important role in the design of the apartment rooms is the color scheme, as it should fully contribute to the creation of a comfortable environment. Therefore, this factor must be carefully considered.
The harmony of the design of the rooms will depend on the shades correctly matched to each other. In this process, you can focus on this table.

To make the room light, you should select soft white-beige warm shades. This is especially true of the ceiling surface, as its light color enhances electric lighting. Therefore, quite often modern interiors the shades of lamps and chandeliers do not turn down towards the room, but towards the ceiling.
You always want to make a children's room bright, so that its colors evoke joy and optimism. However, you can’t get carried away at the same time, it must be remembered that the child will not only play in this room, but also relax, so it is recommended to decorate the recreation area in calmer colors.
The bedroom for adults should be conducive to relaxation, and therefore it is recommended to decorate it in pastel soft and fairly light shades, which will help you fall asleep pleasantly in the evening, and wake up with an optimistic mood in the morning.
The color selection affects the psychological and physical state of the body, because if a person does not get enough sleep or does not rest properly, then his vitality and immunity decrease, so the selection of shades should be taken seriously.
Dark shades combined with more light colors can only be used in a well-lit room, otherwise they will act on the psyche, especially children, very depressing.
Having decided on the materials and their colors, measure all surface areas on which the selected finish will be produced. Next, a list of necessary materials is compiled with an indication of their quantity.
With the list compiled, you can go shopping for the necessary materials.

- It must be said right away that it is not worth buying everything you need for repairs in spontaneous construction markets, where, although prices are lower, no one will give a guarantee of quality. Counting on such "savings", sometimes you have to pay double or even triple the price. Cheap material applied to walls or laid on floors is not known how it will behave, and you may still have to replace it with a quality one anyway. And this is not only unnecessary spending, but also wasted time and effort. Cleaning surfaces from a new low-quality finish is an extremely unpleasant task, as the mood will be completely ruined. Therefore, it is recommended to purchase building material from a trusted seller who can provide quality certificates for all products.
- You need to purchase material with a margin, approximately 15% of its total calculated volume. This approach will help you do the work calmly, without fear that something will not be enough. By the way, you can immediately clarify whether the store accepts the remaining surplus back - this approach is often practiced.
- When choosing products for quality, you should examine them very carefully, as well as study the certificates that you need to request from the seller. For example, when purchasing materials such as ceramic tiles, laminate or wallpaper, you must definitely check the batch number of the product on the package - it must be the same, otherwise products in different packages may differ significantly in shade and even in quality. This difference can sometimes be noticed only in the process of work, by combining piece copies or canvases from different batches side by side - this moment can also complicate the process of high-quality repairs.
- The choice of new doors and windows must be taken very seriously, since replacing them later will be quite difficult and expensive, since this process will necessarily affect recently repaired surfaces.
Reliable front door - a guarantee of safety and comfort
The front door not only protects against uninvited "guests", but also ensures that a comfortable microclimate is maintained in the apartment. It is not cheap, and in order to avoid mistakes when, read the useful information in a special article on our portal.
- Carefully choose accessories for the bathroom. You should not succumb to the currents of fashion to purchase plumbing items made from newfangled materials, as they may not always be suitable for specific cases. First, it is recommended to study their characteristics and calculate all the "pros" and "cons".
- Heating radiators are also carefully selected. Nowadays, on sale you can find these devices made from various materials, but not all of them may be suitable for installation in central system heating. When purchasing radiators, one should rely not only on their operational capabilities, but also pay attention to the manufacturer and the availability of a quality certificate.
Useful information about heating radiators
These heat exchangers cannot be selected solely on the basis of their appearance – their operational capabilities and thermal power, depending both on the area of the room, and on some other important criteria. About all this - in a special publication of our portal dedicated to .
- A few words should also be said about the compositions that will be needed to treat surfaces before installing finishing materials on them - these are various primers and antiseptic solutions. Such products will create better adhesion between materials and protect walls and ceilings from mold stains.
After necessary materials purchased, repair, you can proceed to a phased repair.
Stages of repair and construction works

Surface preparation
One of the most important stages in carrying out any type of repair is the preparation of surfaces, since this will determine how neatly and firmly the finishing materials will adhere to the walls and ceiling. The preparatory stage includes such activities as cleaning surfaces from old coatings and repairing any flaws that may have appeared during the operation of the housing.
1. The first step is to remove old wallpaper or paint from the walls.
Wallpaper can be removed in several ways, depending on how tightly it adheres to the wall:
- With the help of a spatula, with which the canvases are picked up and carefully removed completely or in large pieces.
- If the wallpaper is glued securely and does not want to come off, they need to be wetted with water using a roller, and these manipulations must be carried out several times. When the paper gets wet, it can be easily removed with a spatula.

- The third option is suitable if vinyl wallpaper is securely pasted on the walls, which are quite resistant to water. In this case, they can be steamed using a special device - an iron or a steam generator. If there is no such device, but there is an iron with a steaming function, then you can use it, but apply metal surface vinyl is not allowed. It is brought to a distance of 100 ÷ 150 mm to the wall and treated with steam. After that, the old decorative coating should move away from the wall and can be carefully removed with a spatula.
The paint coating is removed using a building hair dryer or a grinder with a brush attachment installed.
2. Next, you can move on to cleaning the ceiling. If the ceiling plaster has cracks and chips, and it is not planned to make a false ceiling, then old whitewash and sometimes the plaster will have to be removed. This process is quite laborious, and it is also carried out with the help of water, which is first soaked on the surface, and then the old coating is removed with a spatula or a grinder with an iron brush.
 "Weak" places of the old plaster must be cleaned off
 If a suspended structure is to be mounted, then it is not necessary to remove the coating from the ceiling - it will be enough to treat the surface with an antiseptic and strengthening primer.
3. The next step is to remove the floor covering. However, when redecorating, sometimes this process is not carried out, especially in cases where the floor is in good condition and suits the owners quite well.

4. After removing the old coatings, cracks or other fairly large defects will be found on the walls and joints of the planes. They must be repaired, otherwise they may show through the new decorative finish.
To do this, small cracks expand, primed and sealed. cement mortars, putty or sealant. , which sometimes appear at the joints of surfaces, can be filled with mounting foam.
5. After cleaning the walls, the electrical cable is laid out if it was planned to reinstall the sockets. For cable routing in some rooms, you may have to cut strobes in the walls to hide the wiring in them.
6. If the heating circuit is to be replaced, then at the time when the walls are cleaned, markings are made for brackets for radiators, and holes in the walls are also prepared. This must be done on the walls without finishing, so as not to spoil it later.
Replacement of windows and doors
The process of removing and installing these interior elements is usually carried out by specialists, as this is a rather laborious work that requires certain skills and accuracy, special tools. Therefore, if similar experience there is no work, it is better not to undertake such work on your own.

It is also better to entrust the installation of the front door to qualified specialists, because the safety of housing will largely depend on the reliability of its installation.
Interior doors are installed at the final stage of work, so this work can be postponed for now.
Dismantling and installation of partitions
The next step is the dismantling or installation of the partition, if it is planned and permissions have been obtained for these works. Both the construction and demolition of the wall can be done independently.
How difficult is it to build a light interior partition?
With knowledge of technology and careful performance of work with a similar task, you can completely cope on your own. How to conduct, and what materials are needed for this - this information from detailed instructions can be found in a separate portal publication.
You can also dismantle the partition between the bathroom and the toilet yourself if it is built of brick or gypsum boards. This process will require a puncher, a sledgehammer and, possibly, a grinder with a metal disk - if the partition is reinforced with a reinforcing mesh.

This is not to say that this work will be easy, but as a result, you can get a fairly large room in which it is quite possible to carry out the planned redevelopment.
Leveling the ceiling and walls
When the windows and doors are installed, and the cracks and gaps that have been repaired are completely dry, you can proceed to. This process is simple, anyone can perform it - the main thing is to carry it out carefully, without missing a single surface area. Priming is carried out with a roller, and hard-to-reach places processed with a brush.
Then, after complete drying of the primed walls and ceilings, they need to be leveled. To do this work, you need some experience, therefore, before diluting a large amount of putty, you should try your hand at small area walls with a little mortar.
If the walls have a fairly even surface with minor flaws, it will be enough to use a putty composition. But in the case when the surface has large distortions, the alignment will have to be carried out by plastering along the beacons. However, if the area of \u200b\u200bthe room allows, then the walls can be leveled with sheets of drywall.
 A very laborious, but very important stage - leveling the walls
 No matter what technology the surface leveling process takes place, after the layer of plaster and putty has dried, the walls and ceiling should be primed again.
The ceiling requires perfect alignment if it is not planned to be covered with a stretch or false ceiling.
How to properly level the ceiling surface?
The process of carrying out is quite complicated and requires special skill. Therefore, if a decision is made to do this work on your own, you should pay attention to the recommended article of our portal.
The process of leveling surfaces also includes the finishing of slopes on window and door openings. They can be ennobled with drywall, plastic panels or plastering.
floor leveling
The next, fifth stage, the surface of the floors is leveled. This process in the apartment can be carried out different ways- this is a bulk self-leveling mortar, a dry screed or floor installation on logs, followed by closing it with plywood or other sheet material.
All these processes may well be carried out independently, after a thorough study of the technological instructions, which can also be found on our portal.
Use of self-levelling building compounds
One of the methods for leveling the floor surface is the use of special construction mixtures. The technology is described in detail in the corresponding publication of our portal.
If you are not sure that you will be able to qualitatively cope with such work on your own, then it is better to turn to specialists.
Decorative wall decoration in living rooms
The next step is to finish the walls - pasting them with wallpaper or painting. These works are not so complicated, and can be done on their own, so it is quite possible to save on them.
If the decoration will be carried out with wallpaper, and they have a certain pattern, you must immediately calculate its step so that the ornament matches perfectly on the wall.

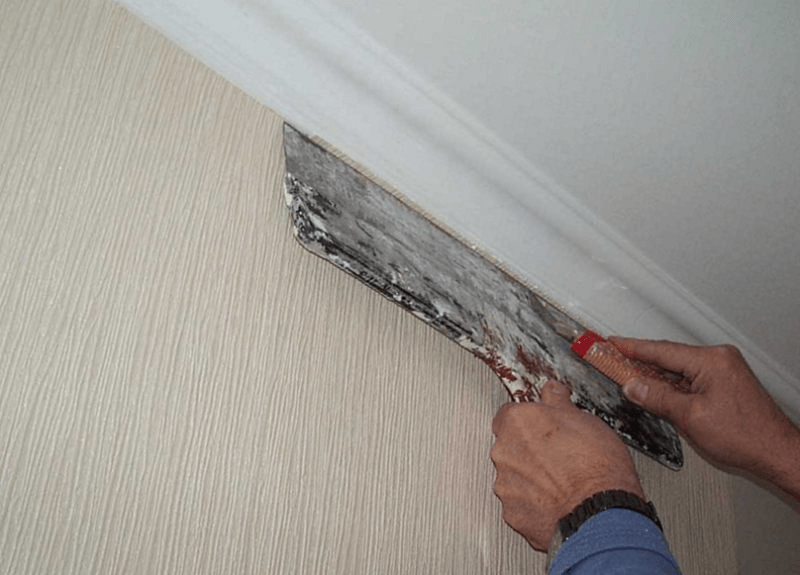
Before cutting the canvases, the wall is marked vertically and horizontally. The lines are beaten off with a colored cord along the ceiling and one of the corners. The first sheet of wallpaper will be aligned along the vertical extreme line, and the subsequent ones are already guided by it and the upper horizontal color strip.

If it is planned to paint the walls, then it is carried out using a roller, which is put on a special bar for convenience.
The wallpaper glued and dried on the walls is framed along the top line with a foam or paper border, which completes the overall design of the room.
Installation of flooring in rooms
The process of laying the flooring must be carried out very carefully so as not to damage or stain the decorative wall finishes. If linoleum or carpet is laid on the floors, then before fixing it to glue or under the baseboards, it is laid out and left for about a day in order for it to straighten out. Cloths of this material are cut in length, approximately 10 ÷ 12 mm less than the length of the room, and laid 5 ÷ 7 mm wide from the wall. Such gaps are necessary for free thermal expansion of the material.

It should be noted that any material laid on the floors must have such gaps. So, when laying a laminate, special inserts are used, which are removed only after the flooring is completed over the entire area of the room.

The installation of the floor covering is completed with the installation of skirting boards.
Installation of interior doors
Interior doors are installed at the last stage of work, so as not to be mistaken in the height at which the door will be installed, since the leveling layer and floor covering will raise the floor and change the level of the floor.
In the enumeration of the stages of work, the issue of repairing the bathroom was deliberately omitted. This event has its own nuances that must be considered separately.
This is the approximate procedure for preparing for repairs in the apartment and its phased implementation. It is quite understandable that the homeowner wants to do this at minimal cost, relying on their own strengths and abilities. But still, you should soberly assess your capabilities - it is possible that optimal solution will turn to specialists.
At the end of the publication - an interesting video clip with expert advice on conducting initial stages apartment renovation.
Video: how to start repairing an apartment
After reading this article, you will learn how to do a do-it-yourself room renovation, how to come up with a design, select finishing materials and consistently, step by step, complete all the work.
What are the rooms in modern apartments
The Soviet experience of do-it-yourself room renovation is still close to many of our fellow citizens.
Houses designed 20 years ago have balconies that tightly block windows. Thus, sunlight cannot enter the room at all.
Atmosphere home comfort according to the old Soviet habit, it is created by lining up brown cabinets on one side, and the opposite wall is usually occupied by a row of seats (a sofa and a couple of monster chairs).
View of the cabinets from this angle, indeed, offers the most panoramic. Thus, the missing feeling of a narrow corridor is given to the room. Carpets on the walls with psychedelic patterns complement the cozy interior of a typical room in a typical apartment. Familiar?

outdated design
When deciding what repairs to make in the room, first of all get rid of the trash, as well as design ideas past era. Bright rooms, cheerful colors, functional furniture and large spaces are in fashion today.
Where to begin
Decide where to start the renovation. According to all the rules, major repairs in the apartment begin from its farthest corner.
The hallway is the last to be renovated. Why? Because the corridor is the most accessible place in the apartment. Therefore, construction debris, dust and dirt will somehow appear here. It's not so bad if they cover up the old trim you were going to remove anyway. But if the garbage settles on brand new, recently finished walls in the hallway, you will quickly realize your mistake.
Having decided on the place of repair, decide how the outcome of your work should look like. Do you want to make only cosmetic repairs or dream of global interior changes?
On a piece of paper or in a specialized computer program, create a sketch of the future room. Once the “project” has been approved with the family and aligned with the budget, write down the steps you need to take to reach your goals.
Note! Even if you spend money on repairs very economically, at the stage of drawing up a design project, it would still not hurt to take the help of professional designers. They will help not only competently change the interior, increase the space, but also choose finishing materials that will perfectly fit into your budget.
Removing wallpaper
Sequence of work
Dismantling
The sequence of repairing a room, like any other room, as a rule, does not differ in variety.
- Repairs begin with the removal of old coatings from walls and ceilings. If you plan to re-lay the flooring, the dismantling work will also touch the floor.
- Preparation for dismantling consists in the removal of all furniture. If this is not possible, it is best to cover all surfaces.
- At this stage, the wallpaper is removed, paint and plaster are removed from the walls and ceiling. Further actions will depend on what kind of decoration of the apartment with your own hands you are going to do.
Wall alignment
- If the walls are planned to be glued with thick wallpaper, upholstered with wall panels, and the ceiling closed with a tension or hinged structure, you can not waste time on leveling the surfaces. The listed finishing materials will perfectly hide all the flaws.
- In the event that the repair consists in pasting with thin paper wallpaper, applying a layer of decorative plaster on the walls, a flat surface will be necessary. An excellent result is achieved by applying a primer and 2-3 layers of putty to the walls and ceiling.
Note! Before applying each new layer, the putty must be allowed to dry for 24 hours.
- If the repair involves the installation of electrics, the reinstallation of heating pipes, the installation of an air conditioner, suspended and suspended ceilings, these works are carried out before the fine finishing of the premises begins.
The last stage - pasting the walls with wallpaper, installation wall panels, applying decorative plaster. Of all of the above, the most affordable price is inherent in wallpaper.

Decoration Materials
When choosing materials, it is worth considering the type of room in which the repair is being carried out. For example, for decorating a nursery, inexpensive paper wallpaper or decorative plaster, which is resistant to mechanical damage.
When refurbishing the hall, purchase more expensive materials because the living room is the face of the house. Finishing the bathroom requires the presence of heat and moisture resistant materials - tiles, film stretch ceilings.
To repair a room, 16 sq. m can take 6 rolls of wallpaper and 6 packs of wallpaper glue. It is worth considering these figures when purchasing materials in the store.
Thus, repairing a room is a tedious, but solvable task, which (if the whole family puts on it) can be solved in as soon as possible. Of course, it all depends on the dimensions of the room that you are going to renovate.
Summing up
We hope our article was useful to you. In order to more accurately understand the technological and practical issue, our website contains a detailed photo and video instruction, in which you will find useful information on this issue.
Photo gallery
kursremonta.ru
Do-it-yourself room renovation | School repair
I am ready to tell everyone (and show in pictures) how you can relatively inexpensively do it yourself good repair. If everything is in order with your hands, it is not difficult.
So, a specific object. Room 15 sq.m. Future bedroom. Rectangle 3x5m, height 2.65m. It hasn't been renovated in a long time. There are no obvious construction defects (walls, ceiling are visually even, the floor is even on the horizon).
Due to the fact that the removal of furniture was gradual, the repair was a little stretched out in time. It all started with the drafting of a future room, an approximate arrangement of furniture and original design ideas. Repair began with the replacement of the old wooden frame on a modern plastic two-chamber window. Made and installed with no problems. The next step was to replace the radiator. The grinder sawed off the old pipes, and in their place put metal-plastic pipes with a new radiator. In the future, the pipes were planned to be sewn up with drywall. The floor, thank God, turned out to be in very good condition, it was decided not to touch it and not to make a screed. After removing part old furniture began to make a frame for drywall from metal profiles. First it was decided to sew outer wall with a window. Ceiling profiles PP 60x27 and guide profiles PPN 27x28 were used, which were used in the future. The main difficulty was in the exact measurements of the installation of drywall from the wall. Pipes interfered, and the already mounted window sill did not allow to increase the distance from the wall. But the level and plumb line did their job here. First, the profile was fixed to the ceiling. According to the plumb line, they marked the place where the profile should be installed on the floor. After that, they screwed the PN onto the walls. Next, they installed the PP vertically and fixed them in several places to the wall using direct hangers. It turned out a finished frame on one wall. Having laid the opening mineral wool for heat and sound insulation, the wall was sewn up with plasterboard. At the same time, the window slopes were insulated and sewn up, using the same metal frame for this.
After that, they began to make a frame on adjacent walls. We determined the angle from which all measurements are made, with a chopping thread we drew parallel lines on the ceiling and on the floor, along which the PPN guides must subsequently be fixed. Niches were marked on the walls, which should be according to the project. Having fixed the PPN on the floor and on the ceiling, they began to make vertical racks from PP 60x27. The profile was cut off 7-10 mm less than the height of the room, inserted into the PN every 60 cm and attached to the wall in three places after about 70 cm using straight hangers. In places where there are niches, first a PN was attached to the wall along a marked line, cutting and bending it as it should be in place.
At the same time, in the places of future sockets, a wall was ditched under the mounting boxes. The bulk of the sockets and all the switches were planned to be made on a gypsum wall, so the walls had to be ditched in at least two places, under the TV socket and the socket in the niche.
After the main frame was made, low-current wires were thrown - telephone, Ethernet, TV. Weakness went along the top 3-5 cm from the ceiling. The power cable was later laid a little lower, about 10 cm from the ceiling.
While construction was going on, the old door was not dismantled. It was removed at the last moment, when all the dirty and dusty work was done, almost before wallpapering. In the meantime, the frame was being erected, Ursa-100 insulation was placed between the guides. At first, he kept on the wall due to the fact that the frame itself held it, and later, power wires were thrown on top, which pressed the insulation quite well against the wall, so that it did not fall under its own weight. All power wires were NYM 3x1.5, NYM 3x2.5 and NYM 4x1.5 was used on the feed-through switches. The entire power cable for reinsurance was laid in the corrugation. The electrical circuit was quite complicated and it took a lot of cable. It took about 150 meters of power cable and about 50 meters of low current for a 15 meter room. The power cable is attached to metal frame With inside with clips, and between themselves with the help of plastic ties. Junction boxes were planned in the corners of the room, one for the socket group, two for lighting.
After some time, all the walls were insulated and all the cable was laid. The frame was covered with drywall. We used ordinary drywall (not moisture resistant) 1200x2700mm. Cut off in height, set, fastened with self-tapping screws. On the spot, I marked holes for sockets, switches and drilled them with a crown, immediately installed the mounting boxes and pulled the wires out. I also sawed niches in drywall with an electric jigsaw in place. After I sewed up all the walls, I sewed up the drywall and the sidewalls of the niches. In semicircular niches, the sidewalls were soaked and bent in place.
When the walls were all sewn up with plasterboard, I began to manufacture a multi-level ceiling structure. All the markings were made on the ceiling, the contours of the ceiling, the location of the lamps, and mirrors were drawn. Based on this markup, in the future, the ceiling frame was made. The entire sequence of work can be seen in the photographs. In parallel, electrical junction boxes were assembled, the wires were twisted and welded.
After the ceiling was ready, all the joints were puttied using Fugenfüller, Vetonit KR, sickle and angle-forming paper tape. The curves of the niches and the ceiling were reinforced with plastic flexible corners, which were later puttied. After plastering work old door was dismantled and replaced with a new one. Before wallpapering, window slopes and niche sides were painted with Delux white washable paint. The ceiling was painted with water-based paint several times.
Wallpapering took one day. After that, for some time, the floor was cleaned in the room, the remaining pieces of drywall were taken out to the trash, and the instrument was partially taken out.
Read also
It was decided to put the German Tarkett laminate on the floor. Thank God, the floor was even and we decided not to even remove the old linoleum and put it directly on top of it using a 2mm underlay. Waterproofing was also not done due to the fact that linoleum itself does not let moisture through. According to the project, the laminate was supposed to lie diagonally, so they laid it. After the floor was done, it remains to finish the little things. Fix the plinth, cut the wallpaper in some places, wash the mirror on the ceiling from adhesive tape, seal the joint between the window and the slope, etc. The room is ready, it remains to wait for the ordered furniture to be delivered.
Naturally, after everything was ready, ideas appeared on how it could be done better, more correctly. You know what not to do. Here also. It was necessary to bring the heating pipes to the radiator differently. The flow of water through the battery goes from bottom to top, but vice versa. Because of this, there is no 100% efficiency in heating the radiator. The second disadvantage during the repair is that, due to laziness, the old wallpaper was not completely torn off. Can get wet under the heater. The third minus is that vapor barrier was not made. And the last flaw is the lack of supply ventilation. Sealed windows do not allow air to pass through and stuffiness is felt in the room. I would like to install a KIV valve in the future. This can be fixed, although it would be easier to think about it at the very beginning of the repair process.


Discuss the article on the forum of masters
homemasters.ru
Do-it-yourself room renovation: where to start?
If you have planned a do-it-yourself room renovation, but don’t know where to start, after reading the materials of our Remontik website, you will solve this problem. Following our advice, the repair work will not drag on for a long time, and the final result will please you.

First of all, you must understand that the renovation of the room needs serious pre-training. The most important point is the preparation of a detailed repair plan, taking into account all the nuances. Consider tips for organizing repairs from professionals:
- What type of repair to choose: capital or cosmetic.
- Preparation of interior design and detailed renovation plan.

- Determine the main steps for renovating a room.

- Make a list necessary tools and materials.

- Plan for upcoming expenses.

- vacate the room.

- Where to start repairing a room with your own hands.

Now let's dwell on each of the stages in more detail, attaching photos and videos to them.
What kind of room renovation is needed: major or cosmetic
First of all, you need to decide on the volume and complexity of future repairs. In order for the apartment to be clean and bright, it is enough to carry out a superficial, cosmetic repair: replacing the wallpaper, changing the old linoleum, whitewashing the ceiling, painting the walls, etc.
If you are planning to get rid of everything old and boring, decide on a major overhaul with replacement windows, leveling walls, installing new floors, as well as modern ceilings. Your home will be transformed and become beautiful and new.We do not recommend refusing the help of professionals during major repairs. First of all, it concerns the creation stylish design premises, including redevelopment, as well as the demolition of some partitions and walls.

When planning repairs, starting from your financial capabilities.
Choose an interior design and decide on a renovation plan
At the very beginning, decide on the design and interior of each individual room that you are going to change in your apartment. You can seek help from an experienced designer, which will slightly increase your financial costs for repairs.

For the room where you are going to carry out repairs, you need to complete detailed drawings of all stages of work, in their clear sequence.
We advise you to complete five renovation sketches for all individual rooms. On the first drawing, we recommend displaying the view of the rooms from above, and on the other four - each wall. Complete all drawings detailed description, as well as a plan for the sequential implementation of repairs, which will avoid inaccuracies and simplifications in work.

- Locations of furniture. Those walls that catch the eye most of all need to be given maximum attention and use the highest quality finishes.

- Think carefully about where it is better to place chandeliers and lamps so that the light can better illuminate the room.

- Given the location household appliances, mark the places for the outlet. To then competently design the installation of electrical wiring in different rooms.

- Consider the location of the main decorative elements: mosaics, paintings, brick wall.

In the repair plan, it is necessary to indicate the required finishing option: painting, wallpapering the walls, etc. To divide the room into separate zones, we recommend painting one of the walls with a different color in order to focus attention and visually divide the room. Such moments also need to be reflected in the plan.
How to determine the order of repair of rooms in an apartment
According to the advice of experts, in order to avoid excess dust and dirt during repairs, we advise you to first make repairs in rooms that are far from the front door. The last stage of repair is better to choose walk-through rooms, as well as a corridor through which construction tools and materials will often rush through. In order not to scratch or stain the finish of an already repaired wall, and also not to damage the new floor.
A cellophane film can act as an additional protection for the renovated room (it is fixed on the outside of the door). It provides reliable protection of the premises from building dust, dirt, plaster, paint and accidental damage.Repair of a room in an apartment: do it yourself or by specialists
You don't have to do all the repairs yourself. If necessary, repairs or only particularly complex measures can be entrusted to experienced specialists. Firstly, knowledge and experience will allow them to carry out repairs efficiently and quickly. Secondly, you do not have to buy expensive tools with which a screed is poured or tiles are laid out.

Even if the process of installing an interior door seems simple to you, the slightest inaccuracy in this regard is unacceptable. Of course, you can hang and arrange furniture in the kitchen, align the walls and do a little painting yourself. However, entrust more complex repair work to specialists so that later they do not have to be redone, which will significantly increase financial costs.

Make a list of necessary tools and materials
- After choosing the design of the room, interior and furniture, you need to draw up full list building materials. Their total cost and quantity directly depends on the repair work, as well as the methods of their implementation. If you have the necessary budget, it is worth buying building materials with a small margin.

- Prepare a list of decor items: shelves, holders, paintings, mirrors, etc. Start shopping with selected decor items. If the planned decor element is not available, you can quickly change it or develop a new design room renovation plan.

- Prepare a list of necessary tools for repair. To do this, use the advice of a consultant in the hardware stores in your city or professional repairmen.

Count the expenses
When the preparatory work has been completed: sketches and repair plans have been drawn up, lists of all tools and materials have been prepared, a decision has been made on the possibility of repairing the room on your own or with the help of repair specialists, you will calculate the average total price of the planned repair.
Do not rush to purchase all the materials on your first visit to the store. In the compiled lists of tools and materials, put down the cost of various stores, which will save on purchases. Be careful when choosing the services of a construction team. Special attention should be paid not only to the cost of repair work, but also to the reviews of our friends about the quality of repair services.

vacate the premises
To ensure reliable protection of furniture from damage, construction dust and dirt, collect it in the central part of the room. After that, cover with plastic wrap. Therefore, free access to the ceiling and walls. We recommend moving expensive equipment and clothes to other rooms.

Do-it-yourself room renovation: where to start and what is the sequence of work
Repair work should start with the most dusty ones: replacing windows, window slopes and installation of new window sills. In this way, you can avoid dust and dirt during painting work, when it is forbidden to open windows in order to avoid an increase in humidity and temperature changes. When the slopes, windows and window sills are installed, cover them with hardboard or plastic wrap to prevent accidental contamination and mechanical damage.
Take care of marking places for installing additional sockets, make electrical wiring. At this stage, do not install sockets and do not connect them to the shield.
When using welding work (for example, when changing batteries), do it simultaneously in different places in the apartment to quickly complete this difficult and dusty stage of work, which sometimes involves breaking down walls.

Before repairing floors, walls, ceilings, you need to check their condition with a water or laser level. Start by applying the thickest layers of mortar. While they dry, you can do other small jobs without downtime.
Upon completion of such a preparatory stage, proceed with the repair, performing it in the following sequence: repair of the ceiling, walls, floor. First, work is carried out using putty, plaster, cement mixtures. Then proceed to the installation of the floor, doors and slopes.
Latest renovations:
- painting or pasting the ceiling;

- wall painting or wallpapering;

- flooring installation;

- installation of thresholds, skirting boards and platbands.

By following the correct order during the repair and having a clear plan of action, you can avoid many mistakes, save time and money. This is one of the main components of a durable and beautiful repair, along with the observance of the technology and the quality of the materials used.
You may also be interested in:
remontik.org
How to make repairs in the room?
 Repair is a rather loose concept. For some, making repairs means completely destroying the entire room and finishing all surfaces from scratch, for others, replacing wallpaper is a repair. Therefore, first you need to decide what you want to do: cosmetic repairs or major repairs, as well as outline the scope of work and their sequence.
A well-planned renovation will take less time and will also save you money. How? This will be discussed further.
How to make repairs in the room with your own hands?

So, a few rules, following which your repair will proceed smoothly and smoothly, without unpleasant surprises and unforeseen complications.
Rule #1. Decide in advance on the design of the room. It is much easier to select materials for repairs when you know exactly what the end result should be. To develop a design, you can use the services of a specialist, or you can do everything yourself. It will not be superfluous to look at thematic magazines or sites. With the help of special computer programs for clarity, you can create a picture of the future room.
Rule #2. Check out what's new in the building materials market. The modern market offers a variety of materials for roughing and finishing surfaces, which can greatly simplify and speed up repair work. It is better to entrust the choice of building materials to experienced builders who are guided in matters of price and quality and can choose exactly what you need.
Rule #3. You need to buy everything you need for repairs in advance. Before you go shopping, you need to determine what you need and in what quantity. In order to calculate the consumption of materials, it is necessary to measure the parameters of the room: its exact area, the length of the walls, the height of the ceiling, the dimensions of window and door openings, etc. This data should be as accurate as possible, so it is better to take measurements several times. Based on the data obtained, it is possible to calculate the consumption of all materials. It is desirable that the amount of materials be determined exactly, otherwise you will either have to overpay for their excess amount, or then buy them in addition.
It is best to buy building materials at wholesale depots, where prices are lower and the range is wide enough. It will also be more profitable to purchase all the necessary goods in one place, if, of course, this is possible. Given the discount system, which directly depends on the cost of the purchase, you can count on a significant bonus and free shipping.
When using repair materials that need to be specially ordered or whose quantity is limited, it is necessary to accurately determine their consumption. If there is a shortage of such materials, the repair may be suspended or other materials will have to be used, which will necessarily affect the result.
Rule #4. Before starting repair work, it is imperative to remove all furniture and other interior items from the room. If they are left, they will not only interfere with free movement, but most likely they themselves will become unusable, covered with construction dust, scratches, paint or mortar stains, etc. Not to mention the fact that in this case it is almost impossible to make a high-quality floor covering. So it’s better to spend a couple of hours removing furniture than throwing it away anyway. To do this, you can use the help of loaders or independently clean the repair area.
Rule #5. Prepare a set of necessary tools in advance so that during the repair you are not distracted by looking for a drill or hammer. The set of tools directly depends on the planned work and the technology for their implementation. Be sure to have rags, solvents, a bucket of water at the ready. Almost no repair can be carried out without scaffolding. At home, they can be replaced by a table of suitable height, which allows the most convenient work on finishing the upper part of the walls and ceiling. Please note that such a table will almost certainly lose its original appearance after repair, and it is unlikely that it will be possible to use it further as furniture in the apartment.
In addition, you need to think about your safety by preparing a respirator, goggles, gloves, etc.
Rule #6. Be sure to completely remove the old finish. This applies to flooring, old wallpaper, peeling plaster, etc. The dismantling of the finish is carried out starting from the floor. Even if you are not going to change the flooring (for example, carpet or laminate), it is better to remove it, otherwise it will not survive until the end of the repair.
As for the walls, they do not have to be cleaned to brick or concrete base. If they are smooth, freshly puttied, free of cracks and roughness, they can be refinished. Old wallpaper or other finishes must be removed in order to apply a new one. There are usually no problems with wallpaper, but if you are “lucky enough” to deal with old paper wallpapers that have been glued “for centuries”, you will have to make an effort not to damage the wall surface. In this case, the wallpaper is wetted with soapy water, which helps to remove it.
Dismantling the ceiling finish depends on its type. If it is whitewash, it is removed with a special brush. If the ceiling is covered with water-based paint, which has a completely normal appearance, you should not wash it off. In cases where cracks, crumbling plaster, or other serious defects appear on the surface, it must be cleaned to the ground.
If it is planned to replace windows and doors in the room, they must also be dismantled before starting repair work, since this is a rather “dusty” process, and in some cases even requiring partial destruction of the walls. If the windows and doors will be used as before, then after the completion of all work related to dirt and dust, their surface is cleaned, if necessary, polished and painted. This should be done only after a thorough wet cleaning of the apartment so that small dust particles do not settle on the painted surface. Otherwise, the result will be a rough and sloppy surface. Before installation, a protective film is applied to new windows and doors to protect them from possible damage. It is advisable not to remove it immediately after installation, but leave it until the completion of all repair work. At the same time, it will protect the surface from dust, drops of paint or solution and other substances that can damage it.
Rule #7. Remove construction debris after each stage of repair. For all the time it will accumulate so much that it will simply be impossible to work indoors, so it is advisable to immediately take out everything superfluous, and wash the floor regularly so that dust does not accumulate.
Rule #8. Plan the repair work so that at the beginning there are all the “dirty” processes, leaving behind a lot of debris and dust, and only then fine finishes. Let's consider in more detail the sequence of work.
Where to start renovating a room?

Traditionally, renovations start from the ceiling.. Decide what exactly you want to do with it. If this is leveling the surface with putty, you need to apply it immediately, and then sand it, so that later you don’t have to return to the ceiling finish. It is advisable to remove the resulting dust immediately. Plasterboard ceiling is also mounted, puttied and sanded immediately, but suspended structures, panels or stretch ceiling are installed after finishing the walls, otherwise construction dust may settle on them, and their surface may become dirty or damaged.
In general, in most cases of repair, the ceiling finish comes first, although there are exceptions. For example, when it is planned to finish the ceiling and walls with putty, work is carried out in parallel, after which the ceiling, if necessary, is covered with a fine finish, and then a finishing layer is applied to the walls (decorative putty, wallpaper, paint, etc.).
After the ceiling comes the turn of the walls. First you need to determine their evenness, the quality of the corners, as well as the condition of the previous rough finish. If the walls were not leveled before, then most likely this will need to be done. Another common problem is uneven corners. Almost all finishes require the most even surface and right angles, since they will not be able to hide wall defects. As a result, even expensive types of finishes will look pathetic on bumpy walls; when using wallpaper, there is a high probability of skewed canvases, inconsistencies in the pattern and the appearance of other defects. Therefore, the preparation of walls for finishing is an obligatory and crucial stage of repair.
The type of finish for the walls is selected depending on the chosen design style. It can be paint, decorative putty, different kinds wallpaper, panels. You can start finishing immediately after finishing all work related to dust or other possible contaminants.
It is important to remember that it is the walls that largely determine the appearance of the room and the quality of the repair. Any defect on their surface can spoil the overall impression. Therefore, when working with them, you need to be extremely careful, strictly follow the technology for applying finishing materials, use only high-quality products.
Recently, the use of various built-in wardrobes, plasterboard shelves, partitions and other functional decorative interior elements has become popular. They allow you to fully use the useful area of the room without cluttering it with heavy pieces of furniture. In addition, they create unique interior and enable the realization of original design solutions. To create them, metal profiles and drywall sheets are usually used, which, after installation, are puttied and, if necessary, painted or covered with other finishes, similar to the walls or vice versa, standing out against their background. The installation of such structures should take place parallel to the finishing of the walls. The assembly and fastening of such structures requires certain skills, therefore, to create them, it is better to seek help from specialists. Ignorance of the technology of their assembly can lead to the destruction of structures, damage to materials, and possibly the surface of the walls. So it is better not to take risks and immediately turn to professionals.
Floor repair may include both a simple replacement of the floor covering, and the replacement of its entire structure. In the first case, the floor can be done immediately after finishing the walls, in the second - before finishing. A complete floor replacement involves leveling it by pouring a concrete screed, installing a “warm floor” and other work. In this case, there is a high probability of damage to the wall decoration.
Before starting the repair of the floor, you need to remove all debris and thoroughly wash the surface. Dust, sand, earth, residues of mixtures and other foreign materials must not accumulate, and the coating must not be mounted on them. Foreign particles can subsequently cause premature wear of the floor.
The surface of the floor should be flat, and not only because it is beautiful. It is quite difficult to lay a floor covering on an uneven surface, and over time it can quickly lose its appearance. The flooring itself is mounted after the final completion of all other work. During the repair, the floor is constantly exposed to loads: moving scaffolding and tools, constant walking, bumps, stains from paints and mixtures, layers of dust. If the coating is laid earlier, it will not last even until the repair is completed. The same applies to skirting boards, which are mounted after laying the flooring. Modern models of skirting boards not only fasten without problems, but also have special caps that hide fasteners.
When planning the sequence of repair work, you need to remember that the main thing is not to spoil what has already been done. If you do not follow this principle, you can immediately prepare for a new repair, requiring additional time and money.
postroy-sam.com
where to start, cosmetic, consistency
The issue of repairing a room almost always rests on the budget for future work. Most often, the owners of an apartment or house are faced with a choice - to do a cosmetic renovation of the room with their own hands, without putting it off indefinitely, or to plan a major restructuring with redevelopment and a major design update for an indefinite future. Most masters in such a situation recommend a redecoration of the room, during which the vast majority of problems with the interior of the room can be solved.

How to approach the organization of repairs in one room
Starting repairs in a room is always inconvenient and even scary, especially if there is not enough experience, and of the assistants at hand, there is only a cheat sheet on doing a do-it-yourself room renovation for beginners. But, as a rule, uncertainty and doubts pass when the scope of future work becomes clear and the question is resolved in what sequence to make repairs in the room.
Therefore, the first step is to draw up a master plan for cosmetic repairs, and most importantly, before trying to make repairs in the room, it is necessary to draw up a detailed estimate for the purchased materials and consumables. This is a prerequisite, even for repairs in a small room you will need to make a list of several dozen items.

Where to start repairs in the room is not important, you can carry out repairs in the sequence that seems more convenient in these specific conditions. Traditionally, do-it-yourself room repairs begin with the most “dirty” or rough work and end with fine finishing procedures.
A typical list of work or a sequence of repairs in a room is as follows:
- The old finish is removed from the walls, ceiling and floor. Removing the floor covering gives the largest percentage of dust and dirt, so it is removed first;
- A rough preparation of the floor is being carried out for further laying of a new floor covering;
- Wiring is being repaired, lamps, switches are being moved and hung, corrugations are laid out for television and Internet cables;
- Walls and ceilings are cleaned and plastered. If the plans for cosmetic repairs involve changing the wallpaper to a more modern type of finish, then you will need to level the walls with gypsum plaster;
- The ceiling surface is leveled in a similar way. For whitewashing or painting with a water-based emulsion, the ceiling is overwritten, plastered with a lime-gypsum mixture and a decorative coating is laid;
- Decorative wall decoration is being carried out, ceiling plinths are being glued, the lining of interior doors is changing;
- A new floor covering is laid, skirting boards are installed, lamps are hung, switches are being installed.
Of course, at each stage of repairing a room, a photo, a large amount of debris and dust will be generated. Not only will you have to regularly clean the room and take out rubbish blockages, you will need to try to cover areas with already completed repairs with a protective plastic film to avoid dusting the surface.

What not to include in a room remodel
Master finishers often call redecoration work "for three days", in order to update the interior in a room, more, as a rule, is not required. The list of repair measures does not include the most expensive work:
- Redevelopment of premises with the transfer of interior partitions;
- Replacement of the heating system;
- Installation of expensive multi-tiered suspended ceilings;
- Balcony glazing and replacement of windows with double-glazed windows;
- Underfloor heating equipment in the room.
It is clear that all of the listed components of the repair require serious financial costs and the involvement of qualified specialists in the work. It will take more than a day or two to carry out such serious events. In addition, such is the specificity of the repair in the room that, willy-nilly, dust and construction debris spread throughout the apartment. Therefore, the situation is regulated in this way - either cosmetic repairs are made in a single room, or the entire apartment “gets up” for major repairs.
In general, the redecoration plan includes everything that can be done in a couple of days with your own hands for relatively little money.

The main task of cosmetic repair
The main goal of the repair work is to refresh the interior of the room, remove minor defects and damage accumulated over the years, which are insanely annoying and interfere with everyday life.
In rare cases, cosmetic repairs are the result of force majeure, for example, the flooding of the room by the neighbors on the floor above or the preparation of the premises for rent. There can be many reasons, but the main thing is still maintaining the premises in a comfortable condition for living.

Properly performed cosmetic repairs make it possible to save on the volume of future overhauls. For example, performing a floor base screed and leveling the walls will at least reduce the time and effort spent on preparing for a major overhaul, of course, provided that the repair of the room with your own hands is done as conscientiously and efficiently as possible. .

The next stage of repair, distribution of costs and loads
One of the most difficult stages of redecoration is fairly considered to be budget planning and material procurement. Especially if you plan to do most of the repair procedures yourself. The reason is simple - amateurs and novice craftsmen have no idea at all how much specific material is required for a particular area of work.
In this case, the problem is solved in two ways:
- The compiled list of works and the estimate can be shown to an experienced craftsman who will help calculate the expense by squaring the room;
- Calculate the consumption based on the typical recommendations of building materials manufacturers, increasing the stock for glue, plaster mixes, wallpaper, flooring by 10% of the calculated indicators.
In the latter case, the cost of purchasing materials will increase significantly, but in the end, the remains of cement, dry plaster and glue can be used to redecorate other rooms in the apartment. In addition, having a list often helps to get a wholesale discount, so there should not be significant gaps in the budget for a future cosmetic renovation of a room with a competent organization of the purchase.

Preparatory stages of repair in the room
The first, most time-consuming stage has always been and remains the rough peeling of the walls and ceiling. Usually, repairs in a room begin with the removal of furniture and sealing the front door with a protective awning. You can use thick plastic wrap or an old blanket. An impromptu curtain will protect the rest of the apartment from noise and dust, which, even with very careful work, the use of a vacuum cleaner and wet cleaning of floors, always accumulates in considerable quantities in the room.
Before repair, lamps must be removed, instead of a chandelier, a cartridge with a light bulb is left in the room. If double-glazed windows are installed in the room, then it will be useful to tighten the window opening with foil before repair. It is clear that the floor covering is also covered with a film, it is easier to roll up the laid polyethylene than to wash out the dirt in the room every evening.
Removing old finishes from walls
It takes about a third of the planned time to prepare for cosmetic repairs. During this time, you will need to remove the whitewash and wallpaper from the walls of the room. If there are areas with damaged plaster, it will take another day to knock the plaster off the walls.

Old wallpaper is removed either with one panel or scraped off in small pieces for a long time, it all depends on the glue used. Before removing the wallpaper, the surface is moistened with a spray bottle with a small amount of water. After 20-30 minutes, the tapestries can be removed in patches. For particularly strong adhesives, boiling water and steam are used. In any case, after peeling off the old trellises, you will need to go through with a vacuum cleaner and a stiff brush to remove dust and glue residue.
Stripping and restoration of the ceiling surface
The ceiling is freed from the decorative coating much faster and easier than the walls. If the plans for cosmetic repairs include sticking polystyrene plates or laying plastic panels, then it will be enough to remove the top layer of whitewash.
The situation is more complicated if the ceiling in the room is painted with water-based paint or whitewashed with lime. In this case, it will take at least a day to remove the durable layer of the old finish.
The most common option for restoring the ceiling during cosmetic repairs involves leveling the plane of the ceiling. In any room of any apartment, floor slabs lie with a trim of several degrees, which leads to a difference in ceiling height near the opposing walls of the room from 2 to 5 cm.
If the time and budget for cosmetic repairs allow, then it is best to level the ceiling with high-quality gypsum plaster.

To do this, plastic slats are sewn onto the ceiling and the plane is tightened with a plaster mesh. Reiki-lighthouses are glued with alabaster, guided by pre-stretched marking horizontal cords. The mesh is sewn on dowels. The total time required for the final leveling of the ceiling in the room is 5-6 hours of work.
In one working day, you can complete a complete ceiling repair. The next day, you can rub, prime and paint the surface.

Cosmetic repairs to the walls of the room
During cosmetic repairs, the walls are leveled and plastered only in exceptional situations when the situation requires it, for example, the appearance of a large number of cracks or chipping of the plaster. In addition, the total area of the walls of the room, as a rule, is three times the area of \u200b\u200bthe ceiling, which in itself requires a lot of time and materials.
Therefore, during cosmetic repairs, the preparation process is limited to cutting small cracks, followed by puttying and grinding the surface. Sometimes, in order to level the plane of a single wall, especially problematic areas are subjected to grinding with an electric grinder.

In addition, at this stage of the repair work, it is not difficult to change the profile and configuration of the electrical wiring in the room. It is enough to drill channels in the lower part of the walls to the installation site of new electrical outlets, break through the "glasses" for the undercuts and install the outlets themselves. Corrugations with wiring laid in channels can be rubbed with gypsum or alabaster mass. All work will take a maximum of 2-3 hours. At the end of the preparation for finishing, the surface is vacuumed and primed.

Rough floor preparation
After the completion of the most time-consuming work with the preparation of the ceiling and walls, you can proceed to cleaning and preparing the floor. If the floors are concrete, with laminate-based flooring, then cosmetic repairs may be limited to re-laying laminate boards, with or without replacement of the lining material. Most often, damaged plates are changed in the room, after which the coating is polished using wax mastic.

During cosmetic repairs, linoleum coatings are cut out, the base is cleaned to concrete, primed and covered with a heat-insulating lining based on polyethylene foam.

If the room has wooden floors, then first of all the floorboards themselves are cleaned and repaired, then the joints are clogged and minted, after which the surface is polished and prepared for painting.
Don't forget about debris and dust
Any repair work, even the most simple and superficial, is always accompanied by the formation of a large amount of debris and dust. Before repair, you need to prepare two or three polypropylene bags, in which all the garbage from the room will be collected daily. At the end of the day, after each finishing operation, the walls and floor are cleaned of crumbling crumbs and plaster residues, and before finishing, the walls are vacuumed or wet brushed.
If it is supposed to level the walls of the room with gypsum plaster, then the amount of garbage will increase by five to six times. It will be necessary to think in advance and find a way to collect and remove from the premises 150-200 kg of cement-sand garbage screenings. You cannot send it to the garbage chute or garbage cans, you will need to order a special service for the removal of construction waste.
Fine cosmetic repairs in the room
The first is the finishing of the ceilings. Usually, the repaired and sanded surface is primed and painted with light-colored acrylic paint.

If wallpaper is used in the interior of the room, the ceilings can be decorated with non-woven or vinyl wallpaper to match the future wall decoration. A common practice for decorating lamps and chandeliers is the use of imitation styrofoam moldings and decorative ceiling plinths.

The fine finishing of the walls in the room is considered one of the most responsible and at the same time time-consuming cosmetic operations. Even taking into account the fact that half of the walls in the room will be covered with furniture, a certain part of the walls will still be clearly visible to everyone in the room. If during the cosmetic repairs it was not possible to qualitatively level the surface of the walls, you can hide the flaws only under the wallpaper. Best of all, tapestries on a fabric basis or with a pronounced embossed textured surface. It will take 7-8 hours or a full day to paste over the room.

Repair of doors and floor in a small room
The wooden plank floor of the old layout often has to be hidden under linoleum or laminate. In this case, the surface of the floorboards is polished with a sander, and the joints are sewn together with nails hammered at an angle to the board. At the next stage of the repair, the floor surface is sewn up with OSB boards, after which linoleum or any other type of flooring can be laid in the room.

The situation becomes more complicated if the concrete floors are aligned with the level of the screed throughout the apartment. In this case, any floor covering in the room will lead to the appearance of a threshold, so the laying of laminate or parquet must be planned simultaneously in all rooms.
The final stage is the restoration of interior doors. The hatch and the door itself, if they are in good condition, can not be changed, but restored with cleaning and polishing of the surface. The outer lining of the door frame during the repair is traditionally replaced with a new one. The replacement of doors with a carrier frame is planned for a major overhaul, usually so that the entire apartment or house has doors of the same style and design.

Conclusion
Repair of a room, even in a cosmetic version, requires careful preparation, first of all, in the details of the future interior of the room, the method of decorating walls and floors. Any attempt to postpone the decision to the future, to do it randomly, as it happens, will lead to a significant increase in costs and increase the time required to restore the room by two to three times.
bouw.ru
For repairs, you will need various brushes and rollers.
The rooms in our house have a different purpose, and each of us has our own vision of the necessary transformations during the renovation. Therefore, we will consider only one of the options for repairing a room. We will analyze in detail how to make repairs in a room with your own hands to an average resident who knows how to hold power tools in his hands and is ready to learn and work on his own.
What do we do
Let's take a look at the option simple repair in the room, but with the addition of a cabinet with shelves. We will make the ceiling one-level with a glued figure. The walls will be covered with wallpaper, and the floor will be covered with laminate.
Preparation for repair

Wall tiling
First of all, all things must be taken out of the room. Now we need to clean the walls from old wallpaper, paint and lime. If the plaster falls off or "breathes" - it must also be removed from the wall. In any case, those sections that do not stick to the main wall.
Now let's do the floor. Perhaps your room has a flat plank floor, the boards of which are in good condition. In this case, you will have to dismantle only the baseboard. If the boards are bad or bend - tear off such a floor and do not regret it. Perhaps there is linoleum on the floor of the room. Remove it and check the evenness of the screed. For 1 running meter floor should be no more than 1-2 mm difference. If the difference is greater, then you will either have to fill in the screed, or use a floor leveler.
Pay attention to the condition of the interior door. Maybe it is also better to dismantle it along with the door frame in order to install another one.
Window
If the window in the room needs to be replaced, then do it now, at this stage of repair.
Electricity

Wall papering
The room, of course, needs light and power sources, that is, sockets. At this stage of repairing the room, it's time to do the wiring. Determine immediately where the lamps will be located (walls, ceiling) and bring the wires to these places. Provide enough outlets in the right places. Pass all the wires passing through the ceiling into an electrical corrugated hose.
On the wall, if necessary, make strobes for wires. For a room for this purpose, a copper wire with a cross section of 2 square meters is required. mm. Fixtures, sockets and switches install after you paint the ceiling and paste the wallpaper.
Floor
If you decide to pour the screed, then fill it so that it is on the same level as the main floor of the apartment. More information about pouring screed can be found here.
Maybe there is a good old screed on the floor, the differences of which do not exceed 2 cm. In this case, use a floor leveler. How to work with the floor leveler can be found on our website.
Putty and slopes
Plumbing installation
We putty the walls with starting putty. Whether you use beacons is up to you and your walls. Perhaps your walls are even, or almost even, which is not so important for wallpaper. It can be said that if 0.5 cm of a slope is observed on 1 m of the wall in one direction or the other, it can be considered suitable for putty under wallpaper. The corner of such a wall can be leveled using the rule, without beacons. However, you can make lighthouse putty. How to do this, you can see here.
Slopes, in addition to the starting putty, will have to be putty again with satengypsum or finishing putty. This can be done when you putty the ceiling and cabinet.
After the initial wall putty, install the door frame. Interior door it is better to do without a threshold - it is more convenient to use.
Plasterboard cabinet

Plasterboard cabinet
You can skip this part of the interior, but for those who want to have additional shelves in the room, we will tell you how to do it.
To mark the cabinet, we need a pencil, a tape measure, a level, a plumb line and a construction square. We will make a bedside table 60 × 60 cm around the outer perimeter. In the corner of the room, on the ceiling, with the help of a building square, we outline the perimeter of the cabinet. Using a plumb line, we transfer these dimensions to the floor. We use UV and CV profiles with a width of 75 mm. We fasten pieces of the UV profile to the ceiling and to the floor from the side of the blank wall of the cabinet.
Now we install four corner profiles CV, moreover, three of them are fastened to the wall, and one, external, is fastened only to the UV profile.
Now we cut the pieces of the CV profile to size and, cutting them in the right places, we make partitions for the shelves. For partitions we use both types of profiles, installing not only side, but also intermediate fasteners. To screw the profiles together, we use small self-tapping screws, called fleas. You will sheathe the frame with plasterboard sheets after you install the ceiling. You can putty and paint the cabinet at the same time as the ceiling.
Ceiling

The results of the repair in the children's room
Now it's time for the ceiling. We mount the frame for a flat ceiling and hang drywall sheets. Ceiling installation instructions can be found here. Before puttying the ceiling, we sheathe the cabinet with shelves with drywall. We putty the ceiling and cabinet. After the putty dries, we paint the ceiling and cabinet. After painting the ceiling, you can install the fixtures that are provided for the ceiling.
Wallpaper
The walls are already dry. You can hang wallpaper. Wallpapering instructions can be found on this page. After pasting the wallpaper, you can install sockets, switches and sconces.
laminate and door
We lay the laminate and hang the door. If you find it difficult to install laminate, then read the methods of installing laminate on our website. Don't forget the door frames. Now it remains to fasten the plinth around the perimeter of the room and the repair can be considered completed.
remontmechty.ru
How to make an inexpensive home renovation
T Anything can be a repair tool. For example, replacing a window block with a plastic one. Further on, you will find that everything in the room is interconnected like a garland of monkeys holding each other by the tails.
A new window requires repair of slopes, slopes - replacement of wallpaper. Old skirting boards do not fit the new wallpaper in any way. Then it may turn out that linoleum does not interfere with changing, and the ceiling needs repair after changing the wallpaper. Therefore, repairs are best done in a complex, if not a high-quality apartment renovation, then at least a good one room.
However, with the modern abundance of building materials, a decent and inexpensive repair requires only desire, a small set of tools and diligence. And some time to finish reading this article.

Economical room renovation
Preparing to renovate a living room
The task of preparation is to turn the room into a “blank slate” where nothing interferes with further creativity.
First of all, we remove furniture, lamps on the walls and on the ceiling. Instead of a chandelier, we hang a simple cartridge with a powerful lamp.
Let's move on to the old finish. We remove all finish coatings to be replaced: old wallpaper, old floor covering, clean the ceiling from tiles, wallpaper and (or) whitewash.
At the same time, we clean everything that crumbles and can be cleaned without much effort.
If the coating, like an archaeological excavation, has many layers, we remove everything, if possible, up to putty or plaster.
After clearing the main arrays, we carefully remove all kinds of dowels, nails and screws.
Rough work - the basis of quality repairs
We start the repair with rough work, the purpose of which is to repair and prepare the bases for applying finishing coatings:

Good foundation preparation is the key to a quality repair
We cut large cracks, minted them with gypsum putty. We close potholes, holes from dowels, screws, etc. with the same composition.
Plastic plugs - dowels, are easy to pull out with a self-tapping screw and pliers: insert the screw into the dowel and tighten it with your hand until there is enough force, and then tighten it with a screwdriver a couple more turns. Pull the screw with pliers, the cork will easily come out of the wall.
Removing old outlets
- turn off the electricity supply;
- unscrew the cover, remove or loosen the fixing and spacer screws, remove the socket and disconnect the wires;
- we isolate the ends of the wires, and fill them into socket boxes, fixing them with tape.
We clean the walls from roughness with the help of a fine plaster mesh. Apply a deep penetration primer. It solves three problems at once:
- increase adhesion;
- strengthen the top layer of structures;
- dust off the surface.
Moving on to finishing work in the room
Let's start the fine finish from the ceiling, glue it with white polystyrene foam tiles. This option is economical and simple for an inexperienced repairman. Even without experience, a ceiling of 15-18 m 2 can be pasted over in 6-8 hours.
Unlike painting or wallpaper, tiles do not require high-quality putty or other preparation, and can even be glued to the floor panel.
We use acrylic glue. Unlike transparent polymer adhesives for foam, its adhesion allows you to work on the principle: "applied, pressed, forgot."
For white tiles, such glue is better, also because they can immediately fix minor flaws like putty.
The next stage of finishing - floors
The simplest solution for finishing the floor is linoleum. For styling and fitting, it requires only a tape measure, a marker, a ruler and a mounting knife. We buy linoleum according to the width of the room and lay it with a solid carpet, without gluing.
We roll out the roll and let the material rest for a couple of days to get rid of irregularities. Then cut to size following simple rule: not sure - don't cut.
If still in doubt, cut off obviously less than necessary. Linoleum is cut easily, and fixing if you cut off the excess is not an easy task.
We cut with an ordinary clerical knife. A wide spatula is suitable as a ruler, and in its absence, a building level.

We cut linoleum
Wall papering
Wallpapering the walls completes the main repair work. We take paper wallpapers, as they are the most inexpensive.
Before starting work, you need to make sure that the planes of the floor and ceiling are parallel to each other. Or their horizontal difference does not exceed 5-7 mm. In this case, you can cut five or six strips from wallpaper rolls at once. We leave one to adjust the pattern of the following canvases, the rest are lubricated and glued.

Gluing wallpaper
If the difference in the distance from floor to ceiling in different angles exceeds a centimeter, you should not cut more than two strips. You can make a mistake, and it turns out that, for example, at the top the sheet is wrapped on the ceiling, and at the bottom it does not reach the plinth.
Lubricate the strip with glue, fold it. First, we transfer the edges to the middle, then in half, and again in half (see Fig. 1). We put it in a pack. After being processed last page, we turn the pack over so that the first of the greased sheets is on top, and we begin to glue.
We start pasting from any of the corners of the room, preferably from the one closest to the window.
Having pasted the prepared canvases, we cut new ones and repeat all over again.
We do not spare glue for pre-priming the wall. With special care, we coat its upper quarter, and the places where the joints are supposed to be.
Installation of floor and ceiling skirting boards. Completion of works
The installation of floor skirting boards is the only operation that requires a puncher with a drill with a diameter of 6 mm.
It is better to start the installation of plastic floor skirting boards from the same angle where the wallpaper was started from.
For fastening, we use “quick installation” nails 3-4 cm long. We set them back 10-12 cm from the edge of the plinth strip and then approximately every forty centimeters.
Styrofoam ceiling plinths are glued directly on top of the wallpaper. We use the same white acrylic glue. Accurate cutting in corners is difficult for a beginner, even under the miter box, but using glue as a putty can eliminate most of the flaws.
We complete the repair by installing sockets, replacing the switch by returning the chandeliers and lamps to their place.
Repair completed. It remains to wipe the dust and celebrate its end.
From this article you will learn:
- How to make a room renovation plan
- What are preparatory stages repair
- How should a room be cleaned?
- What should be the sequence of certain operations when repairing a room
Often, apartment owners, before starting repairs, think: is it worth it to do the cosmetic finishing on their own? It seems to be not a very difficult job, but sometimes it is not enough. Often it is necessary to carry out a major reconstruction of housing with redevelopment and a complete replacement of decorative finishes. The method of transforming the premises mainly depends on the financial capabilities of the owners. Where to start repairing the room and in what sequence to do it? You will learn about this from this article.
What kind of repair is to be done: cosmetic or major
Before taking on the repair of the room, from the very beginning it is necessary to determine what exactly needs to be done - a cosmetic finish or a major reconstruction of the room. The correct classification depends on the types of work that they plan to carry out.
What is cosmetic repair? Why is it needed? This name was formed from the word "cosmetics". In the construction industry, during such a finish, only the appearance of the ceilings, walls and floors of the room changes. The dimensions, shape and layout of the room, as a rule, remain unchanged. In construction, cosmetic repairs differ from major ones in much the same way as makeup differs from cosmetic surgery for women.
- Cosmetic repair, its distinctive features
Why is a room refurbishment being done? After such an update, it acquires an attractive appearance, especially when the apartment is located in Moscow in an old housing stock. But the work carried out does not change the configuration of the room.
Book a discount on repairs
up to 10% for 15 days!
Enter your number and we will book
for you a personal discount
How to start a redecoration in the room? Wallpaper is usually re-glued, ceilings are whitewashed or tiled. Skirting boards and floors can be painted. If you want to get additional decoration, the work will cost more than a simple cosmetic repair.
As a result, the room will look new, but only the colors or texture of the finishing materials will change, and all walls, openings, and communications will remain in their places. When you are satisfied with such an update, you can start redecorating the room. If such a finish is not enough to give the room a presentable appearance, you will have to invest a large amount of money in order to carry out a major overhaul. This is an incredibly labor intensive process.
- Overhaul program, where to start
The overhaul includes all work that relates to cosmetic finishing, plus the following can be added in addition:
- replacement of the heating system;
- change of flooring after redevelopment of the premises;
- complete replacement of electrical wiring or change in its scheme;
- demolition, moving wall structures or adding new ones (except load-bearing walls).
Thus, during the overhaul of the room, the space is completely reorganized. The room starts to look completely different.
How to start a major overhaul in the room? A very difficult stage is the removal of previous partitions and the construction of new ones. It's dirty and noisy work. The process of demolishing old walls is always accompanied by a huge amount of construction debris in the room, which will need to be removed. Then you need to bring material for new partitions into the apartment - brick or drywall, depending on what exactly you decided to build walls from.

Important point: Are such actions legal? According to our legislation, any redevelopment that leads to a change in the location of the walls on the plan must be properly documented. The cost of the procedure depends on the size of the room.
Some work during the overhaul is problematic. For example, you can change the heating system in an apartment only after the heating season has ended. With central heating batteries, it will not work just as easily as with a conventional water supply system, in which the riser is easily blocked. This must be taken into account when planning work.
Capital renovation of the apartment means complete replacement all finishing materials and communications. When it is necessary to repair only one or a few rooms, such work will be more related to cosmetic repairs.
What is the best way to start renovating a room? First of all, you should consider the appearance of the room. To do this, you need to clearly plan your actions.
Which room is better to start apartment renovation
If you are going to carry out major repairs using the services of specialists, it does not matter which room to start with. Professional masters do the work in their own way, if they are not paid by the hour. They do not care about the question of where to start repairing the room. Hired builders perform work immediately in the entire apartment. They use the smallest room as a dressing room, renovating it at the very end.
If you are going to make repairs with your own hands, this method will not work. What is the best job to do at the first stage:
- Renovating a kitchen or bathroom is a big deal. Such difficult work should be done even faster, preferably within a few hours. It will be necessary to change the stove, pipes, toilet bowl and other plumbing fixtures. Without basic household amenities in the apartment about quality repair there can be no speech.

- From which room to start repairs in the apartment? It is recommended to do this in a room that is farthest from the entrance. He is first freed from furniture or, if this is problematic, covered with a film, moving it away from the walls. Thus, you will prepare the room for renovation.
It is not necessary at this stage to tile the kitchen or install PVC panels, such work can be done later. Promoting beauty in the room is secondary, designer finishing does not matter at the moment.
- At the first stage of repair, it is premature to deal with the design of the hallway and corridor. It is more competent to carry out this work at the very end, at the stage of finishing.
How to start renovating a room
You must first decide what you want to get, and only then you can think about where to start doing repairs in the room.

Only when you answer all these questions, you will be able to draw up an action plan on how to properly start renovating a room:
- Before you start repairs in the room, you should collect information about the materials that will be needed.
- It is necessary to calculate the amount of materials for construction and decoration.
- Think about what part of the repair you can do yourself, and for what work you will have to use hired labor by inviting professional craftsmen.
- Draw a diagram of where you want to place sockets and switches.
- Doors and windows should be ordered in advance so that repairs are not delayed due to their absence.
- Decide on the dates when exactly you need to start the repair and when to finish it, calculating the necessary time for preparation, so as not to delay the deadlines.
- There will be a lot of garbage during work, you need to think about how to get rid of it.
- It is necessary to prescribe a detailed order of work.

Where should you start renovating a room? Think about how you would like to see the room? Contact the services of a designer if you are at a loss with an answer. It is better to decide before the start of the repair, it depends right choice building materials and types of repair work. It is necessary to calculate everything in advance so that you do not have to finish the room again.
Drawing up a list of necessary tools and materials, calculating costs
When you have chosen the right interior design, you can proceed to the compilation of a list of materials for repairs. The amount of money that will need to be spent depends on the cost of repairs. Purchase building materials with a margin if your budget allows.
How to start a room renovation? Any design plan is based on decorative elements. Some of them, such as paintings, shelves, mirrors, etc., are best purchased in advance. If any item is missing, you will have to adjust the interior design plan.
To start renovating a room, you also need to make a list of the tools you will need. Repair specialists or sales assistants in hardware stores will be able to help with this.
After all preparatory work, drawing up a plan, buying materials, preparing a list of tools, choosing a repair method, you can calculate how much the whole idea will cost.
It is not recommended to purchase all materials for construction in one store. Examine the cost of goods. Prices may vary from store to store. You need to reasonably approach this issue, you can save a lot on repairs if you buy building materials at wholesale prices.
How to start repairing a room: 5 preparatory steps
Before starting repairs, everything should be taken out of the room. It is recommended to cover the doorway with a film or an old cloth. This will protect the apartment from dirt that will form in the room during noisy work, even with regular cleaning. Neither a vacuum cleaner nor constant mopping will help, there will be a lot of dust in the apartment.
Light fixtures will need to be removed. It will be possible to leave only a cartridge with a lamp. Window openings should also be sealed with foil, the same applies to floor coverings. Easier to clean after repair protective material than to wash all surfaces. Work on the preparation of the premises is carried out in several stages. To understand where to start repairing a room, consider this step by step.
- Removing old coating from wall surfaces
- How to start cleaning the ceiling before repairing the room?
- Removing the door frame
- Wall surface preparation
- Where to start repairing the floor in the room? Surface preparation
Before starting repairs in the room, old wallpaper is removed from the walls. If the plaster is in poor condition, it must also be removed. This may take a significant amount of time.

How to remove wallpaper to start renovating a room? It depends on the glue with which they were glued. Wallpaper can be easily removed in large patches, and sometimes they have to be literally scraped off the walls. It is recommended to pre-moisten the wallpaper with water using a spray bottle. After half an hour, they themselves will begin to lag behind whole canvases from the surface. Hot water dissolves the strongest adhesive. Then the walls are cleaned from the remnants of the finish with a metal brush or vacuum cleaner.
It is much easier to remove the lining from the ceiling surface than from the walls. If you plan to cover the ceiling with plates (panels) made of plastic or polystyrene, it will be enough just to wash off the whitewash.
In the case of painting the surface with water-based dyes or whitewashing it with lime, you will have to work hard. It is necessary to remove the entire layer of the old coating completely.

Often there is a need to level the surface of the ceiling before you start redecorating the room. Ceilings in houses are usually installed with a slope of several degrees from the perpendicular. This difference leads to the fact that the height of the ceiling in one room varies between 2-5 centimeters.
When replacing a door, it is advisable to change the old door frame as well. Instead, you can immediately install a new one, but so far it is better without a door leaf.
Where to start repairing the walls in the room? Usually, during cosmetic repairs, the alignment of the walls is not carried out. Plastering is necessary only if there are many defects on the surface, there are significant violations of the upper layer. Such a laborious process will require a large amount of materials. The total surface area of the walls in the room significantly exceeds the area of the ceiling.
It is recommended that before starting repairs in the room, clean and putty small cracks on the surface. Then you can grind it with an electric grinder. With the same tool, various bumps and bulges on the surface of the walls are easily removed.

At the same time, you can ditch the channels for the wires in case of replacing the wiring in the room. To install new outlets, you will need to make special "glasses" in the walls. After the installation of electrical equipment, the recesses are rubbed with a gypsum-based material. This work may take several hours. Then the wall surfaces are cleaned and primed.
Upon completion of all work on the preparation of walls and ceilings, you can do the flooring. How to start repairing the floor in the room? If a laminate was laid in the room, then for cosmetic repairs it is enough to lay a new coating, removing the old one. If the laminate is in good condition, you can leave it, replacing the panels with defects. Then it is necessary to polish the surface with a wax-based mastic.
To start repairing linoleum in a room, you need to remove the old coating, clean the base to concrete. Then the surface is primed and covered with thermal insulation made of polyethylene foam.
Wood floors need to be cleaned first. Then the floorboards that need repair are restored, the joints between them are filled with wedges. Then the floor surface is polished.

During any repair work, a lot of dust and construction debris is generated. Prepare polypropylene bags that you will use when cleaning the room from dirt. Every day after finishing work, the surfaces must be cleaned by collecting debris in a bag. Before finishing the floor, the coating is vacuumed or wet cleaned with a brush and water.
Room finishing
So, you have to overhaul the room. What is the best place to start? Before you prepare the room for fine finishing, you should perform the following work:
- partitions are demolished and moved, arches are cut through (if necessary). This is done without disrupting the operation of gas or plumbing equipment in the apartment;
- electrical wiring and other communications are being laid. When the walls are bare, it's easy.

At the same time, pipes and batteries are being installed. The work should be done with high quality so that you do not have to redo it later. This is a very important point, it is better to take the help of professionals.
In the case of redecorating a room, where to start the repair work? In the prepared room, it is recommended to do the following:
- Installation ceiling covering- the ceiling frame is installed and electrical wiring for lighting fixtures. Small holes from 8 to 10 mm are made in drywall sheets. In case of installation spotlights this is done after finishing.
- Wallpaper and plinth are glued to the ceiling.
- Laminate is laid over the hardened floor screed. A plinth is installed around the perimeter of the room.
- Sockets, switches and lamps are mounted.
- The door is hung, the doorway is decorated with platbands.
Sequence of some operations
The sequence of repair work is often controversial. Some people think that the procedure may be different. Everyone has their own opinion on this issue. How to start a room renovation? In what sequence should different types of work be performed, from the point of view of specialists?
- When to install double-glazed windows - in advance or after repair?
What is the best way to start repairing windows in a room? Often there is a need to replace old double-glazed windows. It would be more correct if this is done after finishing work on surface preparation, before finishing. If the windows have been replaced before, this step can be skipped if the glass units are in good condition. You just need to make sure that their design is airtight and thermal insulation is reliable.

Check window sashes for closing and opening. They may be skewed. This can be determined using the level. After decorating the premises, it will be more difficult to eliminate such shortcomings. During this period, window sills can be installed, protecting them with polyethylene from splashes that occur during the decoration of the room.
- Laying flooring or installing doors when renovating a room, where should I start?
It is desirable to lay any floor covering before installing the door into the room. Then you will not be mistaken by setting the required gap between the threshold and the door leaf. Doors do not require glue or mortar. It is impossible to spoil the floor during such work.
It's about the door door frame can be installed earlier, before the walls are leveled. It is only necessary to take into account the height of the future decorative floor covering. At this moment, all the irregularities of the opening are visible, it is better to eliminate them immediately. In the case of a perfectly flat surface, such work can be done later.
- How to start repairing a room correctly - do you first glue the wallpaper or lay the flooring?
Walls are usually painted or wallpapered before decorative flooring is installed.

Some craftsmen do the opposite. They explain this by the fact that the wallpaper, which is glued after installing the floor covering and skirting boards, can be easily replaced if necessary. The plinth does not hurt, the excess part of the wallpaper is simply cut off.
The desire of people to paint the ceiling after installing the top skirting board is explained in the same way. Proponents of this option claim that it is very convenient. You can first close up the gaps between the ceiling and the baseboard, and then paint the entire ceiling. Get a monolithic surface.
- What is the best way to start repairs in the room: glue wallpaper or install a stretch ceiling?
You can install a stretch ceiling at any time, such work is dust-free and neat. There is no risk of any damage to the surfaces. Typically, stretch ceilings are installed after all repairs are completed.
The nuances and order of repair in the bathroom
The bathroom is a special place in the apartment, repairs here must be carried out very carefully. This is a room with excessive humidity, significant temperature fluctuations can occur here. A certain procedure should be followed when repairing a bathroom, finishing work must be properly organized.
The usual everyday business: the apartment clearly needs repair, but there is not enough money. How to make an inexpensive apartment renovation with your own hands? It seems to be the simplest, obvious way: surface cosmetic repairs. That is, plywood wallpaper, whitewashing the ceiling, painting, fixing the creaky floor; Possibly window replacement.
However, if you calculate the labor costs and consumption of materials, it turns out that by increasing labor costs by half, and spending money by a quarter, you can give the apartment a completely different look, and for a long time. How much you need to invest specifically depends on the prices in the region, but the general methods by which you can make an apartment cozy and elegant inexpensively are the same.
Saving Money when repairing an apartment with his own hands, he stands, like the Earth in ancient legends, on three whales and a slowly hurrying turtle under them:
- We are not afraid of work. Nothing comes from nothing. Either money or labor.
- Wherever possible, we do not change the capital, but the old one that has lost its appearance, but renew it.
- We attribute the maximum savings to where it will not affect the quality of work and will not be visible.
- We spread the costs of labor and money over time: having conceived repairs in the summer or autumn, we spend a year on preparation, and then we pile on and quickly do everything. To lay out 200-300 thousand rubles at once is a problem, but it is quite possible to break them up in parts for a year. In addition, there will be time to measure seven times - cut once.
Where it's hard to save
The only area where you have to invite a specialist is to remake and strengthen the electrical wiring if it is old and weak. Here, the only way to save money is to negotiate with the DEZ electrician. He will do the work in pieces, in his spare time, but the likelihood of hack work will be even less than that of “branded” specialists: after all, he will then serve all this.

It is better not to save on electrics and wiring, however, some points, such as installing sockets, can be done independently.
Tool
A good specialized tool makes the job much easier and cheaper. But it's hard to buy. Therefore, it is better to rent a tool as needed. In terms of costs, it will come out a little if you decide in advance on the design and draw up an approximate work plan for yourself.
Season
Plumbing
A sore point with independent cheap repairs is the replacement of plumbing. If it is still “alive”, only filthy, then it can be cleaned and painted. How to do this will be described below. But if there are chips and cracks, then, if you like it or not, you need to change it.
For such a case, here is some information for you: new settlers, especially in houses above the budget category, often start a major overhaul immediately upon entering, and excellent, completely new faience and cast-iron plumbing equipment ends up in a landfill. Landfill operators (simply - landfill scavengers) have long turned this circumstance into a profitable business.
They do not make direct contact by office phone with strangers, but it is quite possible to get through to them using word of mouth methods. The rate is from a third to a half of the factory price for a household item. And do not think that they will take you to the dump and show you where it lies. In the back room you will be offered a choice of clean, carefully washed products, which you can sit down on at least immediately.
Construction garbage
The next sore point is the removal of construction waste. The operation is not cheap, and requires paperwork. Exit: a basement, a barn, a cottage or a closet, and a few used bags of plastic sackcloth, bought for a penny. Construction debris does not sour and does not rot, it can then be poured into a container in a garbage dump in a bucket. There is nothing illegal in this.