Drainage pit for a bath: we build ourselves. Drain pit for a bath - ways of arranging The volume of a drain pit for a bath
Proper drainage of water from the bath is one of the most important points during construction. Its durability directly depends on this, the absence of harmful smells of raw materials or fungus in it, and how often the foundation will have to be repaired later. In this article, we offer you to understand various options drainage system devices.

The easiest way is to install a drain pipe
The simplest and most tried and tested for decades draining water in a bath is a drain pipe, which is laid even during the construction of the steam room foundation. It must be done obliquely with respect to the drain pit itself - so you do not have to additionally insulate it.
The pit itself should be dug at a distance of 3 to 5 meters from the bath, and it is imperative to strengthen its edges from possible collapses. It is better if these are concrete rings - or a frame filled with concrete. But the bottom of the pit is important to make it so that the water in it is absorbed into the soil freely.
So that the drain of water for the bath does not become clogged, it is advisable to make the pipe completely without bends - after all, it is from them that it is most difficult to remove debris. And yes - you can only take a sewer pipe for these purposes, the diameter of which has its own strictly defined value.

Installing a drain pipe is quite simple, just follow these instructions:
- Step 1. A pit is being prepared, and a trench is digging from it to the bathhouse.
- Step 2. A drain pipe is installed - and it is not necessary to insulate it, but it will not hurt.
- Step 3. A cement floor is made in the washing room, with a slope around the entire perimeter to the drain pipe. It is important that the floor really turns out without dents - then water should not stagnate anywhere.
- Step 4. So that without any problems the bath can all year round work, the water drain is equipped with a grid - all the garbage will collect on it, and there will be no blockages in the pipe.
- Step 5. After all this, you can lay tile tiles on the cement floor - of the color and style that you like and matches the style of the bath interior. And already wooden grates with special impregnation are placed on the tiles - so that during pleasant bath procedures you do not have to walk barefoot on hot tiles.
Where and how best to drain the water?
But where the water itself will go - it all depends on the planned budget and the load on the drainage. So, it never hurts to build a separate cesspool at a distance from the bath, and already lay a trench from it and lay a sewer tube in it in good insulation.
And the most budget option is right under the washing bookmark of gravel (both large and small), where the water will go.
Funnel - easy
Some attendants still make something like a funnel under the washing and steam rooms - they concrete its walls and smear them with liquid glass. In the center of such a funnel is a drain pipe that extends beyond the bath: into a pit, the walls of which are reinforced with bricks, or the pit itself is an old iron barrel without a bottom.
At the bottom of the pit - gravel, on top - a cover made of thick metal and a hole for a ventilation pipe. Judging by the reviews, such a simple, but reliable system you can not open for ten years.
We also recommend reading the article about installing a shower drain in the floor under the tiles on the Vannapedia website - the installation technology is very well described there classical system water drain.
Drain hole outside the bath
But some builders today are convinced that water must be taken out of the bath. Like, the sand dries for a long time even in summer, and in winter all the water that goes under the foundation in the old fashioned way will simply turn into ice - and oh warm floors in the steam room it will be possible to forget until spring.
Others are sure that very little water is used for one or two people in the bath, the steam room is usually used from time to time, and if the sand is not taken as ordinary, but as a large fraction, then no problems should arise ...
But the pit itself can be made using a technology that has recently become especially popular among attendants: the pit is made from the tires of a jeep or a car similar to it. Water flows into this pit through plastic pipes, and so that neither cold nor unpleasant odors get into the bathhouse in winter, a water seal is made - something like a hydraulic lock:
Point 1. A five-liter plastic bucket is taken, a handle is made of galvanized tape, and an iron pipe is placed on the lowest cord from the top tire - across the pit. A bucket is hung on it - it will hang like a cauldron over a fire, below the upper level of the pit.
Point 2. A corrugation is put on the end of the sewer pipe, which is lowered from above into the bucket - it will be at a distance of 10 cm from the bottom and 10 cm from the edge, i.e. in the middle of the bucket. That's the whole hydraulic lock - after draining, all the water will be collected in a bucket and overflow over the edge, gently flowing into the pit. And when the drain stops, the water that remains in the bucket will not allow the same air to enter the bath. And, even if dirt or leaves settle on the bottom of the bucket, it can always be turned over to clean it.

What system to make for a large number of people?
For a steam room, which three or four friends visit from time to time, one water outlet in the bath is needed, but for a whole company of regulars it is already different. In a bath for a small number of bathers, a drain pit is usually arranged right under the foundation. Its walls can be overlaid with bricks and covered with coarse sand - for summer bath the very thing. But in the second case, you will already need a special pipe that will go to the drainage well - and below the freezing level of the soil, otherwise it will freeze. Or you can combine both methods - using the first in summer, and the second in winter.
And so that the water from the bath does not disappear in vain and does not pollute environment habitat, you can use a septic tank, which will clean it and distribute it through irrigation pipelines. The most complex and expensive way to remove and purify water from a bath is a well with biological filters. It contains slag, brick battle and rubble. The whole secret is that with the constant entry of bath wastewater into the well, it eventually becomes covered with silt, and in the sludge there are microorganisms that then purify the wastewater. Such a septic tank is usually built in the lowest place on the site.
That's all! Nothing complicated - a competent drain in the bath can be done with your own hands.
A bath is an almost obligatory attribute on suburban area. No shower cabins and bathtubs can replace the healing effect of a steam room, so a bathhouse is often erected even before a house is built. Do not forget that even the smallest bathhouse requires the disposal of used water. The simplest and, at the same time, practical option local sewerage- a drain hole for a bath. Consider how this structure can be built.
It is possible to organize the removal of waste water from the bath different ways. If it is possible to connect the drain to the central sewer or organize the discharge of water into a common drain ditch, then this option would be preferable.
But, if this is not possible, it is necessary to build local systems for receiving wastewater. Let's consider how to equip a drain pit, if this particular option for arranging a sewer is chosen.
What needs to be done before construction begins?
Everyone knows that the construction of any object or communication must begin with design. The construction of a treatment plant for a bath will not be an exception.
GWL assessment
First of all, you need to find out at what level the underground soil waters lie. If this level is high enough, then the construction of a traditional drain pit will have to be abandoned, since it will be filled with soil water.
How can you determine at what distance from the surface the groundwater occurs? As a rule, to obtain this information, it is necessary to carry out a hydrogeological study, including the drilling of ores. However, a preliminary assessment of the situation can also be made using ancient folk methods:
- If there are wells nearby, then by the level of water in them, one can draw a conclusion about the GWL.
- Another sign is that with a high GWL, many plants grow on the site that need moisture in large quantities. For example, horsetail, coltsfoot, reed, sedge, etc.
Determining the volume of chambers and other nuances of construction
The volume of the receiving chambers depends on how the bath is designed for a person - the drain pit should be the more voluminous than large quantity people will use the washroom. With insufficient volume of the pit, wastewater simply does not fit in it and will flow over the edge.

Also, the quality of the soil on the site should be assessed, it depends on whether it will be necessary to strengthen the edges of the pit. If the site is small, then it makes sense to place a drainage drain hole under the bath. But this is possible under the following conditions:
- the pit must be built before the construction of the bath begins;
- the bath building will be raised above the ground, that is, it will be necessary to build a pile or columnar foundation, and the elements of the foundation must be very high quality waterproofing;
- it is necessary to provide good ventilation between the floor of the bath and the surface of the earth;
- the pipe laid between the drain of the bath and the pit must be insulated with high quality.
As can be seen from the above, the location of the drain pit under the bath is associated with great difficulties and involves a significant increase in labor costs for construction. Therefore, in most cases, a pit is built at a distance from the bath building.
The location of the treatment tank should be determined in advance. As a rule, it is recommended to place the pit at a distance of 2-2.5 meters from the bath. Otherwise, it will be difficult to build a pipeline with the required slope. In addition, you need to make sure that the pit is at a sufficient distance from the source of drinking water.
Laying a drain pipe from a bath
The arrangement of drain pits begins with the laying of a drain pipe, which will lead from the bath to the treatment plant:
- The construction of the drain pipe begins with the construction of the foundation for the bath.
- When laying the pipe, turns, bends and joints are not allowed. If this requirement is not observed, there is a risk of blockages.

- After installing the drain pipe, the floor in the bath is filled with a concrete screed, while the floor is made with a slope towards the pipe. After the screed dries, you can put on the floor tile or other moisture-resistant finishing material.
- The drain hole of the pipe should be protected with a grate to prevent debris from entering the pipeline.
Advice! Insulation of the floor in the bath, as a rule, is not done. Since a properly constructed floor warms up quickly when the stove is fired and does not let in the outside cold. The drain pipe, laid with the necessary slope, also does not require insulation.
Drainage pit construction
If the soil on the site is strong and, at the same time, has excellent filtering properties, then the construction of the pit consists in digging a pit and constructing a drainage layer of crushed stone or gravel.
However, such ideal conditions are extremely rare. As a rule, well-draining soils tend to crumble, so when building a pit, it is necessary to provide for the strengthening of its walls. Options for materials that can be used to lay out the walls of the pit:
- The brick is moisture resistant (ceramic).
- Slate sheets.
- Rings from reinforced concrete are well.
You can also use improvised materials:
- Old tires with a rim cut off on one side.
- Barrels made of plastic or metal. The bottom of such barrels is removed, and holes are made in their lower part for the passage of water.

Installation steps
- The first and most time-consuming stage of construction is the preparation of a pit for a pit and a trench for laying a pipe. The excavated soil should either be scattered over the site (if it is high-quality soil), or taken out of it.
- During the construction of a brick tank, the walls are laid half a brick thick - this saves material. In the rows of brickwork, five-centimeter gaps are made to drain the liquid.
Advice! Masonry can be made not only from brick, but also from natural stone.
- When constructing a tank from concrete well rings, perforated products should be selected. If it was not possible to buy them, then you will have to form holes yourself with a puncher.
- After completing the process of strengthening the walls of the pit, the formation of a drainage layer at the bottom should begin. To do this, sand and gravel are poured into the pit, the layer thickness is at least 20 cm.
Advice! If there is no crushed stone, construction waste - broken brick or concrete can be used to form a drainage layer.
- Strengthening the walls of the pit is completed at a distance of 40 cm from the surface of the earth. At this level, an overlap should be arranged - lay a finished reinforced concrete slab or pour the mortar along the formwork built in advance.
- An opening should be provided in the ceiling, which will be used to control the filling of the pit with drains, and, if necessary, to pump out water. The hole is closed with a secure hatch. After that, the drain pit in the bath is ready.

Option to build a drain pit from barrels
If the bath will be used 1-2 times a week and it is not planned to install a toilet bowl in it, then a do-it-yourself drain pit for a bath can be built quickly and easily from plastic barrels. Apply metal barrels not recommended due to their tendency to corrode. There are two ways to build a drain pit for a bath from barrels. Option one:
- preparing a pit;
- at the bottom we form a filter layer, pouring crushed stone 40 cm high;
- a barrel without a bottom and walls perforated in the lower third of the height is installed on the prepared filtering layer;
- a drain pipe is connected to the barrel, going with an inclination from the bath;
- the pit should be larger than the barrel, after its installation, about 10 cm of free space should remain on all sides, which must be covered with fine gravel mixed with sand.
The second option is more complicated; two barrels are required to build a drain pit. The second is installed below the first by 200 mm. The barrels are connected using an overflow system.
Such a drain pit works on the principle of a septic tank. The first barrel is airtight, solid sediment settles in it. The second barrel is draining, how to make this option is described above. Water drainage from the second barrel can be organized into drainage ditches.
When building a bath, a system for discharging used water should be provided. An inexpensive and practical option for waste disposal is a drain pit for a bath. You can build this structure on your own, without involving teams of builders, since there is nothing complicated in its design.
Many owners of private houses want to have a good Russian bathhouse on their site. But before proceeding with its construction, it is necessary to carefully consider and competently organize the drainage system. Currently, there are several ways to remove waste water from a bath that do not require large financial investments and supply to the general city sewer system. Well made plumbing washing bath will help ensure a long service life of floors and foundations, as well as prevent the appearance of mold and fungi on the walls.
Drainage device in the washing room at the bath
Drainage in the bath can be carried out in various ways, which depend on the type of floors in the washing room of the bath. There are wooden leaking and non-leaking, as well as concrete. For the first case, it is necessary to arrange a special reservoir for the flow of water, from which it will be poured into the sewer. And for the second option, the floor is laid in the bath with a slope, and special gutters and ladders for the drain are mounted. Any drainage system in the bath should be arranged before laying the floors.
When choosing to create outdoor sewerage Baths must take into account factors such as:
- The intensity of the operation of the bath;
- building dimensions;
- Soil type and depth of its freezing;
- Sewer system (its presence or absence);
- Is it possible to connect to the central system.
The above aspects are among the most important in determining the drainage.
For a small bathhouse, where one or two people will bathe several times a month, you should not make a complicated sewer. It will be enough to dig an ordinary drain hole or a small pit under the bath.
The type of soil is of great importance when creating a drainage system. For sandy soils that absorb water well, it is recommended to make a drainage well. In clay soils, it is better to equip a drain pit, from which drains will need to be periodically pumped out. It is also necessary to take into account the degree of freezing of the earth, since the water in the pipes that will be laid above the required mark will simply freeze and the plastic will crack.
If you do not want the water from the bath to simply flow out and soak into the ground, you must use a septic tank with a sump, where the drains will settle and be cleaned, and then distributed through irrigation pipes. The most complex and expensive way to remove water is to build a well with biological filters, which consist of slag, broken bricks and rubble. The peculiarity of this method is that when waste water enters the well, its walls are gradually covered with a layer of silt, in which microorganisms that purify water live.
Advantages and disadvantages of each external drainage system in the bath
Consider Various types drainage, as well as their characteristics, advantages and disadvantages.
This is a sealed pit made of reinforced concrete, in which water from the bath accumulates. When it is full, it is pumped out using a special device.
Advantages:
- The simplicity of the device;
- Does not require maintenance;
- Low cost.
Flaws:

Drainage well
Such a water drainage system is a pit with a filtrate that purifies wastewater. The filter can be sand, broken brick, crushed stone, slag, etc.
Advantages:
- Low cost;
- Ease of construction.
The disadvantage of the system is the regular replacement of the filtrate or its cleaning. And this procedure requires a lot of physical effort.
Pit
Such a system consists of a hole that is dug immediately under the floor of the washing room. At the bottom of the pit there is a natural filtrate, which passes through itself wastewater, which gradually drains into the depths of the soil.
Advantages:
- There is no need to run a pipeline;
- Low cost device.
Flaw:

This is a system that consists of a septic tank and pipes emanating from it, which remove water purified from impurities. Drainage systems are installed at a certain slope so that the water quickly leaves and is completely absorbed into the ground.
Advantages:
- Works offline;
- It can be used to create a sewerage system with several points for receiving waste water;
- It can even clean "black" drains if an anaerobic septic tank is installed.
Flaws:

Alternatively, you can connect to the central sewer. Then there will be no need to arrange external facilities for the reception and processing of waste effluents. But here you have to pay for the services of specialists and draw up various permits.
The internal drainage system of the bath
The washing room inside the bath is equipped taking into account the future drain and the selected floors. Drainage must be carried out in such a way that moisture does not remain in the room, which will contribute to the development of fungi and mold.
- Leaking wood floors are the most widely used, as they are the most simple option bath drains. The boards are laid with gaps of about 3-4 mm, so that through the cracks the water from the washing room goes into the pit unhindered. Such floors are collapsible so that high-quality drying of the boards can be carried out. In this case, the floor is arranged without a slope for draining, since water will soak into the ground under the bath.
- Non-leaking floors are arranged with an angle of inclination to the drain, through which the waste water will flow into the water collector, and then into the sewer. Also, water can drain into any selected drainage system.
- Concrete floors are easy to care for, durable and reliable, so they are perfect for arranging a washing room in a bath. Such floors are also made with a slope towards the drain, so that water can quickly and freely go into the selected sewer system.
Preparation for the construction of a drainage system: drawings and diagrams of various drains
Scheme of the device of a wooden leaking floor with a drain. Must be done before laying floors.
If a dry steam room is provided in the bath, and there is a shower in the washing room, then it is necessary to provide for a drain in the steam room.
In the sewerage of the bath, where water will be collected from several rooms, it is imperative to install a riser with a ventilation valve.
If the steam room and washing room are in different rooms, then the gutter for draining water is laid under the ceiling between them.
Under the wooden floor must be done concrete base with a slope to the central part, where the gutter will go, joining the sewer.
Also, instead of concrete, you can lay a pallet made of stainless or galvanized steel on the floor under the flooring.
Video: device for a galvanized pan for draining water under the wooden floor of the bath
When installing self-leveling floors on which tiles will be laid, it is necessary to observe the slope, where a ladder is installed at the lowest point to receive water, which is connected to the sewer.
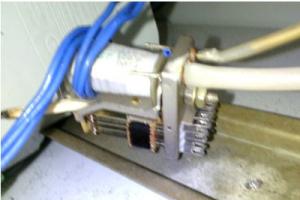
- For the installation of a sewer system inside the bath, it is necessary to use modern durable plastic pipes, which have a long service life, and therefore will serve for many years. They are not afraid of moisture, are not subject to corrosion, like ordinary metal or cast iron ones, and are also easily and simply assembled on their own without the involvement of specialists. PVC pipes are great for the device internal sewerage in the bath, malleable in any processing, and can also be with or without a socket. Service life more than 50 years.
- Cast iron pipes are too expensive, heavy, and also inconvenient to work with.
- Asbestos-cement pipes are the cheapest, but they often have many defects. Also, for the installation of a non-pressure drain, pipes with a smooth inner wall surface are required, and asbestos cement products often have rough inner walls with recesses.
Types of plastic pipes:
- PVC pipes (polyvinyl chloride);
- PVCH (pipes made of chlorinated polyvinyl chloride);
- PP (polypropylene products);
- HDPE (pipes made of low pressure polyethylene);
- Corrugated polyethylene pipes.
Any of the above types of pipes can be used for internal device plum in the bath. The diameter of the product for the main line is taken based on the future intensity of operation of the bath and the number of drain points. For an ordinary bath with a steam room, a washing room and a toilet, pipes with a diameter of 10–11 cm are recommended. If plumbing is not installed, then pipes with a diameter of 5 cm will be enough to drain water.
Calculation of material for creating a drainage system and tools
For the installation of internal sewerage in the washing room, we will need PVC pipes gray color, as well as joints and adapters.
- The number of pipes depends on the length of the internal drain system.
- We will also need tees with a size and an angle of 110–110–90 ° - two pieces (highlighted in red in the diagram);
- Elbow adapter - 90° - three pieces (highlighted in black in the diagram).
- Horizontal sewer pipes - Ø11 cm;
- Vertical pipes for the device of water drain receivers - Ø11 or 5 cm.
- For pipe connection different diameters you will need adapters from 5 to 11 cm.
- For the external sewerage of the bath you will need pipes orange color(PVC).
For work we need:
- Spade bayonet (special equipment);
- Building level;
- Bulgarian with a cutting wheel;
- Sand;
- Cement;
- Rubble.
Step-by-step instructions with a photo for the manufacture of various drain designs in the bath
Before considering the drain system in the washing room, it must be said that the entire sewer internal system in the bath is interconnected and consists of three waste water receivers.

The trapik for the drain is a siphon, which has a water seal that does not let unpleasant odors into the washing room, and it also serves as a grate that does not let large debris into the sewer.
In the photo we can see the slope of the tiled floor to the drain for the drain.
A drain drain must be installed in the bath rooms.
Video: trapika functioning system with a water seal in the washing room of the bath
- First, we will lay the sewer pipes. To do this, we dig trenches.
- At point A and B, the depth of the trench should be approximately 50-60 centimeters in relation to the ground level (outside the foundation). If the height of the base is 30-40 centimeters, then the depth of the trench will be 80-100 cm in relation to the top of the foundation.
- From points A and B, we gradually dig ditches so that the slope is about 2 centimeters per 1 running meter. We pour sand about 5-10 cm thick at the bottom of the trench and tamp it well, observing the necessary slope.
- We fill the foundation and make a hole for the sewer pipe.
- Drain pipes are installed vertically (1 and 2 for traps). To do this, we drive sticks about 1 meter long into the bottom of the trench, and then we tie plums to them. We install vertical pipes, making a small margin of length. In the process of installing the floor and installing the ladders, we will shorten them.
- We install the sewerage system according to the specified scheme.
In the construction industry, the depth of laying sewer pipes in the southern regions is about 70 cm from the ground surface. IN middle lane the depth varies from 90 to 120 cm, and in the north it is at least 150–180 cm.
In order for the drains not to freeze, the tubes must be insulated with several layers of special 10 mm polyethylene foam.
Under one end of the pipe we dig a shallow hole for a drain. Now we need to try to drain a certain amount of water in order to check the correctness of the slope of the pipe. We check all the pipes one by one.
We make an external sewerage system with our own hands
If the volume of waste water does not exceed 700 liters. per week, then we can use old truck wheels as a septic tank. We can calculate the water absorption area of a septic tank, given that the degree of water absorption of 1 sq / m of sandy soil is about 100 l / day, mixed sandy loam about 50 l / day, loamy soil about 20 l / day. Depending on the type of soil and its water absorption, we calculate how many wheels we need.
- We dig a hole 2x2 meters and a depth of about 2.3 - 2.5 meters, depending on the level at which the pipe will exit. We fill the bottom with sand 10–15 cm, and rubble on top - 10–15 cm.
- In the pit, we tightly stack the wheels vertically on top of each other about 5-7 pieces. The top point should turn out so that the drain pipe can definitely enter it.
- In loamy soil, it will be enough to install 7 wheels. If the site has sandy or sandy soil, then 5 pieces are enough.
- We cover the wheels with a metal or plastic durable cover with a hole made in it. We insert a ventilation pipe into it, through which air will flow, ensuring the vital activity of microorganisms that process wastewater.
- We carry out a test drain and bury the entire structure.
How to make a drain well for drainage: a guide
drain hole may be plastic or metal tank, reinforced concrete rings or red bricks.
- We choose a place in the lowest place of the site so that the water from the washing room leaves by gravity. In order to make it convenient to pump water out of the well and the car could drive up to it freely, you need to choose a place with a convenient entrance.
- Digging a hole with an excavator. If there is no equipment, then you will have to dig manually, and this is a lengthy process. We monitor the condition of the walls of the pit (they should not crumble). We can dig a hole in a square, rectangular or round shape.
- We make the bottom with a slight slope to the hatch for easy cleaning of the tank. We fill up the sand 15 cm and concrete the bottom. Instead of concreting, you can simply lay a reinforced concrete slab desired shape and size.
- We lay out the brick walls. You can take a used red brick. For masonry, we make a solution of clay and sand. In one of the walls during the masonry process, we install an inlet pipe for water.
- Since brick walls are waterproof, we need to treat them with a special sealant. For this we take bituminous mastic or other similar material.
- We mount the ceiling from reinforced concrete slab. The upper part of the well should be blocked on all sides by about 30 cm. To pump out water, we make a hole above the pit section where the slope is located. Overlapping is arranged in several steps. First, we make formwork from boards and pour a concrete layer of 5–7 cm. We put reinforcement on top and pour the next layer of mortar. Let the concrete dry for a few days.
- We put a metal hatch, and cover the concrete floor with polyethylene and fill it with soil, so that only the hatch is visible on the surface.
How to place a drainage system with a pit
- Under the floor of the washing room we dig a hole 2x2 meters and a depth of at least 1 meter. At a height of 10-15 centimeters from the floor level, we install a pipe that will connect the pit to the external sewerage system. We observe a slope of 1 centimeter per 1 linear meter.
- We put a layer of gravel, broken brick, gravel or expanded clay on the bottom, and pour a layer of sand on top. We strengthen the walls with brick, large-wave slate or natural stone.
- On top of the pit, we lay logs, and we already mount a wooden floor on them.
- So that the waste water can easily go straight into the pit, the boards are laid at a distance from each other. Such a wooden floor can not be attached to the logs so that it can be easily removed and dried.
The second version of the pit device is a water collector, from which effluents will be poured into a septic tank or sewer when a certain mark is reached. Basically, this method of drainage is used when arranging leaking floors.

How to install a ground filter for a bath
For the device of such a system, a separate septic tank will be required, which will serve as a sump and distribution well. Drainage pipes will depart from it in different directions, designed to distribute treated effluents around the entire perimeter of the yard. You can buy a septic tank, or you can make it yourself from large plastic or metal containers.
A reinforced concrete septic tank or a round brickwork structure functions perfectly.

Drainage system rules:
- The length of the pipe should be no more than 25 meters;
- Laying depth of at least 1.5 meters;
- The distance between the pipes is not less than 1.5 meters;
- The width of the trench for drainage is at least 50 cm, maximum 1 meter.
- We dig a trench, taking into account the angle of inclination of about 1.5 °. We check the angle with the usual building level.
- We pour 10 cm of sand at the bottom of the clay soil trench and 10 cm of gravel on top. In loamy soils, the pipe will need to be wrapped with filter material to prevent silting. On sandy soil we make a sand and crushed stone pillow, and we wrap the pipes with geotextiles.
- Pour 10 cm gravel on top of the drainage, and then fill the ditch with earth.
- The filtration system must be ventilated, so at the end drainage pipe we install a pipe about 50 cm high, and put a protective valve on top.

Video: how to bring the drain system to the bath
Properly made drain in the washing room of the bath and its other premises guarantees a long service life of this facility. It will help protect the building from the harmful effects of moisture and prevent pollution of the territory by waste water. Even in small baths it is necessary to equip the drainage system, so this process must be approached with full seriousness and responsibility.
Bath is a place often in contact with water. Moreover, this happens both outside and inside. AND protect wooden walls waterproof coating is not enough- it is necessary to organize a high-quality drain in order to avoid frequent repairs of the foundation, damage to the bath by a pathogenic fungus and rotting of wood.
Water is drained from the wash room directly to the drain tank or to a place reserved for draining. The options for organizing a water intake system can differ quite a lot depending on the conditions in which the bathhouse was built and on the type of drain.
First you need to know the answers to several important questions regarding the conditions for the construction of a branch:
- Where will the drain be located and how much area should be allocated for it?
- What type of soil is on your site where the bath will be located?
- Is it possible to connect to the central sewer?
- What budget are you looking for?
- Will you build the drain yourself or will you use hired labor?
From the correct organization of drain communications depends on the longevity of the building and the quality of the bath procedures themselves. Even if the volume of runoff is small, you should not rely on the soil to absorb all the liquid: the remaining water will still spoil the foundation and the soil itself, which may cause the building to shrink. The only case when a drain may not be necessary is if the bath itself is used no more than once a month by a small number of people (2-3 people). Here you can use the so-called leaky floor, with widely laid boards. In all other cases, this is the first thing to plan after laying the foundation. Therefore, it is very useful to know various ways organizing a drain for a bath, even if you do not do it yourself, but order it from a construction company.
Autonomous sewerage with a settling well
The first and most time-consuming method is a filtering settling well based on autonomous sewerage. Here the system consists of two tanks, preferably made of plastic. The first tank filters the effluents from coarse particles with a simple mesh filter, equipped in the tank. The second tank conducts the second stage of wastewater treatment before sending them to the sewage pit. But for any variant of drainage with sewerage, a special design of the floor in the bath is necessary.
The whole point of such a floor is to tilt towards the center of the room at the initial stage of construction. A fitting is mounted in the center of the floor, which is closely adjacent to the connector in the floor, tightly treated with sealant around the installation site. The fitting funnel is selected within 5 cm, with slight deviations. Sewage pipes from all rooms, if several, are connected by a splitter. But it's worth knowing that the construction of a cesspool is advisable only in the case of deep occurrence ground water , not less than 4-5 m deep. Otherwise, your pit will be flooded all year round and the smell of putrefactive bacteria from it will haunt you until each subsequent cleaning. If the conditions for the waste pit are favorable, then the second point in calculating the flow will be to determine the volume of the pit according to several criteria: the number of people in the bath, the frequency of use and the cost of water.
Further, when the drain project is ready, the location of the pit is calculated: it should be no further than 2 meters from the bath. If you place the drain too close, then there will be a chance of water penetrating into the foundation. If it is too far, then it will not be possible to make a sufficient slope for the water to drain naturally.
When laying the foundation, you most likely already familiarized yourself with the type of soil on the site and its properties. When creating a drain hole important to understand physical properties land, since taking this into account, accompanying measures will be selected to strengthen the frame of the pit. However, if the soil is not loose and does not crumble, then nothing will have to be strengthened. But overly tight clay soil also has a drawback in the case of arranging a drain - it does not absorb well. Sometimes on the plots there is a successful combination of fairly dense soil with good absorbent properties. Then work with the pit will be limited to the fact that it will simply need to be dug and filtered according to one of the methods described. But such conditions are very rare. Most often, the soil crumbles and you have to resort to strengthening the boundaries of the pit. Often used to reinforce brickwork with gaps to absorb water, or wild stone (any waterproof material). The easiest option is to use a large plastic tank with many holes as the inner frame of the pit.
 It is also important to choose optimal size for holes in the tank. The optimal shape for the tank in this case is a streamlined cylindrical one, since it in the best possible way holds the water pressure. It is also necessary to provide the pit with a heavy overlap of iron or steel.
When the tank is ready, filtration material (broken or) is poured into the bottom of the pit, and then covered with a layer. The sewer pipes, previously connected under the floor of the bath into one, are discharged at a slope to the pit. Moreover, the optimal slope required for rapid runoff varies within 1 cm per 1 meter of the pipeline.
Arrangement of a simple drain pit
This method of organizing runoff is simpler than the first one due to the exclusion of several stages of filtration. It implies all stages with the organization of flow in the bath itself and digging a hole, but in this case only a septic tank without filters will be used. The method is used if there is no desire to bother with replacing the filtration material and it is possible to use a sewage machine for pumping out wastewater.
But in this case, you should consider the entrance to the pit at a distance of reach by the sleeve of the machine. The second way to clean a simplified pit system is the use of special bacteria to process decaying residues in a septic tank. Its efficiency, of course, is several times lower than the complete removal of waste or natural filtration, but it also has a place to be.
Ground filtration method
In this method, the main one is the organization through which the liquid will be brought to the sewer. The system will be distributed over the entire area of the site so that the water has time to pass through several stages of filtration before draining.
Filtration is carried out according to the principle of drainage: at the first stage, a grate is installed on the pipe (in the initial section) to catch large waste. Then, in the future, the water goes through a section of pipes covered with large filtering material. The last stage is a fine filter, that is, coarse sand.
Thus, the water from the drains will be filtered throughout the site at the same time creating an additional source of irrigation I. This method is only suitable in case of low groundwater, since the location of the pipes should be more than 0.5 meters above the water level.
Drain pipe method
In general, this method is similar to the previous ones and differs only in the type of materials and slight differences in the design of the septic tank. Here the longer length of the pipe is important. At the same time, it is important to install the pipe itself at the stage of pouring the foundation with a slope towards the area for the construction of a sump.
The sump is made on the basis that make up the walls of the pit. The bottom, in turn, should not be blocked by anything for better absorption of waste. The pipe is laid without corners and bends, and the diameter of the pipe is taken as the maximum possible among sewer pipes for domestic waste. When installing a pipe, it is important to insulate it, since when the soil freezes and deforms the plastic, at best.
Drainage material (crushed stone, broken brick, or slag from coal combustion) is placed at the bottom of the trench, covered with a small layer of sand. After that, a drain pipe is laid at the bottom, taken away from the bath. The pit will be designed for a small amount of waste, not more than 100 liters. Therefore, you should think carefully before choosing this option.
In the event that there is at least some possibility to connect your drainage system to the central sewerage system, then this is the most optimal and most effective option for organizing wastewater. If the site is located in an unsuitable area for this, then you will have to carefully study the features of the soil, the slope of the site, internal communications, the presence and level of groundwater, correctly calculate materials and energy costs. Often the owners of the bath are faced with a choice, a septic tank or a well? Both options have their pros and cons. For the arrangement of the well, for example, it will take more time than for the installation of a septic tank. But the right well provides the best filtration water and practically does not allow the appearance of unpleasant odors. A septic tank is more suitable for frequent use of the bath, as it provides faster absorption of water. In financial terms, the organization of a septic tank and a well are almost the same.
The gutter, which was described in the last, fifth method, is permissible only in the case of a small volume of water and the absence of cultivated plants on the site. Otherwise they will just be poisoned detergents coming from the drains, even though the water will be filtered to some extent. Nevertheless, this is the cheapest and fastest option for organizing a drain.
In general, despite the seeming ease in the task of organizing the drain, it is not so easy to calculate all communications correctly. Therefore, if you do not have experience in construction, it is better to hire a team of builders - today this service is not too expensive.
Add site to bookmarks
This function is performed by a drain pit for a bath - it is arranged in order to divert wastewater from the structure. In order to carry out water supply to the bathhouse with your own hands, it will not take much effort - it is quite enough to lay metal-plastic pipes, and such an operation will not require special building skills. But when disposing of wastewater, all required standards must be observed.
Drain pipe laying
In order for the water not to stagnate near the bath, it is necessary to build a drain pit. To do this, you have to lay a pipe from the bath to the pit.
According to the rules, the laying of the drain pipe must be carried out during the construction of the foundation. It should be located at the bottom of the foundation so that the slope goes to the drain pit.
With sufficiently strong soil on the site, it is possible to arrange a pit for draining wastewater in this way: a foundation pit is dug, after which a drainage layer of gravel or gravel is built at the bottom. But such soil is very rare, so it is imperative to strengthen the walls of the pit.
How do you strengthen the walls?
- slate sheets;
- ceramic moisture resistant brick;
- well rings made of reinforced concrete;
- used tires, in which the rim is cut off on one side;
- plastic or metal barrels.
Strengthening the walls of the drain pit using improvised materials

In order to avoid soil destruction, it is necessary to strengthen the walls of the drain pit.
The first stage is the preparation of a pit, which you can dig with your own hands without the use of equipment, and the construction of a trench for laying a pipe. The soil excavated at the same time can be scattered around the site, provided that the soil is of sufficient quality, but it is better to take it outside the site.
When building a tank of silicate or ceramic bricks, the walls can be laid out half a brick thick to save building materials. When choosing such a material for laying out walls, you should first determine whether it suits your conditions - not all soil will be suitable for sand-lime brick. For drainage of liquid in brick rows, gaps of five centimeters should be left. Masonry can be done with your own hands, both from brick and from natural stone.

If the tank is planned to be made from well concrete rings, when buying a product, you must choose those where there is perforation. If this failed (there may not be such rings on sale), you will have to form holes yourself using a puncher.
After the process of strengthening the walls of the drain pit is completed, it is necessary to make a drainage layer of crushed stone, gravel at the bottom, the layer must be at least 20 cm. Construction waste can also be used for this purpose, for example, broken brick, concrete fragments and so on.
Strengthening the walls of the pit can be completed at a distance of about 40 cm from the surface. Here you will need to arrange a ceiling, for example, lay a slab of reinforced concrete. It should have a hole in it in order to control the filling of the pit. sewage and pump them out if necessary. This hole must be closed with a hatch.
How to arrange a pipe for draining water from a bath

For a bath cesspool should be excavated approximately three meters from the base. There are some features that you will need to observe when laying a drain pipe with your own hands.
- At the pit itself, the edges must be protected from shedding or collapse by a formwork device, with the help of concreting, slate sheets or reinforced concrete rings.
- The bottom of the hole must be left free. Due to this, water will be provided with free absorption into the soil. At the same time, the top should be provided with a good overlap, where there is a hole for the pipe.
- When laying the pipe, bends and joints should not be allowed, otherwise blockages may occur during operation.
- After the installation of the water supply and drain pipe is completed, the floor in the bath is poured with concrete. When pouring, maintain an inclination in the direction where the drain hole is located.
- The drain hole must be closed with a special mesh, grate - this is done to provide additional protection for the pipe from blockages.
- When the cement dries completely, it is usually ennobled with tile tiles - several removable tiles can be laid out on such a floor. wooden gratings. With their help, you can prevent possible discomfort and reduce the risk of burns that can occur from contact with hot tiles. If necessary, the gratings can be removed from the surface - this may be necessary for antiseptic treatment or drying the floor, as well as for replacing the gratings when worn.
If the floor is poured in accordance with the rules, such a floor will not require additional insulation. Both the floor and the tile will heat up quite quickly during the fire and will not let cold air in from the outside. It will not even be necessary to insulate the pipe itself, if a sufficient slope is provided when leading it towards the drain pit.
How to make a drain pit from a metal barrel

A metal barrel is an excellent tool for a drain pit due to the fact that the soil will not collapse into the pit.