The well for a summer residence is decorative. Making a well with your own hands. From what, from what, from what
It is difficult to imagine a Russian court without such an element as a well. The power of tradition turned out to be so strong that even the achievements modern technologies could not defeat them, and until now it can often be found in villages and suburban areas. Therefore, in this case, the design of the well with your own hands or with the help of a designer comes to the fore.
Wooden structures
Wells made of natural wood can be harmoniously entered into any landscape. They are well complemented by built-on houses with various carved figures of birds and animals.
If you plant flowers nearby, install a bench, a barrel, part of a wicker fence, a stylized cart and a windmill, you can create a special atmosphere that will emphasize the individuality of the site. For some, this is not a complicated design of wells, but someone believes that he cannot cope with this.
Very often, such superstructures are made resembling a round, tetrahedral or hexagonal frame. The walls are lined with cobblestones, bricks or sheathed with a planed board, and the structure is crowned with gable roof.

The upper element of the house is often made in the form of a tent. The coating can be made of wood, shingles, polycarbonate or even straw.
Tip: if you want all buildings to be as consistent as possible in the same key, make the roof similar in design to the one installed on a residential building using the same roofing material.
How to make jewelry functional
- Fix a tight cover above the water, which protects the mine from debris, and will also become a kind of insulator from hot sun rays.
- Complete the composition with a chain-and-bucket bobbin that can be more than just decorative element, but also quite working - in case of a power outage.
- Structures will look interesting and beautiful on the site, all elements of which have lace carvings, woven mesh elements.
- If you plant climbing plants nearby, such as clematis, roses, ivy, grapes, which will act not only as decorations, but also complement landscape design objects, creating an original decor effect and turning it into a shaded recreation area.

You know how to beautifully design a well in a different style, why not use brickwork, concrete or forged structures. But, in any case, decorating a country well will not be a boring pastime and will allow you to show your abilities, as well as a sense of style.
Well made of concrete rings
Quite often, for decoration or in the form of the main part of the well, they use wooden beam. However, not everyone can afford to purchase such a building material, so below will be given instructions on how to make a well from concrete rings at minimal cost.
At the first stage, it is necessary to prepare tools and materials so that the work does not stop:
- a solution of sand with cement up to 4 buckets;
- 0.5 l of pastel color paint;
- Master OK;
- tassel;
- container for cement-sand mixture;
- putty knife;
- natural stones are small, but about the same size.

Related articles:
Process
- Mix the solution with your own hands or use a concrete mixer.
- Then apply the entire mortar evenly on the upper concrete ring, making sure that the layer is the same everywhere.
- Take a spatula and level the walls, and then wait until the mortar begins to set slightly.
- Proceed directly to the design of the source, for which, decorate the bottom by about 1/3 with natural pebbles, pressing them into the solution with little effort. For the top, use turnkey solution or do something of your own, like decorating it with a flat natural stone.
- Decorate the remaining 2/3 of the concrete well with a brick pattern:
- draw bricks with a sliver on a slightly hardening mortar, if they do not suit you, you can make rings using the neck of a glass jar;
- leave the composition for 24 hours, when the pattern is ready, so that the solution "grabs";
- take a brush and paint and paint the bricks. The brush can be replaced with an ordinary sponge, which is more convenient for staining.

On this, the process of decorating a concrete well with your own hands can be considered complete. From the foregoing, it became clear that it is quite light, the price of the project is minimal, and even a beginner in the construction craft can cope with such work. If you have children, invite them to participate in this with you, they will definitely like it.
Tip: don't use paint bright colors, for example, green or pink, otherwise the well will look ridiculous. It is better to give preference to calmer shades.
Care
Having created an exclusively designed country well, it is necessary to monitor its cleanliness. Therefore, the work is not yet finished, as many may have decided.
It requires the same care as other structures, even if you just closed it.
- Thermal pollution occurs due to various factors, including freezing and thawing of the soil, the action of fertilizers, etc.
- Car - so do not park it next to the well, as washing it can cause contamination of the source. Also do not carry out close oil changes, oil products cannot be weathered.
- outdoor toilet poses little risk. Install it as far as possible from a drinking source.

- Sewerage causes the greatest harm, as effluents from washing machine and bathroom (baths). They contain a sufficient amount of synthetic substances that can pollute the water.
- Do not wash, much less take a shower near the well.
- Protect a 3-6 meter area around the perimeter from animals.
Conclusion
Making a country well is a way not only to make it beautiful, but also to add functionality to it. For decoration, you can use different materials, the main thing is that they do not harm drinking water. In the presented video in this article you will find Additional information on this topic.
For a long time, a well was a mandatory attribute of any site. Inveterate summer residents sought to decorate it, each in their own way. At present, problems with water supply no longer concern many, but the well is still able to create a cozy atmosphere in the garden.
Decorative well - garden decoration
A decorative well will decorate adjoining territory and add zest suburban area. You can make this decor item yourself.
By itself, a decorative well can be of any shape and size.
Before placing a decorative well on your site, you should determine the reason for its installation:
- the need to mask an unsightly area in the garden;
- desire to contribute additional element V landscape design territory.
A decorative well is installed on the site in different cases:

Photo gallery: original ideas for decorative wells
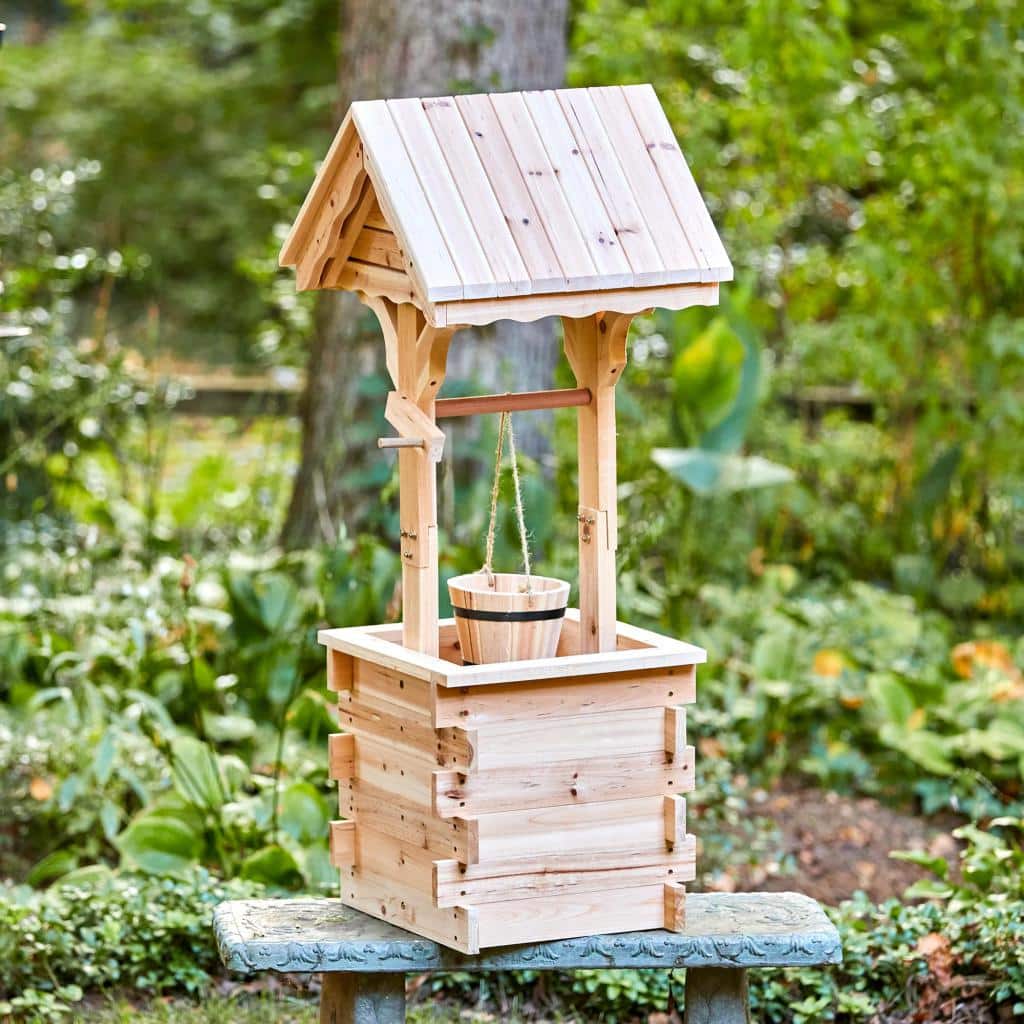 The mini-well is equipped with a small bucket for collecting water
 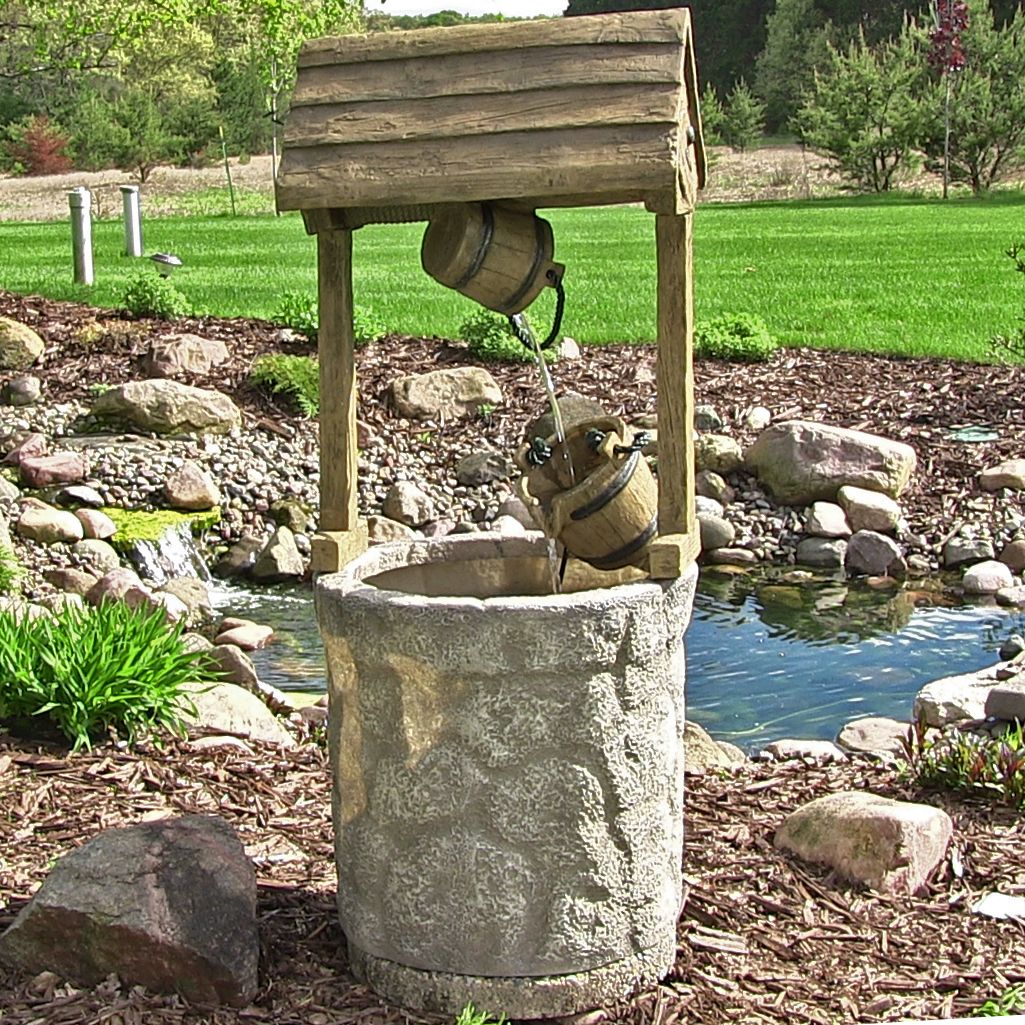 The stone well organically fit into the water interior A very small well was placed in the garden A whole flower garden can be made from the well Flowers can be planted in a bucket The well has a seat Such a small composition has become a decoration of the garden The rounded roof looks elegant The well is painted in bright color
Do-it-yourself wooden well
A well made of wood can be made both in full size and in reduced sizes. To make it, you will need the following tools:
- board 25*200 cm;
- timber 20 * 30 cm;
- screwdriver, self-tapping screws;
- wood saw, machine gun;
- sandpaper;
- alkyd varnish, brush.
Manufacturing process
For the manufacture of a decorative well, any Construction Materials: you can use roofing or floor boards, timber or lining. To avoid rapid decay of wood, it is coated with antifungal impregnation. After applying the stain to emphasize the structure of the tree. Last layer varnish will protect the wood from moisture.
Before you start making a well, you need to create a drawing.
A drawing must be prepared in advance
Step-by-step instruction:

Video: wood well
Brick well: masonry features
If there is a well on the site, and it needs to be decorated, then best solution will lay a well out of bricks. This process is more time consuming and costly than making a wooden ring, and it also requires certain skills.
Brick well will last for many years
The work will require:
- level, tape measure;
- hammer, spatula, chisel;
- brick, cement mortar.
By technical specifications brick for making a well should choose a simple ceramic, not silicate.
Bricklaying process:
- A thick solution is prepared: cement is mixed with sand in a ratio of 1: 2 and diluted with water to the desired consistency.
- A cement mortar 10 mm thick is applied to the compacted earth and the first brick row is laid out. It is important to remember that for laying the first row, the bricks must be moistened with water.
- In order for the masonry to be of the correct shape, a template is made, which rises as rows are added.
- Two rows are laid out using the poking method, and the voids are filled cement mortar.
- Next, 2–3 rows are laid out using the spoon method, and reinforced wire is laid on the 5th row of brickwork for additional strength.
- Each row is checked for height using a level.
With spoon laying, the brick is shifted by half, and with bonder laying, the brick is turned with the short side to the facade.
Video: laying a brick well
Decoration in garden decor
At the final design of the decorative design, it is worth adhering to the general style of the summer cottage.
Country style
In a rustic style, most of the site is occupied by a vegetable garden. Then the well, along with outbuildings, should fit into the landscape and have simple forms. The main elements of decor can be:
- wood carving;
- bright coloration.
As a rule, the following compositions look advantageous in the garden: a cart with blooming flyers, figurines of birds and animals, a wooden mill. Additionally, a thatched roof and wicker fences give a certain charm to the rustic area.
The well can be made similar to a village hut
Sea style
The site in the southern, "marine" style is decorated with palm trees, sea stones and pebbles, and white and blue shades predominate in the coloring. In such an interior, massive wooden wells will look ridiculous. Preference should be given round wells from stone. A maritime steering wheel can be a wonderful decorative detail.
The well can be laid out with river stones
minimalist style
The minimalist style will remain consistent if the well has simple, clear shapes. There should be no frills in its decor. It can be made of brick or stone, and painted in one or two colors that are already present on the site. A neatly trimmed lawn, planted trees and shrubs in even rows - a minimum of decor items.
The well is painted in the color of the foliage and does not stand out
Classic style
Stucco elements can emphasize the classic style. The well itself is made from natural stone. A lamp can illuminate it nearby. Forged elements, stained glass inserts are possible in the design, if they are present in the design of the house and recreation area.
Wells made in " oriental style", look exquisite
Photo gallery: interesting water wells on the site
The base of the well is assembled in the form of a barrel Wheels from a cart - interesting solution For rustic style With forging, the well looks elegant A well with carved elements has become an ornament in a simple summer cottage A well made of stone looks solid The well was made in the form of a house
Gone are the days when the well was only a source of life-giving moisture in the garden. Its use and application in garden decoration has different purposes, but talented amateur gardeners have no limits for fantasies. With a little work, you can create this piece of garden decor with your own hands.
Problems with water in summer cottages make many people think about building a well.
Cause shortage water is especially acute in summer, when it is necessary for watering the garden and vegetable garden.
Drilling a well will help find a solution in this case, but this will require special equipment.
In its turn, construction a do-it-yourself well will save money and solve problems with water supply.
Choose a place
When choosing a place for the construction of a well, it is important to correctly determine its quantity and quality, as well as its composition. soil. For the well, you need to choose a place away from possible sources of household pollution that enter the soil.
In the presence of autonomous sewerage, it will need to be improved and made sealed. The fact is that groundwater will gradually get into household drains, after which the taste of pure water will deteriorate, and it will become unsafe for health.
It is better to install a well on sublime location, and for convenience - closer to home.
In the spring there is a high probability of getting on top water. As for the soil, it should be noted here that a large presence of sand and earth will facilitate drilling wells, but clay soil and a large number of large stones, on the contrary, will create many difficulties.
Well types
There are three type wells: shaft, key and tubular. Let's take a closer look at their features:

- cap(located above the earth's surface);
- trunk well;
- intake component.
Mine wells are convenient in that during droughts they always have water at the expense of additional reservoirs (zumrov).
For guaranteed reserve you need to make the lower, underwater part of the building a little wider, make it a tent.
 This type of well is also called Norton - a kind of artesian structure, which consists of pipes. Its diameter should be equal to 25-45 mm, equipped with a sieve tip.
It is used to supply water. The tube is inserted using a drill. It is installed in the aquifer.
With absence water pressure the pipe is supplied with a pump, in the pressure water layer it can be used without a pump. For the construction of a tube well, it is necessary to carry out drilling work.
A well of this type is much more expensive than a mine well, since the soil is drilled. In turn, it is much more profitable because the water does not stagnate and is always usable.
Tools for the job
To build a well, you will need the following tools:
- scrap (preferably two: short and long);
- all types of shovels;
- sledgehammer;
- scoop (required for a liquid layer of soil);
- rope;
- tub (with its help the soil rises);
- several buckets;
- trolley (for transporting soil);
- rope ladder (for descent and ascent into the pit);
- pump (for pumping water);
- portable lighting fixtures;
- winch.
With the help of a winch it is very convenient to raise and lower materials, only in order to use it you need a tripod. It will need to be installed above the well.
From the materials for the well you will need: cement, sand and gravel
Stages of work
The construction of a well is not an easy task and therefore, in order to facilitate and speed up the work, it is recommended to invite assistants.
Digging a pit
After the place for the construction of the well is determined, he digs pit. Digging a hole for the well is carried out by one person, the rest of the assistants are at the top. They will lift the soil, transport it and lower the materials down.
First, a hole is dug to the depth of one ring. After that, one is placed in it ring, and all the soil is removed from under it, gradually deepening this ring. Going further a little further, it is established second ring.
The rings are placed on top of each other (the second on the first, the third on the second, etc.), increasing the shaft column. Under its own concrete weight, the column will slide down to the same depth as the soil is removed from under the first ring.
Approaching aquiferous the layer will be determined very easily, in the pit you will feel a strong drop in temperature and increased humidity of the underlying soil.
This stage of the construction of the well is the most time-consuming and responsible, so it will take a lot of effort and patience. Wet priming must be removed very quickly. You may need a powerful mud pump.
If it is not at hand, then reaching the aquifer, you will need to make every effort and dig very quickly 2-4 m in depth (the speed of the flow of water in the well depends on it).
 At the very bottom of the well, as a filter, you will need to lay gravel(layer up to 30 cm). The gaps formed between the soil and the rings (concrete slabs) are also filled with gravel. The last laid ring will remain on the surface (it is not buried in the ground).
To prevent leaks into the well of high waters, will help linen rope placed between the rings. The joint of the rings must be cemented. On the surface of the well (around it) is laid clay castle. Wet clay, taken out of the pit during digging, is laid around the well and rammed with a log.
When the well is filled with water, it will need to be pumped out until it is replaced clean and transparent.
We make blind areas
Blind areas protect the well from falling into it contaminated upper and melt waters. In addition, with blind areas, the structure looks much prettier and more convenient for collecting water.
Blind areas are installed one year later after the construction of the well
Time is needed for the rings to settle well and compact. If the blind areas are built upon completion of the structure, bias upper rings may damage them.
 To perform the blind area, clay or concrete is required. Permissible thickness blind areas - from 20 to 30 cm, width - 1.2 -2.5 meters. A clay pavement is a compacted clay layer laid in a recess of a certain size.
However, it has one drawback: if water gets on the surface of the layer, a sticky layer forms. dirt. As a result, additional expenses for protective coating.
Performance concrete blind area: initially a gravel pillow is laid, a formwork is installed on it, into which concrete is poured. To increase the service life of the blind area will help a reinforcement mesh embedded in the formwork.
Concrete pavement requires waterproofing outer walls of the well. This will help to avoid rigid adhesion of the last ring of the well to the frozen surface of the blind area.
Roof
The arrangement of the roof must begin with roof trusses, which is a rigid structure to which the crate is attached. Suitable for this durable board(thickness 3 cm, length 180 cm or roof height). Installation of the crossbar and jib should be carried out using a board (2.5 cm).
Material for the roof, you can choose at your discretion: a board, a metal sheet, roofing felt, and so on.
decorative option
Decorative well is in fashion today. He is country decor and some summer residents equip it with all the details so subtly and accurately that it cannot be distinguished from a real building. Below are photos of decorative wells in the country, which you can do with your own hands. 
Decorative wells are made of wood, tires and other materials. It all depends on how sharply the owners approach its production and what zest they put into it. 
A decorative well is great for decorating a well with electric pump. Some summer residents, using tires to complete the well, plant flowers there, and they perfectly complement each other with their unusualness. ![]()
Decor
A beautiful well always catches the eye and gives the cottage unusual view. Regardless of whether a decorative well is installed or real, it should look like a well, and design fantasy can be used at your discretion.
Consider a few styles designing a well in the country with a photo:
- Country- a wooden hut, inside which you can create any conditions and even install household appliances(that is natural look a wooden well made of logs with a canopy);
- Well - crane evokes old times. Distinctive feature such a well - a mechanism for raising water, resembling a crane's head on a long neck;
- Chalet. Some designers suggest building a chalet well. However, there are two nuances: firstly, the house must be built in the same style, and secondly, this style is characteristic of Switzerland.

Buildings are decorated with natural or artificial stone. And why not build such beauty on your site and it doesn’t matter that in Russia !; - East style. A bright, colorful structure should have canopy. Often it is decorated with various amulets - figurines.

The head can be made of stone or wood. For the roof it is better to use soft tiles with pagoda (raised corners in oriental style). The well must have a wooden bucket; - Modern style. Wells of such a plan are made of polycarbonate, tiles, concrete. Many summer residents use metal or brick in construction.


Content Rules
The very first and most important rule must be observed when building a well, choosing drilling site wells. The constancy of water quality, the absence of possible contamination by bacteria and chemicals, and so on, depend on this.
- in the next 20 m from the well it is forbidden to wash cars, water cattle, rinse clothes, etc., which may contribute to pollution water;
- the head of the well must be equipped lid(de-reinforced concrete floor with a hatch);
- around the well should stand fencing;
- warming and protection of the well from freezing must be done with straw, hay or sawdust. It is completely forbidden to insulate with glass wool and other synthetic materials;
- if necessary, a well is needed clean(remove leaves, mosquitoes and other debris);
- after cleaning must be carried out disinfection structures;
- in a timely manner replace worn out equipment.
A well in the country is extremely necessary and irreplaceable, therefore the construction of such a plan is necessary.
Each of us makes the choice himself, the main thing is that the well should stand!!!
Do-it-yourself well in the country- an important component of the normal life of the owners. Many, of course, have running water, but still not everyone has it, and the quality of the water often leaves much to be desired. In addition, water pipelines connected to summer cottages do not supply water regularly, and sometimes the time without water can drag on for several weeks. But in the summer cottage grow plants and trees that need to be constantly watered, especially in warm weather. Therefore, no matter how it is better to equip an alternative source on your site, thanks to which you will not even think about water at all. Now you will have it always and on a regular basis.
As such an alternative source of water is quite suitable well in the country (photo). Water is everywhere, the main thing is to find out the depth of their occurrence, the choice of a well, the depth of the well and other not unimportant factors will depend on this.
The well will not only provide you with a constant source of water, but will also all year round supply you and your family with clean drinking water. In addition, the well will perfectly complement and. Its design is not always a concrete block that will not attract with its appearance. Today's technologies make it possible to turn an ordinary well into a real work of art.
As an example, you can arrange a well made of wood, which will perfectly echo with. Wood is a natural and environmentally friendly material; when properly processed, it always looks elegant, expensive and attractive. A country cottage area designed using a variety of wooden structures, will get even more elegance and beauty.

To make the well look even more attractive, you can arrange a beautiful one next to it. Just imagine how beautiful it will look in the complex. In general, the design of the site should be given credit. After all, it is here that you will spend all your free time, and you will need such a summer cottage so that you can completely relax from the bustle of the city, retire and enjoy the beauty of nature and clean air.
- it is not an easy task, here you need to think through a lot of nuances so as not to spoil the overall picture. And in order for the site to always be in excellent condition, to please you with its green, and bring the long-awaited fruits, you need to water it and take care of it, respectively, you definitely cannot do without a beautiful and high-quality personal well.

As we said earlier, even if there is access to running water, you should not refuse an additional source of water. So where do you start garden well decoration? First you need to determine the place where it would be best to equip the well. There are two ways to solve this problem: well and dowsing. Both methods are good and effective. Therefore, you need to choose only the one that suits you the most according to any criteria.

So, let's start with dowsing. For this method, we need wire frames, which are made of brass. It is quite possible to make them yourself. We take a wire with a diameter of 2-3 mm, half a meter long and bend it at an angle of 90 degrees. You need to bend it in the place so that the length of the handle is equal to ten centimeters. We need two such curved wires. We take a frame in each hand so that we can spin freely. In this position, we need to bypass our site. In the place where they twist and intersect, it will be seen that the water is located near the surface. It is in this one of these places that you need to spend design of a well in the country photo.
The option with a well will be much more expensive. They are arranged in those places where aquifers may lie. Alternatively, ask your neighbors. There is a high probability that in your country house the level of water occurrence will be the same.

There are several folk statements that can be used to determine the proximity of water to the ground. The first version - after the snow melts, there should be water in the basements of the houses. The second version - sometimes there is an impenetrable fog despite the fact that there are no reservoirs nearby. The third version is a fairly close location of reservoirs. In addition, there may be a large number of midges after the sun sets, thick grass during a drought and moss.
Previously, people resorted to a different method of determining the location of the waters. They took sheep's wool, washed it thoroughly and dried it. filmed upper layer turf and laid wool on this place, on top of which they laid an egg and covered it with a pot of clay. The whole structure was covered with sod on top. The result should be visible already at dawn. If there are signs of dew, then there is water at a distance of three to seven meters from the surface. Otherwise, the water lies very deep and, accordingly, there are no signs of dew.

When choosing a place where the well will be located, you need to pay attention to the location of the sewer, compost pit and toilet. From these places, the well must be placed as far as possible. If this decorative well in the country, then where it will be located will not play a role.
Decorative wells are decorative, they do not perform the functions that are assigned to a real well. Typically, such designs are installed for beauty, to create something special with your own hands. For such a well, we do not need to dig a hole, and look for the depth of underwater waters. A decorative well is, of course, good, but in our case we are talking about a real design to obtain the required amount of water.

Almost all wells are built on the same principle. Their design consists of three main elements: a water collector, a trunk and a head. The reservoir is sometimes also called a reservoir, judging by the name it is clear what functions are assigned to it (accumulation and storage of water). The trunk is needed in order to protect the well itself from shedding soil. It can be made with both round and rectangular sections. But the upper part that we see - the head, is necessary to protect the well from snow, dirt and rain, and also prevents freezing at temperatures below zero.
Many believe that if a pipe is laid to the base, then it is quite possible to organize a good water supply from a well. But in fact, the well is not the design to be at the heart of the whole water supply. It is better for him to equip a well.

With the place and device of the well, the issue has been resolved, now you need to figure out where the digging process begins and how it happens. The first thing that many builders recommend is to start arranging the well in the fall. This is due to the fact that groundwater is sinking, so it will be easier to cope with the work, and it will be easier to determine the exact depth. As for the digging itself, unfortunately there is still no such device that will help to cope with this task faster and without much effort. As before, so now, digging purely handmade. You can dig a hole yourself, or you can seek help from a specialized company. In this case well in the country house price the final one will be more expensive, so if you do not have extra money, try to master this task yourself.

For independent work, we need a shovel (with a short handle) and a tool for hard ground (in case one comes across). In addition, we will need a ladder and lighting fixture, which can be adjusted (a good option for a lamp with an extension cord). At the same time, one cannot do without buckets and a device for pulling them out.
After the pit right size dug, we need to arrange a water tank and, of course, a well shaft. Perfect for stem concrete rings. It is better if they are chamfered for docking, though this option will come out more expensive than usual.

There are two options that you can use to create a well structure. Let's start in order. One of the options involves digging a kind of mine until the moment we come across groundwater. This must be done very carefully, strictly adhering to safety precautions. If the soil is very loose, it is better to immediately proceed to the second method. If everything is going well, we can continue to work. So, we put the rings on top of each other in the pit, after which we dig a couple more rings deeper. If you want to get a rectangular well, you should stop at monolithic walls. This technique is available for non-flowing soils, it is more convenient and faster.
In the second option, the first ring is installed immediately after the pit reaches a depth of one meter. After that, we continue to dig a hole under the ring, under its own weight, it will gradually sink down. When it becomes possible to lay the second ring, we fix it and then we dig and so we continue to that level until we get to ground water. As for the rings, it is worth choosing a design with a cone-shaped sharpening or a metal knife as the first ring, along the edge of which the pins will be located.

No matter how you twist it, seams remain between the rings, they must be repaired. To begin with, we lay out tarred cords or hemp between the rings in the process, and cover them with cement mortar on top. Alternatively, you can use clay. This option is much more environmentally friendly, but it will not last long.
From the moment the water begins to appear, we need to dig a couple more meters. The process is complex, so you can’t do without a mud pump. Upon reaching the desired level, pour granite crushed stone to the bottom. On average, the thickness of such a layer should be 10 cm. Do not forget about the waterproofing of the upper rings.

The most difficult stage of work is over. Now we just have to equip the beautiful upper visible part of the well, and it will be completely ready for use. A well, decorated according to old traditions of wood, will look beautiful. But this is not the only option for action, everyone can independently decide on the appearance of their well. The device of the well, although a laborious task that takes time, but at the same time necessary, because without it you can forget about normal life in a summer cottage.
Do-it-yourself well in the country house. Photo