How and what to buy a hand tool for woodworking. Varieties of cutters for handmade wood products DIY woodworking tools
In the OBI hypermarket, hand-held woodworking tools and consumables for it can be purchased at a price of 70 to 4400 rubles per unit (set). The catalog contains about 220 items of this product.
Features of choice
- . Blades for saws and jigsaws.
- . Hacksaws for wood and rasps.
- . Chisels and chisels.
- . Taps and dies for threading.
- . Planers and grindstones.
Blades for manual jigsaws differ in thickness, type of teeth and material of manufacture. Hacksaws for cutting wooden blanks are equipped with a comfortable plastic (wood) handle, as well as a special hole for hanging the saw during storage. The length and shape of the working part can vary greatly.
Rasps and files are used for rough grinding of parts. With the help of chisels and chisels, recesses of various shapes and depths are made in blanks. Planers are designed for planing flat surfaces. By using grindstones restore the performance of the cutting elements.
Order accessories and consumables for woodworking in the OBI store using.
Payment and delivery methods
- Purchase goods online with delivery
- . You can pay for the order in cash or by bank transfer.
- . You will coordinate the date and time of delivery with the operator by phone when confirming the order.
- . The terms of the free service depend on the city, amount and weight of the product.
- . Unloading goods, lifting and transferring are additional services and may be paid separately, check with the store operator.
Detailed information about the intervals and zones by city, the conditions for unloading and lifting the order are located, where you can independently calculate the cost of your delivery in advance, indicating the postal address and parameters for unloading.
- Order and collect yourself where it is convenient for you
- . When filling out the order form, indicate a convenient date and time for you to visit the hypermarket.
- . You can pay for the purchase in cash or by bank transfer at the cash desks of the store.
Purchased goods can be picked up at any of the OBI stores in Moscow, St. Petersburg, Ryazan, Volgograd, Nizhny Novgorod, Saratov, Kazan, Yekaterinburg, Omsk, Krasnodar, Surgut, Bryansk, Tula and Volzhsky.
Even in ancient times, the profession of cabinetmaker was highly valued. Nowadays, specialists who are able to create beautiful wood carvings are also in a special position, because for them this occupation is not only an opportunity to provide themselves with a good income, but also a chance to enjoy such work. However, in order to actually enjoy the work of creating wood products, you need to take care of the availability of a special tool.
In modern conditions, the cabinetmaker must have in his arsenal a certain set of devices that will help him perform the following types of work:
- thread;
- sawing off;
- splitting and trimming;
- planing;
- turning;
- chiselling.
It is important to understand how woodworking is done. You can learn about this from the following material, which describes the relevant tools.
Woodworking tools
Generally speaking, the devices available today that allow you to work with wooden surfaces are combined into common group called incisors. This list includes cutting blades, saws, axes, chisels, special planers, etc. A feature of any of these tools is its purpose: they are all designed to perform a special type of processing wooden product.
Deciding the issue with the tool for work, the cabinetmaker proceeds primarily from his requests and tastes. In the event that a person is only taking the first steps in this matter and getting acquainted with the basics of wood processing, then the recommendations of experienced craftsmen will be useful to him.
Wood cutting accessories
When starting to create a wooden product, the first step is to cut the workpiece. Here it is necessary to use incisors, which have the form of sharp blades, when used for processing wood, waste is generated, represented by chips or sawdust. If work with wooden surfaces is carried out manually, then most often masters opt for tools such as saws, jointers, one-handed planers etc.
A feature of these tools is that with their help you can do the work "on your own". In other words, when using them, the master's hand moves in the opposite direction to the body.
At the same time, in most foreign countries, the “on oneself” method has become most widespread, in which the main movements are carried out towards the body of the master. Most often, when performing wood processing according to this scheme, tools with an appropriate design are used. These can be specially made hacksaws, saws, etc. These can be considered double-sided cutters, two-handed plows and spoon cutters.
Features of work
At the same time, it is necessary to mention important rule, which every cabinetmaker observes: if you have to deal with a wooden surface that has a large area, then for work use the self method. This allows you to spend less effort on moving the tools used - an ax, saw or planer. But it is undesirable to use an adze for this purpose, which is intended for the “on itself” method.
How to cut blanks
 Faced with the task of sawing a tree, craftsmen most often resort to the help of multi-cutter devices that have a special name - saws. Within these tools, several types can be distinguished:
- longitudinal;
- transverse;
- universal.
For example, if we talk about saws that are designed for cross cutting, then their design provides for sharp triangular teeth, and they all have two edges for right and left threads. A feature of saws intended for longitudinal sawing is the presence of teeth made in the form of a chisel. The use of such a form makes it possible to hold the sawdust between the teeth, removing them from the body of the wood.
As for multi-purpose saws, their teeth made in the form of a right angle. Due to their structure, they can cut fibers in any direction - transverse, longitudinal, inclined.
Varieties of saws
All saws offered today can be classified into several types:
- simple;
- hacksaws;
- one-handed.
Within the framework of mechanical saws, several subspecies can be distinguished:
- tape;
- two-handed;
- gasoline-engine;
- circular.
Most often, when sawing a workpiece, cross saws are used. If there is a need for crosscutting, then the choice is stopped on one-handed or two-handed instruments. For processing, hacksaws of a circular or bow type are usually used. To perform rough wood processing, preference is given to saws with large incisors. In order to perform precise machining in the best possible way, it is effective to use tools equipped with fine teeth.
Splitting and trimming wood
If the cabinetmaker faces the task of creating blanks from bars, ridges or trunks, then it is best to use these types of wood cutters:
- axes;
- cleavers.
The cleaver is massive ax, with the help of which it is possible to effectively perform the cutting of the ridge. Often the cleaver is used in combination with steel or wooden wedges, the latter are hammered into the base of the tree, due to which it is possible to simplify the procedure for splitting it. Processed blanks are hewn, for which household light axes are used. They are attractive in that they can be attached to the belt in special cases.
If it is necessary to trim the surface of a wooden blank, then one has to resort to the help of an adze, which is a kind of ax, in which the blade is located at a right angle to the ax handle. Using this cutter, it is quite effective to create concave or curly products. In some cases, the adze can be made independently, for which a thick metal plate is used, which should have a sharply sharpened and curved edge.
Planing straight and curly surfaces
 Under the planing procedure, it is customary to understand the removal from the surface of the tree thin layers of chips. To cope with this task with minimal physical effort, it is recommended to use hand or turning tools of the following types:
- knives;
- two-handed plows equipped with straight or semicircular blades;
- planes;
- sherhebels.
When performing final planing, special planes are most often used, equipped with a single or double blade, which is fixed in a metal or wooden case.
Removable chips can have different thickness. The determining role here is played by the distance to which the blade or body is extended. With a decrease in this distance, thinner wood chips can be obtained.
If the task is to create curved or rounded elements, say, staves for a barrel, then usually preference is given to special planers, which in their configuration resemble a convex knife. If you have to deal with workpieces that are curved across the plane, then the choice stops at humpback planers. A special variety is formed by planers designed to create edges and narrow grooves when processing panels or boards.
Types and purpose of chisels
 Craftsmen who professional level are engaged in wood processing, most often they use such a tool as chisels. Usually, wood cutting is performed using devices that have type of metal rods, which are distinguished by the presence of a flat surface, a sharp cutting blade and a shank. The last element is located on a wooden handle with a ring.
Each type of chisel is designed to perform its own task. For example, with the help of straight and wide fixtures, it is effective to clean or cut convex or even workpieces. It makes sense to resort to narrow tools when the task of processing wood in narrow sections of parts arises. As for straight chisels equipped with round blades, they should be used in a situation where you have to deal with hard wood or horn knots.
If it becomes necessary to clean a tree that has hollow or deep cavity, usually resort to the help of a chisel-chisel equipped with a thick steel rod. In addition to this, this operation should be performed in combination with a tool such as a mallet. It will be used to drive the chisel deep into the wood.
Although with the help of chisels it is possible to quite effectively remove unnecessary fractions from wood, nevertheless, initially these tools were created for cutting complex products. If the master had the task of creating gutters in the body of the workpiece, then cranberries will have to be used to complete this work. These are chisels equipped with curved or grooved blades. With their help, it will be possible to make a recess of the required radius and depth. At the first stage, you need to use the widest cranberry and create a hole. After that comes turn of smaller cranberries, then move on to using an even smaller one, etc.
Use of special cutters
 The tools described above are not the only ones that should be in the arsenal of a wood carving master. Quite often, a cabinet maker is faced with the task of volumetric cutting, which has to be performed when creating works of art. In such situations, you can not do without spoon incisors.
It is worth noting that these devices were created a hundred years ago. Working with these devices consists in using the “pull-on” method, and you can move the tool both in the longitudinal and transverse directions relative to the fibers.
But not only the spoon device is a common tool for carving masters. Often you have to use a double-sided cutter, "T" shaped. Most often, it is used to process the workpiece when creating products. large sizes. The main purpose of spoon-type cutters is to cut wooden circles, which will later serve as the basis for creating plates, as well as other utensils and other products.
Conclusion
Regardless of your experience in such a matter as wood carving, first of all, you need to take care of the availability of a mandatory tool to perform this self made. That is why hand carving cutters should be present in your arsenal. It should be borne in mind that they differ in their performance and purpose, so you should choose these devices, focusing on the operations that you have to perform.
| Wood is processed mainly in a mechanized way. Manual processing is used for small amounts of work, when fitting finished elements in the process of assembling and mounting structures. An ax is used for cutting logs and other auxiliary work. Weight of carpentry axes: 1.1; 1.4 and 1.75 kg (GOST 2356-43). Wood is sawn with saws, the main element of which is blades that look like steel round discs or tapes with successively arranged teeth. The spaces between them are called sinuses. The saw tooth has three cutting edges - side, front and blade. Depending on the purpose of the saw, the shape of the teeth may be different. For longitudinal sawing, the saw teeth are in the form of a scalene oblique triangle, for transverse sawing - an isosceles triangle, and for sawing in any direction - a right triangle. Saws can be with teeth of a different shape. During operation, the resulting friction heats up and pinches the saw in the cut. In order to avoid this, the teeth are bred (bend) alternately in different directions, and the ends of the teeth are riveted. When sawing wood by hand, the following saws are used. A two-handed cross saw consists of a steel blade with a thickness of 1.1 to 1.5 mm and a length of 1.0-1.5 and wooden handles at the ends inserted into the ears. It is used for sawing logs and boards with rough butt processing. A bow saw is used in carpentry for longitudinal and transverse sawing of wood and consists of a steel band stretched in wooden machine with the help of a string. Hacksaws have the greatest use in carpentry. They come in wide and narrow blades. The length of the hacksaw together with the handle is 0.6-0.7 m. A hacksaw with a narrow blade is used for twisting cuts. For small cuts of a marking nature (non-through), they use an award (Fig. 16, c, d and e). They sharpen the saws with files, and set the teeth with wires. The saw blade must not be bent. The surfaces are sharpened with various plows, consisting of a wooden or metal block with a slot into which a piece of iron (cutter) is inserted. Secure the piece of iron with a wooden wedge. Depending on the requirement for cleanliness of surface treatment, the following plows are used. The bear planer for preliminary rough sharpening of surfaces has handles on both sides and can be used for three jobs together. The sherhebel planer also serves for preliminary coarse sharpening. The sherhebel iron has a rounded cutting part with a width of more than 40 mm. In the process of work, narrow thick chips are obtained, grooved traces remain on the treated surface. Planer unary levels the surface after the sherhebel. The width of the iron of a single planer is 50 mm. The double planer completely levels the surface. The iron of this planer consists of two parts and has a width of GO mm and a block length of 250 mm. A jointer is used to level long surfaces. In a jointer, the length of the block reaches 900 mm, and the width of the blade of the piece of iron is from 60 to 75 mm. For sharpening a curly surface, planers with a corresponding transverse outline of the block and curly pieces of iron are used. Manual chiselling of nests, through holes, eyes and grooves is carried out using a chisel and a chisel. The chisel is a steel bar, in the conical recess of which a wooden handle made of hard wood is mounted. The length of the chisel with the handle is 345 mm, the width of the cutting part is from 10 to 25 mm. The length of the chisel is 255-285 mm, and the width of the cutting edge is from 6 to 5 mm. To obtain oval holes, chisels with a semicircular cutting part are used. Drills are used to drill round holes in wood. All drills have a cutting blade located along the length of the drill or at the end along a helix. Drills come in various sizes. When drilling small holes, gimlets and drills are used, and for holes with a diameter of 6 to 100 mm, a drill up to 800 mm long is used. To drill holes, you can use a brace - a device consisting of a steel bracket, a pressure head (fungus) and a cartridge for fixing the tail of the drill. The axis of the rotator head must coincide with the axis of the drill and must be strictly perpendicular to the plane of the material being drilled. The figure shows a tool for manual drilling. For marking, measuring and checking the manufactured elements, the following marking and measuring tools are used: tape measure, meter, square, plumb line, spirit level, bevel, urunok, line, compasses and calipers. |
Devices and tools for woodworking
fixturesWorkbench (Fig. 1). It is made from a board with a width of at least 600 mm, a thickness of 40-60 mm and a length of at least 1750 mm. The front side is smoothly sharpened.
At one end of the workbench, two stops are attached - top and side, at the other - a groove is made 100 mm wide and 200 mm deep. For strength, thick bars are nailed to the ends of the board from below for the entire width.
On the working side of the workbench, holes with a diameter of 20-25 mm are drilled along the face and edge at a distance of 50 mm from each other for inserting dowels. On the face of the holes are through, along the rib - with a depth of 50 mm. From the bottom of the workbench, three or four fingers are arranged, which can be retractable or swivel, like a turntable. Retractable fasten with brackets, and rotary - with screws. Fingers should not protrude from the edge of the board. One, or even better, two vertical stops are made against the groove.
The top and side stops are necessary so that the material rests against them when planing. The fingers hold the material in a horizontal position when it is secured in the side stop. In order to hold the workpiece or board firmly, you can clamp it, place a dowel behind it and drive a wedge between the dowel and the workpiece.
Instead of one dowel, you can arrange an adjustable stop, that is, a board with two dowels, fixed at a distance of 50 mm from each other, so that the dowels freely enter the holes.
The stops against the groove are needed in order to abut the material against them when sawing across. When planing edges wide boards should be fixed in the side stop, laying on the extended fingers.
If it is required to cut across, the stops are raised, the material is pressed against them with the left hand, and the saw is held with the right hand and sawed. After sawing, the stops are lowered. When sawing spikes on the ends of any part, it should be inserted into the groove and secured with a wedge.
Rice. 1. Bench board: 1 - top stop; 2 - side stop; 3 - groove; 4 - boss; 5 - tpez-yes; 6 - fingers; 7 - vertical stops; 8 - workpieces; 9 - wedge
The workbench is fixed at a height convenient for work. The board can be attached to the trestles or arranged under the bench on four legs.
On the front side of the board there should be no nail heads or screws that can dull the tool.
Miter box and bottom (Fig. 2). The miter box is used when sawing wood at the right angle. This is a box of arbitrary length, consisting of a bottom and side walls nailed to the bottom at a right angle. The walls must be strictly parallel. They carry risks at the right angle and saw through to the bottom. Sawing is done like this. The board or bar is marked, placed in the miter box so that the mark is exactly opposite the cut in the wall, the saw blade is inserted into the cut and sawn.
Rice. 2. Miter box and bottom: a - miter box; b - bottom: 1 - planing the end of the bar at a right angle; 2 - planing at an oblique angle; 3 - base; 4 - guide: 5 - straight stop; 6 - oblique stop
The bottom is used for precise planing of the ends of the tree at right and oblique angles, as well as for planing the edges of veneer and thin boards.
The length of the bottom is from 1 to 2 m. The base is made of a board 200 mm wide, 30-50 mm thick. A guide rail of the same length as the base is glued to the base, at least 120 mm wide, 5 to 15 mm thick and with a precisely planed edge, since the sole of the plow block moves along it during planing. An emphasis of the same width as the rail is fixed above the guide rail, with a thickness of 25-50 mm. Another side can be attached to this permanent stop, but with a side cut at an angle of 45 °. On these stops, you can plan the ends at different angles.
Planed with a planer with a double piece of iron or jointer. Very little iron is produced. The end of the planed material should protrude from the plane of the guide board by no more than 1 mm. When planing the ends on the bottom, chipping of wood is excluded.
Rice. 3. Clamps, clamps, tsulaga
Clamps, clamps, clamps, presses (Fig. 3). Clamps are used to press the material against the workbench, compress parts when gluing, etc. They are wooden and metal, ordinary, parallel and angular. A conventional clamp is a U-shaped frame with a screw and a handle.
Parallel clamps consist of two bars and two screws with handles.
Clamp clamp - wooden frame with multiple screws. Used for veneering various products and especially wide boards.
Clamps are used when gluing shields from separate boards. There are many structures. The simplest ones consist of two bars with cutouts. Boards to be glued are placed in the cutouts, a gasket is attached to them and compressed with wedges. Holes for dowels can be drilled in the cutouts of the clamps; this simplifies the bonding of narrow boards, since wide spacers do not have to be inserted. You can arrange clamps with adjustable stops, which are attached to the bars with metal clamps.
Tsulagi are presses for the manufacture of bent parts. The collage consists of lower and upper profiles and screws with nuts. The number of screws depends on the size of the frame.
Rice. 4. Devices for marking: 1 - thickness gauge; 2 - comb
Presses are used for the same purposes as clamp clamps. However, the presses are more powerful. The frame is solid wood or metal, screws with a diameter of 20-25 mm or more. Wedges may be used instead of screws. To work, you must have two or three frames or more, depending on the size of the products.
Thickness gauge (Fig. 4) consists of two bars and a block. The bars are fastened in the block with a wedge. There are pegs on the bars that scratch the wood, leaving risks on it. When marking the spikes and lugs of the corner joints, it is necessary to carry out several marks. In this case, it is better to use a comb - a piece of bar with a cutout and studs stuffed into it.
Saws
The tree has to be sawn along, across and at an angle. Depending on this, saws are divided into transverse saws with teeth 4-5 mm high and an isosceles triangle shape, swing or loose - for sawing along with teeth 5-6 mm high and an oblique triangle shape, mixed - for sawing along and across the fiber with teeth of different height and the shape of a right triangle, jigsaws - for sawing parts of complex shape.
The crosscut saw works when the blade moves forward and backward, the other saws only when moving forward. The saws required for operation are shown in Figure 5.
Hacksaws are used in carpentry, especially for making precise cuts. For sawing spikes, wide hacksaws are used with a butt running along the top of the blade. Such a saw does not wobble and it is convenient to saw through spikes with it.
Awards are used for sawing grooves on wide surfaces, i.e. where it is impossible to work with ordinary saws, so the award handles are attached to the top of the canvas. Cloths of awards have a length of 150-200 mm.
Bow saw. This is a wooden bow loom, consisting of two racks, a middle bar, two handles, a bowstring-rope and a twist. The saw blade with a thickness of 1.5 mm is attached to the handles.
Rice. 5. Saws: a - the shape of the saw teeth for various sawing: 1-transverse; 2-longitudinal; 3-mixed
Struga
After sawing, the wood becomes rough. To make it smooth and, if necessary, to give the desired shape, the wood is planed using various tools called strugs.
Sherhebel is used for the initial rough planing of wood along the fibers, across and at an angle.
Fig. 6. Plows: a - sherhebel; b - planer; in - a planer with a double piece of iron: 1 - a hunchback; 2 - piece of iron; g - jointer; d - cynubel; e - end planer; g - folded 3 ~ zenzubel; and - shpuntubrl; k - kalevka and a set of pieces of iron for it; l - hunchbacks; m - fillet; n - cycles
The sherhebel iron is released 3 mm beyond the plane of the sole, which allows you to remove thick 3 mm chips. The oval-shaped blade leaves depressions on the surface of the wood. Planes the tool roughly.
The planer can be with single and double pieces of iron. A planer with a single piece of iron is used for planing wood after processing with a sherhebel. For cleaner planing, a planer with a double piece of iron is used. In addition to the main cutting iron, it has a so-called humpback, which breaks the chips after it is cut off by the cutting iron. Chip fracture prevents chipping of wood.
Planers plan cleanly, but not accurately. Having a block of small length, they freely pass on the big roughnesses which are available on the planed surface.
A jointer is used to more accurately level the planed surface, which depends on the length of the block and the angle of installation of the piece of iron (the jointer has 1000 mm and 45-47 °, respectively, in addition to jointers, there are semi-joiners with a block length of 500 mm).
The grinder is used for especially clean planing. This is a planer with a double iron set at an angle of 60 °.
Tsinubel - a small planer with a single piece of iron set at an angle of 80 °, on the blade of which there are many small teeth.
They are used to give the surface a slight roughness, which provides better bonding of wood. It is mainly used for veneering, stricting the base for them.
The end planer is designed specifically for planing the ends of a tree. The piece of iron is placed at an angle to the longitudinal axis of the block. This planer can also be planed along the fibers of the tree.
Falzgebel - a planer for selecting folds. The block has a stepped sole, which makes it possible to select folds of only one size (the piece of iron is placed at an angle of 80 ° with respect to the axis of the block; the chip entrance is located on the left side of the block).
Zenzubel - a planer for selecting quarters and folds, as well as their stripping, if they are selected by another tool (chisel or ax).
Shpuntubel - a planer for sampling grooves on the surface * of parts. It consists of two pads connected by screws, which makes it possible to install them at the required distance from the edge of the part. In one of the blocks is a piece of iron. To sample grooves of different widths, there is a set of glands. But even with one narrow piece of iron 3 mm wide, you can select grooves of any width, that is, select two grooves at the right distance from each other and select the remaining wood with a zenzubel or gradually move the pads. The pads are moved using nuts, and they are fixed with locknuts.
etc.................
K category: DIY furniture
Devices and tools for woodworking
fixtures
Workbench (Fig. 1). It is made from a board with a width of at least 600 mm, a thickness of 40-60 mm and a length of at least 1750 mm. The front side is smoothly sharpened.
At one end of the workbench, two stops are attached - top and side, at the other - a groove is made 100 mm wide and 200 mm deep. For strength, thick bars are nailed to the ends of the board from below for the entire width.
On the working side of the workbench, holes with a diameter of 20-25 mm are drilled along the face and edge at a distance of 50 mm from each other for inserting dowels. On the face of the holes are through, along the rib - with a depth of 50 mm. From the bottom of the workbench, three or four fingers are arranged, which can be retractable or swivel, like a turntable. Retractable fasten with brackets, and rotary - with screws. Fingers should not protrude from the edge of the board. One, or even better, two vertical stops are made against the groove.
The top and side stops are necessary so that the material rests against them when planing. The fingers hold the material in a horizontal position when it is secured in the side stop. In order to hold the workpiece or board firmly, you can clamp it, place a dowel behind it and drive a wedge between the dowel and the workpiece.
Instead of one dowel, you can arrange an adjustable stop, that is, a board with two dowels, fixed at a distance of 50 mm from each other, so that the dowels freely enter the holes.
The stops against the groove are needed in order to abut the material against them when sawing across. When planing edges, wide boards should be fixed in the side stop, laying on extended fingers.
If it is required to cut across, the stops are raised, the material is pressed against them with the left hand, and the saw is held with the right hand and sawed. After sawing, the stops are lowered. When sawing spikes on the ends of any part, it should be inserted into the groove and secured with a wedge.
Rice. 1. Bench board: 1 - top stop; 2 - side stop; 3 - groove; 4 - boss; 5 - tpez-yes; 6 - fingers; 7 - vertical stops; 8 - workpieces; 9 - wedge
The workbench is fixed at a height convenient for work. The board can be attached to the trestles or arranged under the bench on four legs.
On the front side of the board there should be no nail heads or screws that can dull the tool.
Miter box and bottom (Fig. 2). The miter box is used when sawing wood at the right angle. This is a box of arbitrary length, consisting of a bottom and side walls nailed to the bottom at a right angle. The walls must be strictly parallel. They carry risks at the right angle and saw through to the bottom. Sawing is done like this. The board or bar is marked, placed in the miter box so that the mark is exactly opposite the cut in the wall, the saw blade is inserted into the cut and sawn.

Rice. 2. Miter box and bottom: a - miter box; b - bottom: 1 - planing the end of the bar at a right angle; 2 - planing at an oblique angle; 3 - base; 4 - guide: 5 - straight stop; 6 - oblique stop
The bottom is used for precise planing of the ends of the tree at right and oblique angles, as well as for planing the edges of veneer and thin boards.
The length of the bottom is from 1 to 2 m. The base is made of a board 200 mm wide, 30-50 mm thick. A guide rail of the same length as the base is glued to the base, at least 120 mm wide, 5 to 15 mm thick and with a precisely planed edge, since the sole of the plow block moves along it during planing. An emphasis of the same width as the rail is fixed above the guide rail, with a thickness of 25-50 mm. Another side can be attached to this permanent stop, but with a side cut at an angle of 45 °. On these stops, you can plan the ends at different angles.
Planed with a planer with a double piece of iron or jointer. Very little iron is produced. The end of the planed material should protrude from the plane of the guide board by no more than 1 mm. When planing the ends on the bottom, chipping of wood is excluded.

Rice. 3. Clamps, clamps, tsulaga
Clamps, clamps, clamps, presses (Fig. 3). Clamps are used to press the material against the workbench, compress parts when gluing, etc. They are wooden and metal, ordinary, parallel and angular. A conventional clamp is a U-shaped frame with a screw and a handle.
Parallel clamps consist of two bars and two screws with handles.
Clamp clamp - a wooden frame with several screws. Used for veneering various products and especially wide boards.
Clamps are used when gluing shields from separate boards. There are many structures. The simplest ones consist of two bars with cutouts. Boards to be glued are placed in the cutouts, a gasket is attached to them and compressed with wedges. Holes for dowels can be drilled in the cutouts of the clamps; this simplifies the bonding of narrow boards, since wide spacers do not have to be inserted. You can arrange clamps with adjustable stops, which are attached to the bars with metal clamps.
Tsulagi are presses for the manufacture of bent parts. The collage consists of lower and upper profiles and screws with nuts. The number of screws depends on the size of the frame.

Rice. 4. Devices for marking: 1 - thickness gauge; 2 - comb
Presses are used for the same purposes as clamp clamps. However, the presses are more powerful. The frame is solid wood or metal, screws with a diameter of 20-25 mm or more. Wedges may be used instead of screws. To work, you must have two or three frames or more, depending on the size of the products.
Thickness gauge (Fig. 4) consists of two bars and a block. The bars are fastened in the block with a wedge. There are pegs on the bars that scratch the wood, leaving risks on it. When marking the spikes and lugs of the corner joints, it is necessary to carry out several marks. In this case, it is better to use a comb - a piece of bar with a cutout and studs stuffed into it.
Saws
The tree has to be sawn along, across and at an angle. Depending on this, saws are divided into transverse saws with teeth 4-5 mm high and an isosceles triangle shape, swing or loose - for sawing along with teeth 5-6 mm high and an oblique triangle shape, mixed - for sawing along and across the fiber with teeth of different height and the shape of a right triangle, jigsaws - for sawing parts of complex shape.
The crosscut saw works when the blade moves forward and backward, the other saws only when moving forward. The saws required for operation are shown in Figure 5.
Hacksaws are used in carpentry, especially for making precise cuts. For sawing spikes, wide hacksaws are used with a butt running along the top of the blade. Such a saw does not wobble and it is convenient to saw through spikes with it.
Awards are used for sawing grooves on wide surfaces, i.e. where it is impossible to work with ordinary saws, so the award handles are attached to the top of the canvas. Cloths of awards have a length of 150-200 mm.
Bow saw. This is a wooden bow loom, consisting of two racks, a middle bar, two handles, a bowstring-rope and a twist. The saw blade with a thickness of 1.5 mm is attached to the handles.

Rice. 5. Saws: a - the shape of the saw teeth for various sawing: 1-transverse; 2-longitudinal; 3-mixed
Struga
After sawing, the wood becomes rough. To make it smooth and, if necessary, to give desired shape, wood is planed using various tools called plows.
Sherhebel is used for the initial rough planing of wood along the fibers, across and at an angle.

Fig. 6. Plows: a - sherhebel; b - planer; in - a planer with a double piece of iron: 1 - a hunchback; 2 - piece of iron; g - jointer; d - cynubel; e - end planer; g - folded 3 ~ zenzubel; and - shpuntubrl; k - kalevka and a set of pieces of iron for it; l - hunchbacks; m - fillet; n - cycles
The sherhebel iron is released 3 mm beyond the plane of the sole, which allows you to remove thick 3 mm chips. The oval-shaped blade leaves depressions on the surface of the wood. Planes the tool roughly.
The planer can be with single and double pieces of iron. A planer with a single piece of iron is used for planing wood after processing with a sherhebel. For cleaner planing, a planer with a double piece of iron is used. In addition to the main cutting iron, it has a so-called humpback, which breaks the chips after it is cut off by the cutting iron. Chip fracture prevents chipping of wood.
Planers plan cleanly, but not exactly. Having a block of small length, they freely pass on the big roughnesses which are available on the planed surface.
A jointer is used to more accurately level the planed surface, which depends on the length of the block and the angle of installation of the piece of iron (the jointer has 1000 mm and 45-47 °, respectively, in addition to jointers, there are semi-joiners with a block length of 500 mm).
The grinder is used for especially clean planing. This is a planer with a double iron set at an angle of 60 °.
Tsinubel - a small planer with a single piece of iron set at an angle of 80 °, on the blade of which there are many small teeth.
They are used to give the surface a slight roughness, which provides better bonding of wood. It is mainly used for veneering, stricting the base for them.
The end planer is designed specifically for planing the ends of a tree. The piece of iron is placed at an angle to the longitudinal axis of the block. This planer can also be planed along the fibers of the tree.
Falzgebel - a planer for selecting folds. The block has a stepped sole, which makes it possible to select folds of only one size (the piece of iron is placed at an angle of 80 ° with respect to the axis of the block; the chip entrance is located on the left side of the block).
Zenzubel - a planer for selecting quarters and folds, as well as their stripping, if they are selected by another tool (chisel or ax).
Shpuntubel - a planer for sampling grooves on the surface * of parts. It consists of two pads connected by screws, which makes it possible to install them at the required distance from the edge of the part. In one of the blocks is a piece of iron. To sample grooves of different widths, there is a set of glands. But even with one narrow piece of iron 3 mm wide, you can select grooves of any width, that is, select two grooves at the right distance from each other and select the remaining wood with a zenzubel or gradually move the pads. The pads are moved using nuts, and they are fixed with locknuts.
Kalevka - a planer for profile processing of the edges of parts. The sole of the block and the piece of iron have a shape opposite to the profile of the part. To work, you need a set of appropriate gauges.
Gorbach is a planer for planing concave and convex surfaces, and depending on this, the sole of the block has a concave or convex shape. The piece of iron is placed at an angle of 45-50 °. For hunchbacks, you can use an ordinary planer, but attach linings of the desired shape to its sole.
The fillet is designed to make grooves of different widths and depths, with different rounding radii.
The staple is used for rounding the edges of parts, shields, etc., as well as for selecting rollers. The sizes of the pads, the width and shape of the pieces of iron are different.
Cycles are used to remove the thinnest chips and pile from wood (scraping). Cycles are steel thin plates made of strong steel with a thickness of 0.5 to 1 mm. A cycle can be made from a saw blade. The length of the plate is 100-150 mm, the width is 50-90 mm. For convenience, the plate is attached to the handle. In addition to rectangular cycles, curly ones are made. Cycles remove chips or lint with burrs, which are guided after careful pointing and straightening of the cycle. If the cycle is sharpened like a regular rub-night piece of iron with chamfering, then it is refueled on one side, and if it is sharpened without a chamfer - at a right angle to the plane of the blade, then the burrs are induced on both sides.
To obtain a clean wood surface, planing is performed in three stages. First with a sherhebel, then with a planer and then with a jointer.

Rice. 7. Planing technique: a - straight planing long board; b - planing with a zenzubel; c - planing with a chamfer with preliminary chamfering; g - a miter box for planing moldings: 1 - nails; 2 - a bar in a miter box; d-planing of the kalevki; e - facing: 1 - wrong; 2 - correct
Planing should always be in the direction of the fibers, making uniform pressure on the tool. The planing technique is shown in Figure 7. .
In order for the part to be planed to be completely even, at the beginning of gouging, you need to press harder on the toe of the block with your left hand, and with your right hand make a slight pressure on the heel. At the end of the gouging, the toe is only slightly pressed against the planed wood, but the pressure on the heel is increased.
If you do not follow these rules, then the ends of the planed part will be thinner.
When selecting folds, the part is firmly fixed, the tool is installed and, with the necessary pressure, it is led forward.
The fold can be cut from the opposite side (shown in a circle).
When selecting a mow on a bar, sometimes it is necessary to first remove the chamfer.
To fix the part when planing the molds on it, it is best to use a miter box by driving several nails into one of its bars with pointed ends up.
Since during trimming with a planer it is possible to chip wood from the opposite edge of the part, it is necessary to attach a block to it at the same level with the end.
Thin sticks of exactly the same thickness can be cut as follows.
Dollot and chisels
When connecting parts to each other, it is necessary to hammer out various holes, using chisels or chisels for this (Fig. 8).

Rice. 8. Chiseling holes: a - chisel: 1 - blade; 2 - neck; .3 - whisk; 4 - shank; 5 - cutting; b - the sequence of chiselling; c - cutting technique
Both of them consist of a shank, on which the handle is mounted, and a rim - a broadening near the shank, which creates an emphasis for the handle; necks are located below the corolla and form a transition to the blade. The blade is sharpened and the blade is obtained. Chisel width from 4 to 50 mm, blade thickness from 3 to 4 mm. Blades may have different length. Bit width from 6 to 20 mm, thickness, blades from 8 to I mm. To protect the handle from quick splitting, metal rings are put on its lower and upper parts.
The holes are hammered according to the pre-made markup. Shallow holes equal to the width of the chisel can be hammered like this. They put the chisel vertically with the blade exactly at the risk, strike it with a mallet (large wooden hammer), driving the chisel to a shallow depth.
Then they take out the chisel, rearrange it to the middle of the hole at an angle to the slot and strike it, cutting off the first chip. Then, in exactly the same sequence, the operation is repeated on the other side of the hole, etc.
Deep holes can be hollowed out from both sides according to previously carefully drawn risks.
When it is required to make nests with particularly smooth walls, they are hammered in the same way, leaving the necessary margin for finishing. After chiselling, the end surfaces are first cleaned, then the longitudinal ones.
Rasps and files, in addition to working with a chisel, are also used to process wood with a large curvature, such as curly surfaces, half-oval corners, etc. Rough work is first done with a rasp with a large notch. Then the part is processed with files with a fine notch, achieving the required surface cleanliness. Sometimes they are additionally processed with fine sandpaper.
Drilling is more productive than chiselling. Sometimes the holes are pre-drilled and then chiselled.
For work, drills of various designs are used (Fig. 10). Some drill cleanly and quickly, others vice versa. At the same time, some drills can drill holes only across the fibers, others both across and along.
To rotate the drills, a brace or drill is used. In addition to drills, a drill is used - these are the same drills, but longer, they are rotated by the handle, which is inserted into the hole at the end of the drill.
Perovye, or spoon, drills are used to drill holes with a diameter of 3 to 16 mm along and across the fibers. The holes are not very accurate and clean.

Rice. 10. Tool for drilling holes: a - simple drills: 1 - drill; 2 - screw; 3 - center; 4- spiral; 5 - spoon; 6 - drilling; b - drills for metal: 1 - ordinary; 2 - sharpened for woodworking; c - universal drill: 1 - main part; 2 - clamping bar; 3 - screw; 4 - groove; 5 - mobile cutter; 6 - road builder; 7 - cutting edge; 8 - bottom view; 9 - a cutter with a road builder; d - rot: 1 - fungus; 2 - crankshaft; 3 - handle; 4 - cartridge
Awl-shaped (conical) drills are used for drilling holes for screws with a diameter of up to 5 mm. Holes are torn and rough.
Center drills are used to drill holes that are sufficiently clean and regular only across the fibers with a diameter of 13 to 51 mm.
Centerless, or cork, drills are used to drill non-through holes with a clean, even bottom, for example, in knots and other defective places (wooden plugs of a slightly larger diameter are inserted into these holes with glue than the drilled holes).
Twisted, or screw, drills are used to drill clean holes of different depths with a diameter of up to 58 mm, but only across the fibers of the tree.
Countersinking - a metal cone with cutting edges pointing from the top to the base - is used only for drilling holes for the heads of nails or screws. Instead, you can use metal drills with a diameter larger than the drilled holes.
The universal drill fully justifies its name, as it can be used to drill holes with a gradual increase in their diameter, in increments of 0.5 mm. There are sets of universal drills of various diameters with small and large movable knives.
Rotator - a device for rotating drills. Rotaries are simple and combined with a ratchet. The latter should be preferred. They consist of a fungus, a crankshaft, a handle and a cartridge. The fungus and the cartridge rotate freely around its axis.
- Devices and tools for woodworking
From time immemorial, wood has been a priority building material, raw materials for the manufacture of household utensils, decor. The appearance of new products in this area does not prevent the tree from maintaining high popularity and being in demand. One of the important qualities of this natural material is a simple processing. This allows not only experienced craftsmen, but also amateurs, creative people to create unique decorative elements, building structures. Special tools for woodworking are indispensable assistants in such operations.
Main types of tool
Specialists are well aware of what devices, mechanisms can be useful in various works with a tree. It is quite difficult for a beginner to understand the huge assortment. In order to create your own universal arsenal that allows you to perform any operation, you need to get acquainted with the classification of tools, their types and features.
In this production there are products professional and household, universal and specific. In the woodworking tool category, you can choose:
- mechanical handicrafts;
- electrical devices;
- machine tool equipment.
Most owners have simple hand tools, who prefer to do repairs and construction on their own. Application of various electrical devices network and mobile simplifies the process, allows you to conveniently and efficiently perform complex operations.
Electric woodworking tools make the process much easier
Machines designed for woodworking are installed not only at specialized enterprises. IN model range equipment, there are also household options that have compact dimensions and are easy to operate.
Hand tools for the home master
In the range of mechanical tools for wood there are many universal devices that are used in the most various works. They should be in stock for every craftsman. The presence of this tool provides an opportunity to perform a lot of chores around the house, on the site. A practical owner should have:
- saw hacksaw;
- axe;
- chisel;
- hammer;
- plane;
- brace.

Hand tool on wood
These are the main assistants of a carpenter, without which it is impossible to do in construction and repair. A hacksaw is a tool consisting of a plastic or wooden handle and a metal blade with teeth. Saws are produced in a large assortment, differ in size, size of teeth. The tool is intended for dividing the whole part into elements, eliminating surpluses. In performing small operations, a special jigsaw with a thin blade is used. Cleavers and axes are used for splitting, chopping, hewing.

Jig saw with a thin blade for small operations
A metal chisel, consisting of a working part and a handle, is useful in chamfering, forming recesses, etc. A special hammer called a mallet is used to work with this tool. A planer will help to make the surface even, to give the ideal geometry to the board. If you need to use it regularly, you should buy a power tool for woodworking. There are several varieties of devices of this type: grooves, jointers, etc. In the formation of holes in wooden materials a brace is used that works with various types of drills.

A planer will help to make the surface even.
In the work, the master will also need special materials for processing, allowing you to create a perfectly flat, smooth surface. In such operations, sandpaper is used. It is necessary to stock up on material with different sizes of abrasives in order to carry out rough and finish work.

Sandpaper for finishing work
Electric tool in woodworking
Qualified specialists and many home craftsmen prefer to acquire electrical equipment that allows them to quickly and efficiently perform different kinds works. This woodworking tool is offered in a large assortment. The most popular devices include electrical:
- planes;
- drills;
- chain, circular saws;
- screwdrivers;
- grinding machines and etc.
An electric planer greatly simplifies the process of giving ideal indicators wooden surface. Using a drill, holes of the required size are created. You can use this device in the installation of fasteners, mixing solutions.

An electric planer greatly simplifies the process
Electric grinders are very popular among professionals and amateurs. In production, tape models are used, designed for large volumes of work. In everyday life, repairs, vibration, planetary tools are used for grinding wood.
A chain or circular saw is an indispensable equipment for a craftsman who has to do woodwork in large volumes. Modern multifunctional models perform a number of operations.

The circular saw for wood is an indispensable tool
A home craftsman, a specialist who manufactures complex structures, will need a milling device. Mechanical, power tools for wood processing allows you to create curly elements, stairs and window frames, furniture.
Not only manual jigsaws are used in the creation of small elements, in work that requires special precision. You can also purchase an electric tool for carving wood.

Electric jigsaw perform tasks that require extreme precision
To the benefits electrical appliances refers to the efficiency of operations, the absence of the need to spend a lot of effort. For stationary work, it is advisable to purchase models that operate from the network. Mobile devices with rechargeable batteries allow you to perform operations anywhere.
Accessories
In addition to the main tool, additional devices are used in working with wood. Home master useful:
- work bench with vise;
- pincers and pliers;
- clamps;
- rulers and tape measure;
- joiner's pencils;
- corner and protractor;
- plumb.

Workbench guarantees ease of use
The presence of a workbench guarantees convenience in work. This design is used to perform a large number of operations. It is equipped drawers, they store various little things that the master should always have at hand. With the help of pliers, pincers, you can easily remove hardware, quickly dismantle. Clamps of different configurations are useful for fixing elements.
You can choose wisely essential tool on wood in a large assortment, without spending extra money. Experienced craftsmen give several recommendations:
- When choosing a hand tool, special attention must be paid to the quality and reliability of the working part. In working with him, you have to use effort. Durable, well-sharpened products will allow you to spend less time and effort.
- Any tool should be comfortable. Handles, configurations, dimensions of equipment, fixtures are selected taking into account personal characteristics. Comfortable models will eliminate inconvenience, fatigue, and ensure safety.
- Home craftsmen who rarely use woodworking tools, if necessary, should give preference manual types. This will significantly save the cost of purchasing equipment. If such work is performed regularly, it is better to purchase electrical counterparts.

For regular work, purchase an electric wood tool
It is not necessary to have all kinds of tools in your arsenal. You can limit yourself to several types of universal devices if working with wood is not professional activity, favorite hobby.
woodcarving assistants
At all times, the skill of wood carving was highly valued. Exquisite curly elements adorn the facades of houses, furniture items, household utensils. The emergence of CNC machines that perform this operation on high level, did not make hand carving less popular. It remains one of the most popular hobbies for creative people. Special tools for wood carving allow everyone to master this skill.

Wood carving remains one of the most popular activities for creative people.
There are several types of this art. The flat carving technique is used to create silhouettes with shallow contours. In the relief method, the decor protrudes above the recessed background. For geometric patterns, the technique of deepening the lines is used. In the performance of openwork carving, gaps are cut out. With the help of this art, you can create three-dimensional images in 3D format.
The carving specialist enjoys big amount various devices. They are selected depending on the type of work. In the arsenal of the master there are universal products that are used in many operations with wood. These include hacksaws, chisels, milling cutters. There is also a specific tool:
- knives;
- engravers;
- incisors.
The woodworking tool is selected depending on the type of work
Carving knives
Knives help the craftsman to create a skillful carving. There are many types of this hand tool. The most popular options include:
- tatyanka;
- Bogorodsky;
- cant.

Wood knives for fine carving
The Tatyanka knife has a long handle. The beveled blade during operation is 2 centimeters from the hand of the master, which allows you to create small elements. Bogorodsk knives are available in several models, they can be used for rough and fine carving. The handle of this tool has a semicircular contour, the blades are partially sharpened, similar to a penknife. The jamb is identical in structure to a professional shoe tool. Its blade is beveled at an angle of 45 °, sharpening is one-sided.

Bogorodsk knives for fine carving
In the process of work, the tool for cutting wood becomes dull, regular sharpening is required. The master should have at hand special tools to maintain the required sharpness of the blade. For this are used:
- bars with surfaces of various grain sizes;
- fabric skins of several numbers;
- leather belts and special grinding paste.

Wood cutting tool needs regular sharpening
Chisels in woodcarving
An important working tool is a chisel. These devices also have several types. Masters use devices:
- straight,
- reverse,
- corner,
- curved,
- cranberries.
Chisels differ in profile shapes, create a groove of the desired configuration. A mallet is used in working with the instrument. The sharp working part allows you to do without a power load. There is a modern assortment of electric chisels that can be powered by a network or battery.

Chisels differ in profile shapes
When choosing tools, you must be guided by the purpose:
- jigsaws and chisels are used in the manufacture of sculptures;
- wooden poles, balusters are decorated with a hacksaw, milling cutter;
- engraver, cutters will help to make ornaments on platbands, planks, furniture.
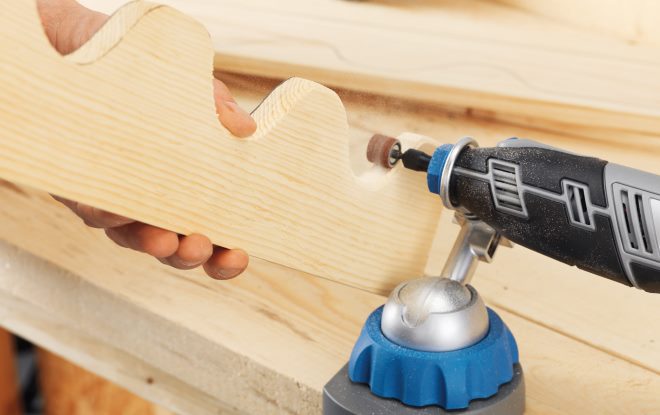
Engravers in carving
A popular tool for a carver is an engraver. It is an excellent replacement for a traditional cutter, it performs complex operations faster and better. There are several types of such devices. The work can be used:
- manual engraver with a set of working nozzles;
- flexible shaft;
- laser device.

Manual engraver performs complex operations with high quality
Hand engravers can be mounted on a screwdriver or drill, grinding machine. Such a complete set is a convenient electric tool for making ornaments, lace, figured or laid on carving.
The flexible shafts are equipped with chucks for fixing on a standard drill. The working tool can be a drill, milling cutter, bur. It is advisable to have a sharpening machine available, which will allow you to regularly edit the equipment, ensure the sharpness of the working blades.