We carry out the installation of PVC lining correctly: methods of fastening. Do-it-yourself installation of plastic lining: installation secrets How to make plastic lining correctly
Facing the facade of the house is an important component of the repair and construction of the building as a whole, since the appearance of the building and everything will depend on the exterior design. personal plot. The modern market of building materials offers a large selection of various products for outdoor work, among which plastic lining can be distinguished, which has a number of specific properties and advantages.

Peculiarities
Building a house is a process consisting of a series of obligatory works that are performed in strict order. Finishing the facade of the building is important not only in terms of aesthetics, it also insulates the house and provides surface protection from many factors. outer skin plastic clapboard walls are in demand among many homeowners, since this material has a lot of advantages.

PVC lining has a number of positive features:
- long service life due to the fact that the material is not subject to rotting and corrosion;
- resistance to various temperatures;
- the material does not burn;
- ease of installation;


- external attractiveness of the facade;
- the surface does not require maintenance;
- good water-repellent properties of the material;
- affordable cost of products;
- products are resistant to negative environmental influences.

But like any other material, plastic products have some disadvantages.
These include the following nuances:
- minimum resistance to mechanical stress and pressure;
- the inability to securely fasten decorative elements to the panels.

Unlike wooden lining, before installing PVC panels, there is no need to cover them with special antiseptics and other compounds that prevent rotting of the material, which is a positive moment that provides savings Money homeowner.
Kinds
For the first time, lining began to be used for sheathing trains, and based on this, the material acquired its name. In appearance, the product is a regular board with an even and smooth texture, on the sides it has grooves that provide connection with subsequent elements.

Plastic lining- this is a panel inside which there are individual cells along the rail. The raw material for the production of the material is polyvinyl chloride.

The material can be of the following types:
- a panel of the usual form, which is visually similar to a wooden beam;
- calm, the advantage of which is a smooth surface, after its installation, the grooves on the panels are almost invisible;
- block house - a panel with a convex surface that imitates a log;
- "American" - a product with a recess inside the panel, due to which the appearance of overlapping boards is created.


Clapboard panel visually resembles a wooden beam, this design is the simplest, so most of the plastic wall panels are produced with just such a profile.

Calm, or "Kolkhoz Woman", is popular due to the lack of grooves that are usually seen in other types of panels.

Block house resembles a log cabin, inner part the panels are flat, the grooves for fastening are located on the sides of the product. The products can be used for facade decoration and for internal works in room. Except original appearance, such a panel has a good level of plasticity due to the presence of special additives in the composition. They provide the product with frost resistance and resistance to fading.


Lining "American" popular due to the peculiarities of laying, since the located panels form a good protection of the joints from the effects of various temperatures and moisture.

Many experts classify plastic lining in this way:
- multi-colored or white panels;
- products made under wood, stone or other materials;
- panels, the main difference of which is the method of their connection - seamless and seam.


When choosing a facade material, you need to take into account that for street decoration it is worth buying lining for external work. The differences between the products are only quality characteristics, visually, panels for exterior decoration and products for interior work are not much different.

The front side of the lamellas has two main types - a glossy or matte finish. In the assortment of some manufacturers you can find products that have a semi-matte finish. The external design of the products does not affect the quality in any way. finished products. White is considered the most popular color for plastic lining, in second place are wood products. Much less often they buy colored products.


DIY finishing technology
In order not to make a mistake in the way of laying plastic lining, first of all it is necessary to study the installation technology. Panels can be fixed different ways. The most common is the option of vertical and horizontal arrangement of panels, so you can visually enlarge the walls, due to which the whole building becomes large. In addition, there is a rather old way - herringbone laying, thanks to which an interesting pattern is created and it becomes possible to save material.


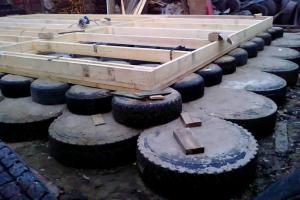
Before you sheathe the house from the outside, you need to make a wooden crate to fix the panels. This design will provide a flat mounting surface. In addition, the frame system allows you to introduce layers of insulation into the structure.

The fastening of elements begins strictly from the corner. The first part of the structure acts as a guide, so its installation should be taken with special responsibility. Having connected several parts together, it is necessary to use the level to control the correct and even arrangement of the panels on both sides.

The sheathing option in length involves laying where the spikes of the lining will be located at the top, so that excess moisture will not accumulate in the grooves.
Fastening products can also be carried out by various means, each of them has its own advantages and disadvantages. by the most in a simple way is the use of a stapler or nails. However, these elements become unusable very quickly, so they may need to be replaced.

It is best to purchase special clamps or thin nails. The latter option is not entirely aesthetic, and the use of brackets allows mounting on brick wall or on a surface made of round logs or foam concrete.

When performing work, it is important to maintain a perfectly even laying, especially for independent work.
Plastic lining is an ideal material for cladding buildings with high humidity, such as baths. When buying materials, please note that the color of the lining from different manufacturers will be different.

When choosing a plastic panel, you should take into account the cost of production, since high-quality products will have a high price.
However, in order not to buy expensive products of poor quality, it is worth considering the main points that will determine the quality of the lining:
- The ability of the material to withstand the load depends on the thickness of the elements. Standard Thickness panel is 10mm;
- the thickness of the front surface of the product must be such that no stiffening ribs are visible through this side, otherwise a lamella of this quality is not recommended for use as a material for exterior decoration;

- the strength of the product depends on the number of ribs and their rigidity;
- the distance between the ribs should not be more than 10 mm;
- color uniformity of the entire product. Many manufacturers do not add coloring pigment to polymer composition during production, but they prefer to process only the front side with it. Such lining will lose its color very quickly, and possible scratches and defects will be clearly visible on the surface.

When purchasing a lining, you need to familiarize yourself with the product certificates, since the panels are made from toxic raw materials. Freshly opened packaging may have an unobtrusive, but specific smell, which is considered the norm. If the smell is felt from a product that is in the store as a sample, then it is worth thinking about the safety of using such products.

The weight of the finished product depends on the thickness of the walls of the lamellas and the number of ribs. The standard value is considered to be in the range of 1.1-1.5 kg / m2. Before buying the entire batch, it is worth testing the panels for a good fit with each other.

Experts agree that the products good quality should not contain more than 20% chalk. Its excess is fraught with a decrease in the strength of raw materials. Chalk is a low-cost material, so it is often used in production to reduce the cost of finished products.

The permissible content of this component is very easy to check - for this, it is enough to slightly bend the corner of the panel. If a crack has not formed at the bend, such material can be used. A white stripe or defect indicates an excess of its norm in the total mass.

Products that are produced by well-known trademarks, it is worth buying without fear, since the company has earned its reputation for more than one year, primarily by the quality of goods, paying special attention to it.
Saving money on the purchase of facade cladding materials is not worth it, as this can result in cost overruns due to the need to carry out repairs with low-quality products. A good plastic lining will decorate the house and there is still enough long time will not change its aesthetic and physical properties.

Beautiful examples
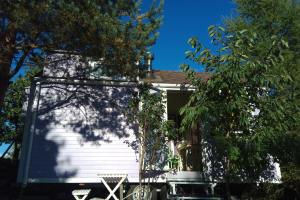
A cozy and attractive home is the dream of every homeowner. The choice of style, taking into account which the house will be decorated, directly depends on the personal preferences of the owner and his desires. Modern high-tech housing or classic Provence can be beautiful and comfortable. For each option, plastic lining will be an excellent addition, thanks to which the facade of the building will harmoniously fit into the overall stylistic idea.

Clear and simple lines, contrasting colors of the facade cladding of the building are the main elements of high-tech style. Wall cladding in neutral colors such as white and black can be a winning option.

Conservative English style will help set plastic panels under a brick, which will favorably complement the design of the house, emphasizing its respectability and restraint with its practicality and perfect symmetry of the lines.

English style The design of the facades of residential buildings is represented by democratic colors, a combination of natural textures or their good imitation with an emphasis on the high cost of finishing. Plastic panels, which are an inexpensive material, are quite up to the task of decorating walls that repeat the painted wood flooring in white or beige tones. Due to the fact that the products can be easily painted with paint in almost any color, the walls of the house can be given the desired shade that matches the overall design. The main thing is to use products suitable for such a surface for painting.
Facing with this material is a very simple and “clean” method of finishing a room. One of the significant advantages of lining is the highest manufacturability installation work.
A wall made of plastic lining is assembled as a constructor for young children.
PVC panels are an excellent alternative to time-consuming and expensive repairs, providing a convenient and easy-to-use decorative finishing material.
Therefore, anyone can do the installation of plastic lining with their own hands. Another important advantage of plastic lining is the almost complete absence of various dust, dirt, waste and other " side effects", which simply cannot be avoided when performing repairs with other building materials designed for interior decoration.
Features of this material

Auxiliary profiles ensure the connection of panels at the outer and inner corners, are used when framing window and doorways, niches, arches and other interior elements.
Plastic lining can be easily cut with your own hands both across and along, which is why there are no problems with this material when installation is performed.
Between themselves, this finishing material is connected according to the simple principle of "groove to groove". With this type of connection, the jointing may not match the colors of the panels at all, or even be mirrored.
Inserts are flat and embossed. The lining has a number of other advantages:
- Democratic price.
- Easy to assemble.
- Aesthetic appearance that does not change throughout the life of the material.
- Rooms that have been paneled look cozy and original, and only water and a little detergent are needed to keep them clean.
- The material is made of rigid polyvinyl chloride, and its hollow internal structure guarantees quite high sound and heat insulation characteristics.
- With the help of plastic lining, you can easily hide all the bumps, etc. without much effort.
Installation of plastic lining can be carried out in several ways:
- by means of nails having wide caps and preferably treated with a coating that prevents the development of corrosion;
- using building brackets;
- adhesive mixtures and compositions;
- using self-tapping screws.
If you do the installation of the lining with your own hands on the surface located in vertical position, then the lining made of plastic must be fixed in increments of no more than 600 mm.
If the installation of the lining is planned to be carried out on the ceiling, then the step should be no more than 500 mm in order to avoid possible sagging in the future.
In any case, plastic lining should be attached exclusively to a clean and perfectly smooth surface. Therefore, you should not be lazy, but take a cloth in your hand and wipe the surface.
Where to start the construction process?
In order to carry out the installation of plastic lining with your own hands, you will need the following materials and tools:
- lining plastic;
- staples;
- a pistol designed for staples;
- saw;
- drill;
- self-tapping screws;
- wooden slats;
- fine sandpaper;
- stationery knife;
- marker or marker.
Stage 1

For walls, the width between the rails should not exceed 30 - 40 cm, for the ceiling - no more than 30 cm. The rails for the crate are attached to the wall perpendicular to the direction of the panels.
Before starting the installation of the lining, it is necessary to build a frame. Of course, you can glue this finishing material directly to the wall surface itself, using ordinary liquid nails for this purpose.
But this option is possible only on condition that the surface on which the lining will be glued is perfectly flat.
Often this becomes possible only after the walls have been finished with plasterboard sheets. With an ordinary construction, even the wall surfaces in panel houses have their own flaws, and if you stick a plastic lining on them, it will easily fall off after a while.
With the help of the frame, the surface of the walls is leveled and, of course, the fastening process is simplified.
In order to create a crate. it is necessary to carry out the installation of rails by means of self-tapping screws over the entire surface where it is planned to fasten the lining. The rails must be fixed horizontally. The distance between them should be no more than 50 cm.
This crate will help to securely mount the plastic lining with your own hands.
Stage 2

Scheme of installation of plastic lining: 1. Mount the grate perpendicular to the direction PVC mounting panels. 2. Additional profiles are used to finish wall and ceiling joints and solve corners. 3. Insert the panel into the initial profile, and fix it.
Do-it-yourself installation of plastic lining can be carried out using nails with fairly wide hats, self-tapping screws, or staples specially created for such purposes.
The latter method is the simplest and saves a lot of time, because the protrusion of the mounting bar is rather narrow, so fixing it with self-tapping screws or nails is quite problematic.
It is necessary to measure the desired height of the plastic panel and cut it off using an ordinary saw or a hacksaw with small teeth. Next, the cut edge must be sanded with fine sandpaper, so that later there is no injury to the skin of the hands.
We continue installation work
Stage 3

The facing part is inserted into the profile groove, and then it is fastened to each of the transverse guides. At the final stage of the cladding, before attaching its last element, you should first fix the finished profile.
Direct installation of plastic lining with your own hands.
The first panel must be inserted into the corner or the starting strip and securely fasten its edge with staples in those places where the panel edge comes into contact with the frame rail. The actual installation of each panel is carried out in 5 or 6 places.
Next, insert the next panel into the grooves formed and fix it in the same way as the previous one. Installation is desirable to start from the corner. If the plastic lining is installed in such premises as a bathroom or shower room, then it is necessary to seal the connection from the bottom of the lining and the starting profile.
In order to seal, it is necessary to use silicone that is resistant to moisture or another similar sealant. Do-it-yourself plastic lining can be mounted not only on the surface of the wall, but also on the ceiling.
The most difficult step is to insert the very last panel into the final bar, which is why it is recommended to put a corner on it immediately. In fact last panel is held on the bracket of the previous mounting panel and rests against the wall.
Final moments of work
Stage 4

For ceiling lights, the locations of the holes are easily cut with a clerical knife.
After completing the installation of the panels with your own hands, you should cut holes in the material for sockets and switches (if, of course, they are required).
This work is carried out using an ordinary clerical knife, jigsaw or hacksaw. Previously, at the place where the cutout will be located, it is necessary to make markings with a marker or felt-tip pen.
Plastic lining exists in a wide variety of shades, so there should not be any difficulties with the selection of colors. With its help, you can realize almost any design idea, while spending a minimum amount of your own efforts and, of course, your precious time.
Installation of such a finishing material is very simple, so absolutely everyone can handle it. It will also not be difficult to buy lining, because it is sold in any hardware store and is quite cheap.
In addition, plastic lining can be used for exterior decoration. country houses, cottages, etc. Such a finishing material will help make the external and, of course, the internal appearance of your home unique and attractive.
In addition to ease of installation and its own aesthetic qualities, plastic lining has another significant advantage - it does not require any special care.
It is enough just to wipe the material with a soft cloth dipped in soapy water as it gets dirty.
Therefore, if you are still thinking about whether to carry out installation work on installing plastic panels at home, you should discard all doubts and get to work. positive qualities this material has much more than negative ones, and by installing the lining, you will never regret it.
PVC lining - a material that is suitable for both interior decoration rooms, as well as for exterior wall decoration. But you need to know some of its features in order to avoid unpleasant moments after repair.
Unlike wooden lining, installation of plastic is much easier. Therefore, anyone who wants to make repairs with their own hands will cope with the decoration of the walls with plastic clapboard.
Features of plastic lining

The lining is made of pvc, the lining for outdoor decoration has the following advantages:
- Waterproof material.
- Plastic does not pass, and does not absorb water.
- Does not deform from temperature changes.
- Fireproof.
- Plastic panels are made using modern technologies. They are non-flammable and do not emit harmful substances for good health.
- Hygienic.
- The plastic does not form fungus and mold. To avoid the formation of fungus on the surface, it should be processed.
- It does not require special care.
- Just rinse with water.
She has few shortcomings. Lining made of pvc plastic is a fragile material. Even a small impact can damage the panels. It has scratches on it. If you want to remove a damaged panel, you will have to replace the entire wall.
Types of plastic lining

PVC lining plastic - it can be different, so before buying, decide which one is suitable for finishing (see).
She happens:
- With seams and without seams.
- Various colors. Manufacturers produce at least 70 shades.
- Different texture.
Imitation of stone, wood, brick, sand and many other textures and patterns. For facade decoration, plastic lining imitating wood, stone or brick is usually chosen. But when choosing, fragility should be taken into account, so you should buy a high-quality lining designed for outdoor work.
Installation of PVC lining

For finishing the facade (see), most often, consumers use pvc plastic lining. Wall cladding with plastic clapboard is much cheaper than other materials.
If you do it yourself, it will be even cheaper. Moreover, the installation of panels is easy to do. This will require the necessary tools for work, plastic panels, accessories for pvc lining and some knowledge.
For exterior finishes, preparatory work. First, we clean the walls of elements that interfere with work.
Remove from walls:
- Sticking nails.
- Old upholstery.
- Water pipes.
- Lanterns or lamps.
crate

After cleaning, even out the flaws on the walls and attach the crate (see). It can be either wooden or aluminum.
The wooden crate consists of bars 50 * 50 mm. They are attached to the wall with screws or nails. The distance between them is no more than 50 cm. The bars must be treated with fire-fighting and antiseptic agents. They are nailed strictly according to the level and must be perpendicular to the direction of the lining.
The metal crate is attached to the walls with a special fastener. Attached to it aluminum profiles. Such a crate is more reliable and durable.
If it is required to insulate the facade, then make the distance between the bars according to the size of the insulation. The bars, respectively, will be higher than 5 cm. Many use a counter-lattice for this. Such a crate is more difficult to do, but possible.
Tools

To work on sheathing with plastic panels, we will use the following tools:
- Plastic panels for exterior decoration. Instructions with information are usually included in the kit.
- Additional elements (molding, corners, plinth).
- Glue or kleimers (see).
- Self-tapping screws or nails.
- Screwdriver or drill.
- Building level.
- Roulette.
- Marker.
- Square.
- Jigsaw.
- Hacksaw.
- Sealant.
Assembly of plastic panels

At the beginning of the assembly, the start panel is attached. To do this, measure a distance of 10 cm from the base and drive in a nail. Thus, we pass around the entire perimeter of the building. We check the horizontalness of the line using the level.
Advice! The launch pad is attached strictly horizontally. Otherwise, the entire assembly will be skewed and it will be impossible to correct this during further work.
After the line is marked, the panel is attached directly. PVC panel lining is fastened with self-tapping screws.
It is attached to the crate. The distance between the screws is 40-50 cm. It is not necessary to tighten the screws. A gap of 0.1 cm should be left. This is done to allow the panels to move freely. In this case, deformation does not occur when the ambient temperature changes.
Subsequent panels are inserted into the special closures of the previous panels. Snap on and secure with screws. Assembly is carried out from the bottom up.

Use a starting corner to create a nice looking skin. It makes it easier to align the panels. Put the corner on the corner of the building. Insert the panel into it and fix it. Thus, all panels are fixed.
Advice! Facade cladding should start from the far corner from the entrance.
Around the window and door openings, corners are also attached into which the lining is inserted. At the same time, excess lining is cut off with a jigsaw or saw with fine teeth.
To complete the cladding of the building with plastic clapboard, install spotlights and finishing strips, as well as decorative elements. On the plinth, pvc lining under the tile is strengthened.
Sheathing a building with PVC clapboard is several times cheaper than installing it with another material. High wear resistance, price and ease of assembly - that's what attracts all consumers. The assembly speed is due to the excellent fit of the panels. With a sheathing, anyone can handle it.
In order to have a complete picture of the assembly of PVC lining, watch the video in this article.
Plastic lining is an inexpensive solution for decorating walls and ceilings with your own hands. Installation of plastic lining occurs quickly enough, and the surface finished with this material takes on an absolutely unrecognizable appearance.
Along with, today plastic lining is in great demand, since it can also be used for outdoor work as well. In order to independently perform the installation of plastic lining, you should study the technology, which is largely similar in principle to other wall finishing technologies.
Plastic lining - material advantages
Material such as plastic lining is considered to be. It is made using polyvinyl chloride, from the same material from which other plastic products are made: dishes, syringes, etc. As a result, plastic lining is an absolutely harmless material, which is often completely sheathed in a bathroom or corridor.

The presence of a tongue-and-groove connection at the edges of the plastic lining on the side allows it to be fastened efficiently and quickly. By the way, the installation of plastic lining can be done with your own hands, if you have a certain tool, which will be discussed below.
Do-it-yourself installation of plastic lining
To carry out the correct installation of plastic lining, you should study not only the technology, but also prepare the entire essential tool for this:
- Firstly, to install the lining you will need: a building level, a plumb line and a tape measure.
- Hammer drill, as well as a screwdriver or drill that can replace it.
- with fine teeth or .
- You will also need such a common tool as: a hammer, screwdrivers, a sharp knife and a stapler.
In addition, in the presence of high walls or the installation of plastic lining on the ceiling, you need to get a construction "goat" or a high stepladder.
The complete do-it-yourself plastic distillation installation technology looks like this:
1. First you need to prepare the walls for the installation of the crate. The surface of the walls after installing the plastic lining will be tightly closed and inaccessible. As a result, you should take care of its high-quality insulation and treatment with antiseptics.

2. The assembly of the crate for the installation of plastic lining is carried out using wooden beams or metal galvanized profile. To the wall, the profile or timber is fastened with dowels, if the wall is concrete, and with self-tapping screws.
3. It is necessary to fasten the plastic lining to the assembled crate, depending on the material from which it is assembled. If it is wood, then it is possible to use a stapler or small nails for fastening. Provided that a metal profile is used for the crate, the plastic lining is fixed to it by means of self-tapping screws.
In fact, the installation of plastic lining is not particularly difficult. Today you can watch videos on the Internet, see pictures. All this, of course, will help to deal with this technology and will bring some clarity to the installation of plastic lining with your own hands.
Thinking about carrying out repairs, you certainly want to get the best result, while it is desirable to do without special costs and meet the work in the shortest possible time. Of course, you should always strive so that the repair work does not cause much trouble, does not interfere too much with the neighbors.
In this case, according to experts, the most suitable solution would be the installation of plastic panels, which also have a name - PVC lining. In this material, we will talk about how to fix the PVC lining, what are the features.
One of the significant advantages of this material is that it is possible to mount PVC lining not only on walls, but also on the ceiling, and it is absolutely not necessary to prepare a rough surface in advance for this purpose.
PVC lining is quite easy to clean, besides, it is just perfect for rooms where humidity is high (bath, bathroom, sauna, etc.). Variety of textures and a wide range colors will create a unique and pleasant interior in your room.
Tool and material preparation
To cover surfaces with this material, you will need a few tools, namely:

Figure 1. The crate is attached perpendicular to the direction of the lining.
- measuring tool (tape measure, metal ruler, building level);
- electric or cordless drill;
- screwdriver or screwdriver;
- hacksaw for wood and metal;
- stationery knife;
- hammer;
- construction stapler;
- ladder.
Materials:
- wooden bars or slats (for the construction of the crate);
- dowel-nails or self-tapping screws;
- PVC lining;
- fittings for plastic panels
- staples or nails.
Before proceeding with the direct installation of the panels, experts recommend keeping them at room temperature for at least 30 minutes. There is no need to rush to remove the protective film before installing the panels, it must be on them throughout the performance of all work. This will allow you to save the presentation of the material.
You can mount PVC lining directly on the surface of the wall, ceiling or on a pre-mounted crate. It should be noted that when attaching the panels directly to the wall, the surface must be completely flat, free of dust, old wallpaper and various paints and varnishes.
As a rule, for the construction of the crate, bars or slats of wood are used, which must be fixed on the surface to be finished at a certain interval. According to experts, these distances should be:

Figure 2. Types of fittings for PVC lining.
- for the wall surface - no more than 300-400 mm;
- for the ceiling surface - no more than 300 mm.
Wooden bars for the crate must be fixed to the wall surface perpendicularly, relative to the position of the lining (Fig. 1).
In the case when the wall to be paneled is made of wood or any other material (into which it is easy enough to screw screws), then it is best to use self-tapping screws to fix the battens. If the wall is made of brick or concrete, then dowel-nails must be used to fasten the bars.
Back to index
Methods for fixing PVC panels
Before you get started, you need to decide how you will attach the PVC lining to the wall. Today there are several ways of fastening:
- with nails;
- with the help of clamps;
- using a construction stapler;
- self-tapping screws.
If you decide to fasten the PVC lining to the crate with nails, then if necessary it will be impossible to reuse the panels, because the integrity of the material will be violated during dismantling.

Picture 3. The metal profile is used in rooms with high humidity.
Most homeowners prefer PVC fixings panels, use staples that are effortlessly driven into wooden slats using a construction stapler. An equally common way to fix the lining is the use of self-tapping screws.
Whichever of the above methods of fixing PVC panels you choose, you must take into account that the fittings (starting and corner molding) are mounted first. In the event that the lining will close the wall to the very ceiling, it is necessary to initially fix the ceiling molding to the upper lath of the crate (Fig. 2).
After that, we insert the lining strip with a narrow shelf into the fixation element. For mounting on the other side of the lining there is a wide mounting shelf. After making sure that the first strip of the panel is mounted evenly, we insert the next strip of lining. To do this, we place its narrow end in the groove of the already installed panel. It is necessary to try to insert the panels as tightly as possible to each other. The last strip of PVC lining, which will complete the row, is mounted with little effort between the molding and the already fixed panel. You can reduce the width of the panel using a clerical knife by moving it along the panel.
Back to index
Some features of installing PVC panels

Fastening methods: on staples, screws, glue.
When facing the walls of rooms with high humidity, experts recommend using a metal or plastic mounting profile for the construction of the crate. The lining is attached to these profiles with the help of special clips, which not only greatly facilitate the installation work, but also make it possible to dismantle the panels, while maintaining the integrity of the material (Fig. 3).
PVC lining tends to expand with temperature changes, therefore, performing repair work, this must be taken into account. Adjusting the strips in height, it is necessary to leave a small gap.
When a thick timber or planks is used for the construction of the crate, then in the resulting space (between the rough surface of the wall and the lining strip), if necessary, insulation material can be laid or additional sound insulation can be performed.
When finishing the ceiling surface with clapboard, there are also some peculiarities. First of all, you need to decide what distance should be between the draft surface of the ceiling and the lining strips. The size of this space, as a rule, depends on the planned type of lighting in the room. If you want to mount built-in lighting elements, plastic panels should be located at a distance of at least 100-150 mm from the ceiling. Then you can hide all the wiring without much difficulty.
To do this, you need to mark in advance the installation locations of the lighting elements with a marker, cut holes of the required diameter and mount the plinths of these devices. After that, you perform exactly the same steps as when mounting the lining on the wall surface.
If your room has a completely flat ceiling surface, the panels can be installed without the preliminary construction of the crate. To do this, first of all, it is necessary to install a ceiling molding on 3 walls. The panels are fixed to the ceiling with glue. In order for the lining strips to be placed perfectly evenly, experts recommend having a building level at hand.