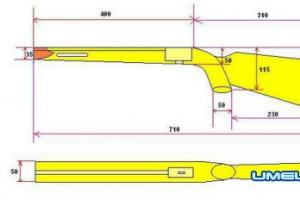
What accessories for the grinder can be made with your own hands. Features of cutting home-made machines from a grinder Home-made stand for a grinder how to make it yourself
The well-known angular Grinder with its ability to cut, grind and clean, it was capable of several more functions. Expanding the functionality requires doing some work with your own hands in order to get the tools you need for the job.

This attachment is a small machine that can easily, safely and very accurately cut metal pipes, profiles or rods. It consists of a base or a small table attached to the ground or to a locksmith's table.
The machine is assembled in a simple sequence:
- install a hinge on the base;
- we weld the carrier pipe to the hinge;
- we attach to the pipe P - a figurative plate for fastening the grinder;
- we put a rubber handle on the carrier pipe;
- install the disk and check its position.
As a result of simple work, we got a machine or stand for a grinder. Now the angle grinder can rise and fall on the hinge on the part installed for cutting. In order for the grinder to rise without loads, we install a spring on the pipe.
Two fixing corners must be installed on the table. At the base of one corner, we make a groove for the bolt around the circumference. It will be needed in the case when the pipe or profile needs to be cut off under certain angle. Then we install this corner with a slot at the same angle to the plane of the cutting disc of the grinder.
Parallel to the corner with an arc slot, we install a corner that can be moved to the part to fix it on the table. The pipe or profile will simply be nested between two corners. This is enough to perform a fast and accurate cut.
By installing a supporting transverse metal bar on the machine table, you can clean the material with a steel brush mounted on the grinder shaft.
Simple cutting machine + (Video)
A cutting machine based on an angle grinder can be made by hand in one day. For the machine, it is necessary to choose a frame - a metal base plate. Attach a hinge to it. Weld a supporting frame with a plate for attaching the grinder to the hinge.
Any suitable part can be used as a hinge. In this case, the hinge is made of swivel hinges passenger car. The hinges have already served their time, but they approached the machine very well.
Do-it-yourself wall chaser from a grinder + (Video)
A strobe is a groove that must be cut in the wall for laying electrical wire or cable. The complexity of this work lies in the fact that the groove must be of constant width and depth. Then the wire will be laid evenly and less mortar will be required for laying.

A wall chaser is rarely used in practice, so it will be expensive to buy it for a home. But it can be made on the basis of an angle grinder - our favorite grinder.
The main task is to install two diamond disc on the grinder shaft with a distance of at least 1 cm:
- install the first disk and fix it with a nut;
- install the second disk and fix it with a nut;
- measure the resulting distance between the disks;
- install protection on the grinder;
- checking the work.
But, if for some reason it is not possible to install two disks on the shaft, the strobe can also be cut using the usual method with one installed disk. You just have to cut the second parallel line.
 Work with a wall chaser is carried out indoors. This creates a huge amount of dust. Not even a respirator can save her. To eliminate this negative phenomenon, it is necessary to make a protective casing that would cover both disks and have a pipe on top for connecting to a vacuum cleaner. There is a similar device in electric jigsaws for collecting small sawdust.
Sometimes to this casing lovers rational use tools fit 2 or 4 rotating rollers. When the wall chaser moves along the wall surface, it will move on rollers, without creating additional loads on the hands.
To manufacture a tool for a wide groove, it is necessary to make special bushings for mounting discs to the desired width. With such a wall chaser, it will be possible to make grooves for laying pipes.
But the protective cover will also need to be made wider. On the casing of the wall chaser for both wires and pipes, it is necessary to install a screw for adjusting the immersion of the cutting tool into the wall. In this case, the casing will consist of two parts connected by a hinge and an immersion adjustment unit.
Milling cutter from grinder + (Video)
Sometimes it becomes necessary to mill a hole or a surface, but there is no familiar milling machine, and there is nowhere to look. But there is an angle grinder - a grinder. This is the solution to the problem. We choose a machine from two options - a movable machine and a movable table.

In the first case, we fix the workpiece or material to be milled, and the grinder is attached in a vertical plane to the frame. On the frame, it is possible to move the plate to which the angle grinder is attached to the left - right and forward - back. In other words, we can move the grinder relative to the workpiece.
In another version, the grinder is fixed rigidly, and the workpiece moves by analogy to the left - to the right and forward - back. These are the main directions for milling. For milling along the up and down axes, it will not be difficult to supplement the adaptor.
Having chosen the option of the machine, you can begin to implement. The only place that will require the involvement of a turner is the cutter holder. It is machined from a hexagon of at least 16 mm, because the grinder thread is 14 mm. Collet type holder. It is easy to manufacture and does not have large beats. A conventional cam chuck does worse.
The advantage of such a machine, as well as all machines based on the grinder, is that they are easily transformed back into the grinder. As a kind of milling cutter from a grinder, you can make a drill.
Pendulum Saw + (Video)
It is not difficult to make tools for a grinder with your own hands. It doesn't even need blueprints. It is enough to know the principle that is embedded in a particular machine. A pendulum saw based on a grinder is no exception. This is the same cutting machine, but its weight is distributed almost in half.
It is somewhat similar to a children's swing. A frame is located on the movable sleeve, and an angular Sander. Any load in combination with a return spring can serve as a counterweight.
Bulgarian in the household is an irreplaceable thing. Quickly polishes, grinds, cuts off the desired workpiece with smooth edges. However, her character is quite obstinate, the speed is high. It's quite difficult to hold on to. If it starts to vibrate, then it is no longer necessary to talk about the accuracy of the work. A tripod or stand for a grinder will help you cope with a powerful tool.
Of course, you can buy a rack at the nearest hardware store, but often, taking into account the power of the available angle grinder, you have to partially modify it. High-quality models are expensive, and Chinese counterparts with stamping from sheet material- unreliable, unstable, quickly flying apart from the strong vibration of the machine. You can make a stand with your own hands, fortunately, there are plenty of drawings, diagrams, master classes, photos today. You can make a homemade product to the conscience, then cut the workpieces with smooth edges if necessary. In particular, the load on the hands, thanks to reliable clamps, fasteners will be significantly reduced.
Benefits of Using a Rack
Often, home craftsmen are faced with the need to cut, cut blanks. Bulgarian is an indispensable thing in the household. But sometimes the work is monotonous. It will be difficult to keep the grinder in one position for a long time and make even cuts on the workpiece in case of vibration.
If you want to make a stable, durable support for a home tool (grinder) with high-quality fasteners, you should take care of selecting the necessary improvised materials: wooden blocks, plywood for stationary installation of the stand on a flat plane, when you no longer have to hold the grinder in your hands and worry about the departure of the abrasive wheel , mutilation.
The main advantages of the rack:
- fast and accurate cutting of light metals ( aluminum profiles, ceramic tiles, metal corners);
- the possibility of locating the angle grinder at the right angle;
- implementation of functions with vertical movement of parts to perform specific tasks in the presence of an angle grinder;
- providing stability to the rotating holder;
- minimizing the risks of a possible statement, falling out of the grinder from the hands;
- no need to constantly hold the power tool in your hands;
- a clear increase in labor productivity and safety at work;
- manufacturing more details in a short period of time;
- accurate placement of the workpiece in a vise in order to cut the desired dimensions.

Isn't it easier to buy?
Someone will say that it is unlikely that a homemade grinder in the form of a tripod will allow you to cut the metal accurately, evenly. After all, the speed of rotation and the speed of rotation of the instrument are elusive to the human eye. Of course, it’s easier to buy a holder in a store and not suffer from making a fixture on your own. However, according to many users, the purchased racks, especially those made in China, need to be improved. Such sheet metal stampings are quite light, short-lived, and quickly fly apart.
Taking into account the fact that tips, master classes, drawings, videos are available today in large quantities, it is quite possible to make an individual mount yourself, taking into account the desired functionality, needs, and personal preferences. The answer, most likely, is unambiguous, that it is better to make a stand for a grinder with your own hands than to buy for a lot of money.

Secure tool holder
Home craftsmen say that the best fixation for the workpiece is a vise, with which the risks of injury will be much reduced, even in the event of a sudden expansion of the disk to the sides. The best option may well be a rotary vise with a longitudinal groove in the base. If you make an oblique cut, you can also expect an increase in the functionality of the device.
For the manufacture of the rack, it is desirable to choose reliable fasteners. The work will require:
- profile pipe (2 m);
- spring to create a counterweight;
- bolts (2 pieces);
- tubes (2 pieces) in the form of bearings;
- metal sheet for mounting a reliable base.
You can make a stand for an angle grinder from improvised materials available in a garage, a private house. You can't do without a welding machine. In any case, such a homemade product will cost less than a purchased one and will be of better quality than a Chinese product in a store. In particular, it is possible to equip the frame of the rack with a handle, for the convenience of controlling the device. Why is it enough to weld a tube (20x20), which will allow you to control the weight of the device, and also give some convenience to work.
As a simple option for homemade, the easiest way is to find a protective cover. Make holes and attach a grinder to it, putting it on bolts with self-locking nuts, then connect it to the frame.
Assembly accessories
First of all, you need to decide what homemade design will be the most suitable. To assemble the frame you will need:
- hardwood, able to cope with any load, without deformation in operation;
- profiled metal pipe for reliable, durable fixing of the angle grinder;
- tool for tightening bolted connections;
- bolts for connections;
- relay 12V;
- metal corners;
- drill;
- nuts, keys;
- chipboard if needed.
Of course, the welded construction will be more durable and should be preferred. But thanks to the bolts, you can make the structure removable with the ability to move to another location as needed.

Assembly
Making a tripod for an angle grinder on your own will allow you to avoid a lot of costs, since factory models are not cheap and rarely have good performance. Of course, some skills from the master when assembling the structure will still be required:
- drilling accuracy;
- ability to work with a welding machine;
- stock of patience;
- minimum experience with angle grinders.
To assemble the rack, you need to follow a number of rules of the instruction, pick up already finished drawing for the frame or develop your own with adaptation to the existing grinder model. To make the rack more convenient and ergonomic, you can view the drawings of factory models and already develop your own, universal version.
It is equally important to first check the working condition of the grinder. If it does not function well, then it makes no sense to build a powerful frame for it. So, the procedure for assembling the structure:
- take on metal pipe, cut into pieces desired length taking into account the drawing;
- make holes in the designated places;
- make 2 frames (upper, lower);
- weld or seat on bolted joints;
- take a metal sheet or chipboard;
- cut the work surface according to the diameter of the rack;
- install on the lower platform of the desktop;
- put on bolts;
- attach the holder to the vertical frame so that the rotation in the form of a pendulum is free;
- install an accurate spring to return the angle grinder to its original position;
- fix 1 end of the spring on the upper end, the other end on the holder;
- take a relay (12V) to increase the level of comfort in working with a grinder;
- connect so that it is convenient to reach the button while holding the grinder in your hands;
- check the integrity of the wiring;
- allocate a separate outlet for the bed;
- take paints, varnishes, a primer for metal and paint the frame in order to give a final, spectacular appearance and protect from rust
- equip the structure with a limiter and a movable ruler;
- check the frame for strength and suitability for work by turning on the grinder at idle.
After all the assembly work has been completed, you can safely proceed to cutting parts with the help of a grinder.
Counterweight
The counterweight is necessary to facilitate the work with the grinder and will serve as an indirect element for safety in case of accidental loss of the grinder from the hands. The main task is to accept vertical position, suspend cutting metal at the right time.
Experts advise equipping the counterweight with a switch in the extreme upper corner and setting it so that the angle grinder can recline 90-110 degrees. This is important for safety makeshift fixture will be firmly held in place, and the angle grinder, if necessary, will immediately turn off.
Today on the Internet you can see many different models of counterweights. Certainly, home master it is worth deciding on your own whether you need a counterweight for the rack or not. Here is a simple option on how to make a counterweight with your own hands. For what:
- choose a spring, taking into account the weight of the tool;
- screw it to the right place, you can look at the photo drawing, how best to put the spring.

Security and protection
The rack must be firmly attached to the frame. For your protection and safety, we recommend:
- securely attach the cable from the grinder to the moving part of the rack;
- fasten the power cord with plastic clamps so that it does not interfere at hand and does not fall under the cutting tool when turned on;
- inspect the cutting wheel before starting work for possible damage, chips;
- use protective goggles at work so that metal particles do not get into the eyes.
In the photo you can see how to make the right protective devices for ease of use. When choosing a tripod for a grinder, first of all, you need to proceed from the diameter of the disk. It is the frame that must correspond to this diameter. A pendulum stand can be a good option, which will simplify the sawing process with a grinder. Moreover, the pendulum system will allow to carry out work of any complexity. It is not difficult to make such a model. You will need: a spring, a metal profile, a welding machine, corners, a pendulum.
Special attention should be paid to the iron table, on which the entire structure will be mounted. It is worth checking for strength, stability, unsteadiness. When choosing a rack, you should not forget about safety. When manufacturing, take into account all the necessary, suitable parameters.
A universal hand grinder - a well-known grinder (the first samples of which from the Bulgarian company Sparky appeared almost 50 years ago) was conceived as a portable drive device for various operations machining. However, as the production capabilities of the tool improved, it became clear that in some cases the grinder needed reliable support. Buy a ready-made bed for a grinder or make it yourself? Today, we will examine this issue.
Industrial frame structures
A bed for an angle grinder will be required in the following cases:
- Cutting / grinding of a structure made of difficult-to-cut material, or with a large surface area.
- Higher cutting accuracy is required.
- It is necessary to process several products with the same parameters.
- The workpiece material is discontinuous in cross section, and the presence of voids and shells can provoke vibration, shock and, consequently, a sharp movement of the machine body.
The frame for the grinder is produced by almost the same companies that produce the tool itself. Price for the simplest design, depending on its manufacturer, does not exceed 2500 ... 3000 rubles, but with an increase in functionality, the price of the bed increases to 20,000 ... 25,000 rubles, and not every home master can afford such costs. In addition, such racks are not particularly versatile, and, of course, do not take into account the individual needs of the user.

Such beds consist of the following elements:
- The base plate, which is made of thick steel sheet and is equipped with T-slots for fastening the workpiece. Maybe a cast iron stove;
- The rack itself, on which a fastening device for angle grinders is provided specific model;
- Adjusting devices that allow you to rotate the rack itself, as well as change the location of the angle grinder vertically;
- Optional: clamps or clamps for the workpiece, the dimensions of which are unified with T-slots. Sometimes the kit additionally includes a bench vise with a set of profiled stands;
- Rotary handle, with the help of which the working movement of the grinder itself is carried out;
- Measuring devices, often an angular or regular ruler;
- In especially advanced models, there is also a return mechanism with a spring.

Positive features are the possibility of clean cutting of pipes from round profiles, which is problematic and even dangerous without a stable clamping of the workpiece. The frame for the grinder is also necessary for corner cuts of any profile.
The technical capabilities of these devices depend on the area of the supporting surface of the plate and the height of the angle grinder in the frame. Usually, the parameters are calculated for a grinder disk with a diameter of up to 250 mm, and for the dimensions of the fixed part of the workpiece no more than 100 ... 150 mm.
We design our own version of the bed for the grinder
Taking as a basis the above completeness of the frame for the grinder, everyone will be able to modify the design to suit their needs. Moreover, many of the details of a home-made device can be used from other mechanisms. For example, the base of the desktop is quite suitable as a support frame. drilling machine or a decommissioned slab from a small universal assembly device (USP), which already has T-slots.

The work includes the following stages:
- Development of technical specifications and drawings. The main parameters of a home-made frame for a grinder will be the maximum diameter of the working disk, the dimensions of the angle grinder itself and the largest section of the workpiece that you have to work with.
- Selection of blanks for the manufacture of the frame. This takes into account the dimensions of the section of the parts, and the material from which they are made. For example, the welded version is less reliable due to periodically occurring vibrations and dynamic loads, therefore, low-carbon steels are preferable to steels such as St.5, steel 45, etc., whose mechanical strength is higher. For the same reasons, tubular profiles are more appropriate than corners or I-beams.
- Making a fixture, relying mainly on one's own capabilities (although a number of parts, in particular, for measuring dimensions, fastening elements for an angle grinder on a rack, etc., are best ordered in professional workshops).
- Finishing (stability check, painting, possibly heat treatment), as well as installation of the control system.
At the same time, it is necessary to provide for the possibilities of the frame for the angle grinder for the future, i.e., the suitability of the device for performing other operations with it, for which any angle grinder is intended.
Further questions will be considered on the assumption that all components of the bed will be manufactured from scratch. For example, the following construction can be taken as a basis (see Fig. 1).

Figure 1 - General view of the frame assembly
From fig. 1 it follows that the bed of this design consists of:
- A support frame that can later be installed on a workbench or any flat surface. The frame is welded from shaped pipes with increased rigidity, including during vibrations.
- Round universal fixture with 8 mm grooves, on which products weighing up to 12 kg can be installed. Installed on USP Rotary table with a screw control mechanism - a handwheel and a reading dial. As a turntable, you can use a hub from any passenger car that fits in size.
- Table made of thick-rolled steel with mounting holes.
- Locksmith vise for the workpiece to be processed (installed on the cantilever to balance the overturning moment from the USP).
- A vertical rack welded to the frame, to which the grinder itself is attached.
- return mechanism.
- Swivel arm with tool holders.
The turntable itself is supplied with a ruler, which should count the angular and linear movements. Its location is clear from Fig.2. Instead of the factory design of the reference ruler according to the drawings, you can also make a home-made one using a set of two ordinary locksmith rulers and an angle meter. For less complex work, and is suitable.

Figure 2 - View of the desktop in the installation position
When making a desktop with your own hands, it is necessary to provide for radius rounding of the corners and the ability to move a bench vise without violating the overall alignment.
Manufacture of the main components of the bed
The greatest technical difficulty is the manufacture of the rotary lever. It should provide reliable clamping and fixation of the angle grinder, its rotation at an angle of up to 90º, as well as the return of the grinder when the load is removed from the rotary handle.
The design of the swivel arm, designed for mounting on the rack, is shown in Fig.3.

Figure 3 - View of the frame from the side of the rotary arm
The swivel arm includes a vertical stand, which is rigidly fixed to the base plate, a console with an axle and a bearing assembly (with their help, the angle grinder will be rotated), a clamping device and return springs located on the opposite side of the console.
In order to securely fasten the angle grinder to the considered design of the frame for the angle grinder, several solutions can be used:
- An open prism, welded from corners, the opposite sides of which are compressed by a clamp;
- Steel ladders with which the tool will be wrapped around in the required section;
- Bolted fixation with the help of two bolts with a persistent thread, which are placed on both planes of the corners, and provide a clamp for the "grinder" by rotating the high nuts GOST 5931, as shown in fig. 4.
It is obvious that in the latter case, the ease of installation and alignment of the angle grinder will be the best (the option with a clamp will be very difficult, and the ladders can be unlocked during prolonged vibration loads).

Figure 4 - Attachment of the "grinder" to the swing arm
The final stage in the manufacture of a home-made bed for an angle grinder is the installation of elements to turn the unit on / off. Experts advise not only to provide remote shutdown of the angle grinder, but also to install a foot pedal for this, since the hands of the worker are busy, and a sudden problem with cutting or grinding is fraught with injury to the worker. To do this, the control of the device is provided through a magnetic starter.
The assembled frame structure for the grinder is first tested with manual rotation of the disk. The purpose of the check is to find out the source of possible beats of the device if an error is made in its centering. Then the angle grinder is turned on at minimum speed, and if vibration does not occur during long-term operation, it is possible to check when cutting a wooden and then a steel workpiece.
From a safety point of view, it is better if the frame for the angle grinder is partially covered with a removable casing, which can be made of high-impact plastic.
Videos of exploited varieties of home-made beds are presented on the Internet in a wide variety. One of them is below.
Every self-respecting master has at his disposal such a type of tool as an angle grinder or grinder. Everyone knows about the range of possibilities of this tool. Many are tempted to make a cutting machine from a grinder with their own hands, which is quite real. You can show ingenuity and imagination to make homemade machine, but it is better to use proven schemes that are offered by experienced specialists.
Why make a machine from angle grinders
A cutting machine is a useful and necessary thing, and not only in industrial conditions, but also in the economy. With this useful tool, you can accurately cut parts and workpieces. This is achieved due to the reliable fixation of the cutting disc, in the spindle of which you can install not only abrasive wheels for cutting metal. The stationary machine can be used for cutting tiles, bricks, marble, granite and other similar materials, while using special diamond-coated wheels in the design of the tool. If necessary, such a machine can be used for sawing beams, boards and other wood blanks.
Many people who have more than once faced the need to make an accurate cut of the workpiece want to know how to make a cutting machine yourself from a grinder and improvised materials. Holding the grinder in your hands, you can also make an accurate cut, but it is more difficult to do this, since the tool has to be held exclusively with two hands. With the help of a home-made cutting machine, you can not only perform, but also simplify the following work:
- Cut sheet material, such as galvanizing used for chimney insulation and other purposes
- Cut ceramic tiles and tiles - keep in mind that the cut can only be made straight
- Cutting materials at different angles
- Sawing a metal profile, pipe, wooden bars, boards, etc.
To manufacture a machine from a grinder, an appropriate approach is needed. After all, the tool itself is very dangerous, so the slightest miscalculation can lead to the fact that the master will be seriously injured. The consequences of working as an angle grinder in case of non-compliance with TB are known, therefore, at the beginning, before building a homemade product, it is worth noting the following:
- Only with the correct manufacture of a stationary cutting machine, you can be sure of its reliability and safety.
- If you planned to do it, then you need to calculate each step so that trouble does not happen during operation.
- Using the machine is in some way safer than working with the tool while holding it in your hands. However, it is necessary to be aware that the grinder is a mobile tool, and making a homemade product is already a safety violation.
- For manufacturing, it is necessary to use materials of appropriate reliability, corresponding to the power and dimensions of the main power tool
Having dealt with the need to manufacture a machine, you can get down to business.
This is interesting! If you can't decide which is better - buy new machine or to make it yourself, then the second option is more preferable, since the cost of a factory device will cost at least 10,000 rubles. At self-manufacturing no expenses will be needed, since the grinder is already on the farm, and the composite materials can be found in the garage.
Making a homemade machine from a grinder
Making your own machine from a grinder is not difficult on your own. Moreover, there is a lot of variety of manufacturing options, which depends on the available materials at hand and imagination. There are two types of cutting stationary machines from the grinder:
- Simple - it received such a name for one reason, which is not only the ease of manufacture, but also the minimalism of the device itself. The tool is attached to the workbench with additional materials, and you can use it
- Complicated - it is rational to manufacture such machines if you plan to use it often for different actions. In most cases, a simple device is enough for a home garage, the manufacture of which takes a little time, effort and consumables.

In order to make a cutting machine from a grinder with your own hands, you will need consumables, which are metal plates, as well as profiles and fasteners - bolts, nuts and washers. From a specialized tool, you only need an electric drill and a welding machine. Learn more about how to make the simplest option cutting machine from a grinder, consider below.
Option 1 - an easy way to make a cutting machine out of an angle grinder
A simple way to make a homemade product involves making a base on which fixed connectors for a movable plate are attached. So, in more detail about how to make a machine from an angle grinder:

For convenience, a handle can be welded to the movable bar, and an auto-return spring can be installed, which will return the tool to its original position, that is, move it up. The photo below shows a finished installation for cutting from a grinder. As can be seen from the example, for its manufacture, a minimum of effort and materials will be required, and as a result, a stationary cutting device is obtained. different materials.

When constructing the device, do not forget that safe operation depends on how to fix the grinder. It must be securely fixed at 2-3 points, which will exclude its movement during work, as well as “flying off” from the movable bed. When installing the tool on a movable frame, it is necessary that the position of the angle grinder be strictly at a right angle, that is, the circle must be located strictly in a vertical position.

The resulting device is suitable for processing various materials from wood to durable stone. When working with a tool, do not forget to use safety glasses, gloves, and overalls. Instead of a workbench, you can use a wooden or steel frame on which to implement the idea.
This is interesting! Similar simplest beds for angle grinders are manufactured at the factory, so if you have an extra 2-3 thousand rubles, you can purchase a ready-made base and use it right today. However, there are no difficulties in self-manufacturing, therefore it is necessary to decide in each individual case on your own which is better.

Option 2 - how to make a pendulum saw easily and quickly
With a welding machine and consumables, you can make a stationary grinder machine in a matter of hours. And for this you don’t need to buy anything, since the necessary tubes, fittings and profiles can be found in a garage or a pile of scrap metal. To build the simplest cutting machine, using angle grinders as the main tool, you will need to use the following details:
- Metal profiles 150-200 mm
- Sleeve length 10-15 cm
- Hairpin 20 cm long and 8-10 mm in diameter
- washers
- Metal corner
- Sheet of metal 2-3 mm thick, which will act as a base
So, to make a simple homemade product, you will need to perform the following steps:
- Cut the stud to the required length, then place the sleeve inside (it should move freely along the stud), and tighten the nuts onto the ends of the protruding stud. Tighten two nuts on both sides, as the second will play the role of a lock nut
- The nuts must not be screwed in completely, they must not come into contact with the sleeve
- The resulting structure should be welded to the steel sheet. At the same time, it is important to grab the nuts, and the sleeve must remain movable, that is, move freely
- At the next stage, it is necessary to make fasteners for the grinder. To do this, you need metal profiles, as well as washers that will play the role of brackets
- Cut to the required length (it all depends on the tool used, but for a low-power grinder, the profile length is 15-20 cm). Weld washers to the ends of the profiles. It is recommended to use at least 2 mounts for the grinder, but three is better
- The angle grinder has threaded holes for connecting the handle. We use these holes to attach the tool to the movable base using pre-prepared brackets.
- First, the brackets are attached to the tool using bolted connections of the appropriate size, and then the reverse ends of the profiles are welded to the sleeve. As a result, we get a finished machine, which can be made literally within an hour
The photo below shows the design of a home-made machine from a grinder with detailed description necessary materials. Using the instructions, and for someone, a diagram is enough to make a home-made cutting machine. At the same time, it is important to take into account that the casing for the angle grinder must be mandatory, otherwise the risk of serious injury increases. It is strictly forbidden to operate the tool without protective clothing not only on a person, but also on the device itself.

The simplest device is ready for operation. The angle in the design of the machine is used as a guide for centering cutting materials. It is also necessary to make a straight hole in the iron sheet, where a part of the disk will “enter” when sawing blanks.
Option 3 - an even easier way to make a cutting machine from an angle grinder
Many do not have welding machines or do not know how to use them, so if you belong to the category of these people, then you should not despair. You also do not need to ask your friends and neighbors to make a machine. It is quite possible to do without welding, and bolts with nuts will be used as the main connectors. So, to design the simplest cutting machine from a grinder, you will need the following consumables:
- Corners - and a small number of them up to 1 meter. If there are pieces, then it's even better. The thickness of the corners is standard 2-3 mm
- Steel tube 30 cm long - will be used as a handle on which the grinder will be attached
- Steel sheet 2-3 mm thick and of any size, but not less than 20x20 cm
- Bolts with nuts with a diameter of 8-10 mm
Let's start making a homemade tool. The manufacturing process is as follows:
- First you need to attach a 15 cm long corner to the steel sheet
- Attach another corner perpendicularly to the wall of the lying corner, using bolts and nuts for this. If there is welding, you can make tack welds
- Attach the tube to the perpendicularly installed corner using all the same bolted connections
- The tube should move freely, so it is not necessary to tighten the nut on the bolt. Instead, it is necessary to lock the fixing bolt with another nut.
- Connect two steel plates measuring 5x6 cm to the tube at a distance from the junction. These plates will attach the grinder to the handle
- Attach the angle grinder to the casing with pre-prepared steel plates
As a result, we get the simplest cutting machine, the photo of which can be seen below.

There are many manufacturing options for similar designs, so it all depends on what you want to end up with and what consumables are available. It is not very convenient to work with the version of the cutting machine discussed above, since it is necessary to constantly hold the tool (due to the lack of a return mechanism), but this is easy to fix. A spring must be attached to the protruding part of the tube, which will return the tool to its original position, eliminating the need for the master to hold the running unit.
How to make a start button for a pendulum machine from an angle grinder
The angle grinder works at the push of a button. Moreover, the speed of rotation of the spindle depends directly on the pressing force of the button. This means that an adjustment mechanism is built into the button, the operation of which facilitates the operation of the tool. When operating an angle grinder on a stationary machine, it is necessary to think over the starting system so that you do not have to hold the handle with one hand and press the button with the other.

If the tool is equipped with a conventional button, which is automatically fixed when it is turned on, as, for example, in the first version of the construction of the machine, then there are no difficulties. First, the tool is turned on, and then work can be done. However, most angle grinders are equipped with self-shutoff buttons that must be held by hand during operation. There are two ways out of this situation:
- Use ties (for example, plastic) or clamps of the appropriate diameter. They hold the button in the pressed position. At the same time, it is also necessary to take into account the latch, which is responsible for the self-switching of the tool. Both the latch and the button must be pulled together with a clamp, screed or other similar materials. In this case, the principle of operation of the device will be as follows - if you need to start the tool, you need to plug the plug into a socket or make a switch
- It is rational to remake the starting system if the tool is planned to be used more often as a cutting machine than an autonomous grinder. To do this, it is necessary to bring the wires from the angle grinder to a separate switch, which will turn the tool on and off if necessary.
The power button, if it is displayed, is best located on the handle. Homemade machine does not require high costs for its manufacture, which, in fact, is its main advantage.

Important points in the construction of a pendulum machine
The type of tool in question belongs to the category of dangerous ones, therefore, when constructing equipment, the following main points are taken into account:
- The manufacture of the frame is the basis responsible for the reliability of the installation. It is impossible to save on the manufacture of the frame, therefore only steel materials are used, the thickness of which is at least 2 mm
- Frame - the design of this part may be different, but the most important thing is to ensure the mobility of the cutting tool. This is achieved through the use of different materials, but in any case, it is necessary to think over the quality of the swivel joint well, since your life depends on it. It is better to spend more material, but make a quality and safe cutting machine
- Tool mount - angle grinder is fixed directly on the moving part. Moreover, the fixation should be as reliable and of high quality as possible. When working with an angle grinder, “backstrokes” can occur, which are dangerous because the machine can simply be damaged, and the master who performs the manipulations will suffer from this
- Provide for the arrangement of a counterweight - this is small, but important element, which allows the tool to return to its original position as unnecessary. This will eliminate the possibility of damage to parts of the human body.
- Protective cover - it must be mandatory, and it does not matter what design of the machine is invented, but it is strictly contraindicated to use the device without a protective cover on
- The presence of a ruler - this will improve the accuracy of the work performed, which is important when cutting parts such as tiles, ceramics, and metal
- The starting device is also a kind of device that affects safety. The control button must be in close proximity to the master performing the work. This will allow you to quickly respond at the right time by turning off the power supply to the tool.
In addition to options when the machine has a movable part, there are also ways to make cutting devices with the tool located at the bottom of the bed or workbench tabletop. However, this option is only suitable for cases where it is planned to saw wood. Below is an example of how to make a home sawmill quickly and easily from a grinder. Details on the manufacture of home sawmills can be read
- Having a stationary machine in the garage, you can quickly, and most importantly, cut different materials with high quality.
- Obtaining a high-quality and even cut, which makes the device perfect
- Cheapness - if there is a grinder, then the cost of manufacturing the machine will be minimal
Now let's find out what are the disadvantages of the home-made device in question:
- Low reliability - even with the most competent approach, it is not excluded that a person can get various injuries just because of working on such homemade equipment. To protect yourself, you need to work in protective clothing
- The complexity of transporting the device - it all depends on its size and weight. Only if the machine is called stationary, then it is intended for operation in only one place
If you already managed to manufacture the type of equipment in question, then it will not be difficult to figure out the correct operation of it. Already at the first test of the tool, you can feel how effective its work is. Below is a selection of photos showing options for homemade cutting machines from grinders. In addition, such a tool as angle grinder is fraught with a lot more interesting ideas to expand the functionality, but that's a completely different story.


A self-made cutting machine from a grinder (angle grinder), which can be made and installed without problems in a garage, is a solution to problems in working with wood or metal for those who often hold this tool in their hands.
Do-it-yourself grinder tools that you can make with your own hands can make working with this tool much easier.
1 Highlights
The main advantage of the grinder is its mobility. But in some cases, when the workpiece is not fixed, and it is not possible to hold it due to the lack of an extra pair of hands, natural vibration appears. Such a phenomenon can lead to sudden destruction of the working disk, which is fraught with injury during the expansion of its fragments.
If it is necessary to cut off several parts of the same length with a grinder, and even strictly along the perpendicular, it becomes difficult to control the passage of the disk and take into account its thickness, in order to comply with the specific dimensions of the cut part.
In addition, there is always the danger of kickback during the sawing process, which can also lead to injury.
In order to eliminate these inconveniences in work, both for wood and metal, you can use tools from a grinder, for example, a home-made stationary cutting machine from a grinder.

The main advantage of a cutting machine from a grinder is its mobility.
With them, the angle grinder will work like a miter saw, which is much more convenient and safer.
1.1 Cutting machine (simple version)
There is a very simple way to create a fixture from a grinder, which will greatly simplify and save energy when working on wood or metal. In order to make a homemade machine, it will take only a few working hours and the simplest components:
- a pipe segment 1.2-1.5 meters long;
- metal plate 8×15 cm;
- steel corner (arbitrary sizes);
- spring;
- movable shaft.
The assembled structure is a pipe, to which a plate with holes for attaching a grinder is welded, it is also a lever (handle) for raising and lowering.
The end of the pipe, on which the angle grinder is installed, is connected through a rotary shaft with a corner, which is fixed on the desktop or just on the floor. A spring is installed in the same part to facilitate lifting the lever.

The main difficulty, with this version of the fixture for the grinder, is the correct fixing of the tool. The saw (disk) must descend and rise along a path strictly perpendicular to the base (angle with a rotary shaft) and exclusively in one plane (without backlash).
Read also.
1.2 Cutting machine for precision work
More difficult option grinder tools that allow you to do precise work. For its manufacture you will need the following components:
- metal corner;
- profile pipe (rectangular or square section);
- metal sheet for the table (an option with plywood or chipboard is possible);
- channel;
- two identical bearings;
- small diameter pipe;
- spring;
- starting relay;
- control pedal.
Before starting work, you should draw up a plan with parameters that are suitable for specific placement conditions and the type of work performed. You can copy it from a ready-made fixture from a commercially available grinder, or study all the options offered on the Internet and choose the most suitable one.
First you need to make a frame, which consists of two frames interconnected on a rotary shaft. So they can fold like the cover of a book. A sheet metal or plywood sheet (chipboard) is laid on the lower frame. Upper the frame must have fastenings for fastening the grinder, which will securely hold it in a stable position under any load.
To fix the workpieces, when working on wood or metal, it is necessary to provide a fixing device. It could very well be an ordinary clamp. It should be welded to the bottom frame.

For easier lifting of the upper frame, as well as for autonomous fixing it in the upper position, you should install a sufficiently powerful spring that will be able to lift the weight of the upper structure (frame with a grinder).
For taking measurements and setting the exact parameters, a ruler with a retractable limiter is suitable. This will ensure that the work is done correctly.
In order to have both hands free when turning the machine on and off, it is recommended to install a foot pedal (switch). To do this, through a low-voltage relay (12V), a power connection is made to the angle grinder. This measure is necessary to improve safety and ease of management.
1.3 Milling machine
The angle grinder is a very versatile tool. In urgent need to do milling machine from a grinder with your own hands will not be a burdensome business, since The design is very simple and does not take up much space. At the same time, you can use it for milling work on metal not regularly, but as needed.
Necessary materials:
- metal plate at least 3 mm thick;
- a piece of a profile pipe of rectangular section with a length of 20-25 cm and a width of at least 5 cm;
- two metal corners;
- fasteners.
Every master has his own workplace. As a rule, this is a table or workbench located in a room where noisy work can be carried out (garage, barn, etc.). It is such a table that will be needed for a device that will allow milling work on metal.

On the edge of the left near corner of the desktop, a plate bent at a right angle is installed for mounting the grinder. The principle is that the fixed tool should protrude from the edge of the table just as much as the disk needs to rotate freely.
To do this, a medium-sized disk is selected, and in the future, without moving the attachment of the grinder, a larger or smaller diameter cannot be used.
After the grinder is installed and fixed, a profile pipe is installed. It should have a cut with a depth of 2.5 cm and a width of 2 mm more than the thickness of the working disk (1 mm on each side). The pipe is welded to the corner, which, in turn, is mounted on the table in front of the grinder mounting plate.
Installed fasteners must be positioned in such a way that so that, hanging from the edge of the table, the angle grinder with its disk would go into the cut of the profile pipe.
Thus, it turns out that during rotation, the disk is surrounded on three sides profile pipe to a depth of 2.5 cm. This allows you to work on metal, holding the workpiece in your hands and resting it on a stand (profile pipe).

This kind of home-made installation can also work as a cut-off saw, and in some emergency cases, it may well replace a lathe.
But not for metal, but for wood, if you provide for the presence of a stop for the cutter and a movable element for fastening the workpiece.
2 Precautions
Since the speed of rotation of the blade is much higher than that of a conventional circular saw, kickback is possible if it hits a hard spot.
Before starting work, it is necessary to let the machine run for several minutes in idle mode in order to make sure that the disk has enough space during rotation and does not cling to any obstacles.
2.1 Do-it-yourself cutting machine from a grinder (video)