How to arrange a water heated floor with your own hands
The usual batteries, which for a long time acted as the only source of heat in the apartment, were replaced by more innovative methods - underfloor heating systems. And it is no longer uncommon that the owners, when arranging their apartments, install a water-heated floor with their own hands.
The key to the smooth operation of the "warm floor" system is the competent choice of equipment and compliance with the installation technology.
Components of the heating system
The principle of operation of a water heated floor is simple. Pipelines are laid in several rows under the floor covering, through which hot water is launched. The circulating moisture gives off its heat to the floor, gradually warming up the room.
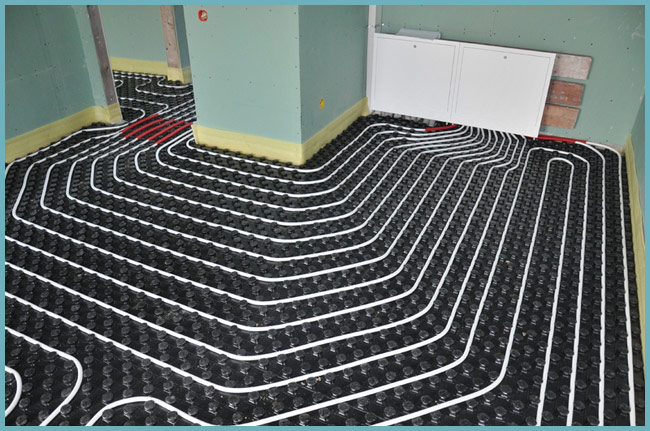
Laying pipes for underfloor heating
In terms of installation, a water system is a relatively inexpensive option compared to the same infrared, film or electrical counterparts. If you install a water-heated floor with your own hands, the expense item can be completely reduced to a minimum.
The main components of the heating system are:
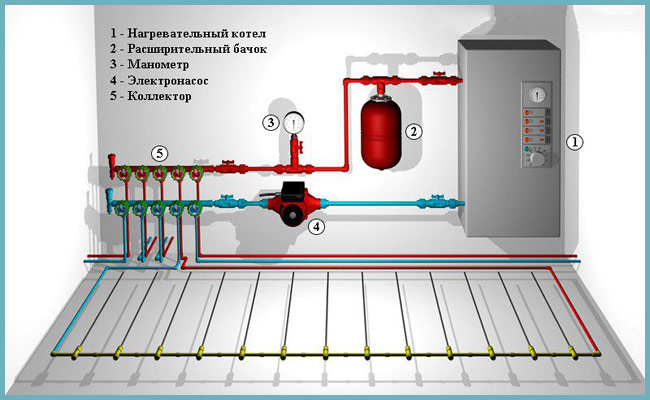
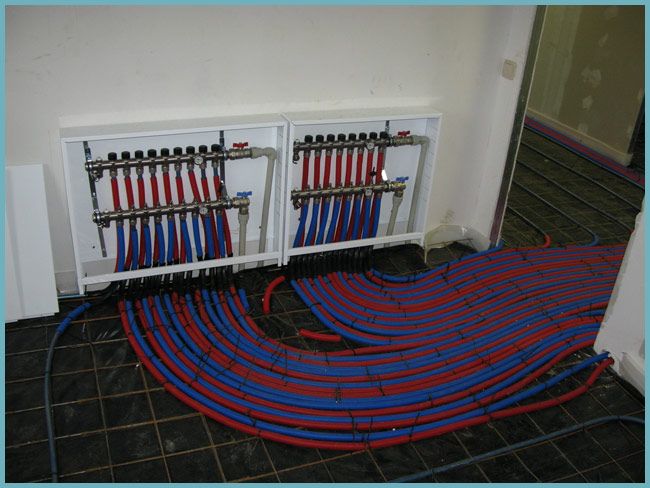
Pipes for underfloor heating
Water floor heating calculator
Before laying the water floor heating system, it is necessary to make calculations so that our system has the correct parameters and structure, this will help us.
Laying patterns: popular options
The uniformity of heat distribution in the room largely depends on the installation method. Therefore, the installation of a water-heated floor with your own hands necessarily includes a planning stage.
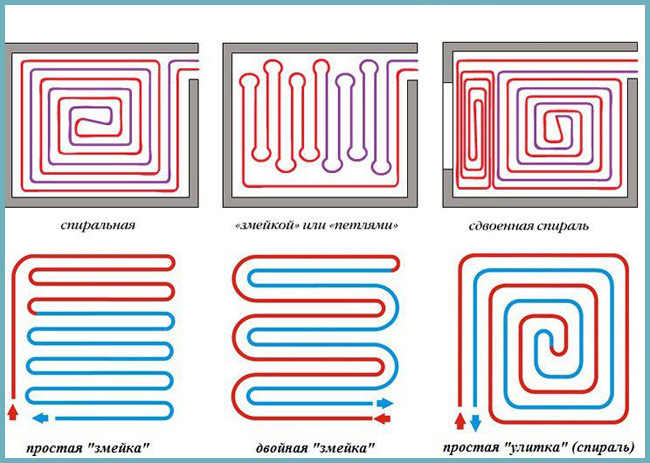
Most often, three installation schemes are used:
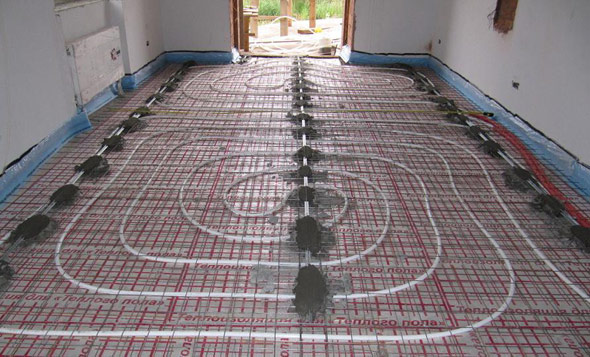
- Snake - involves the placement of pipes along opposite walls in the form of a wavy line. It is well suited for most rooms with a small area.
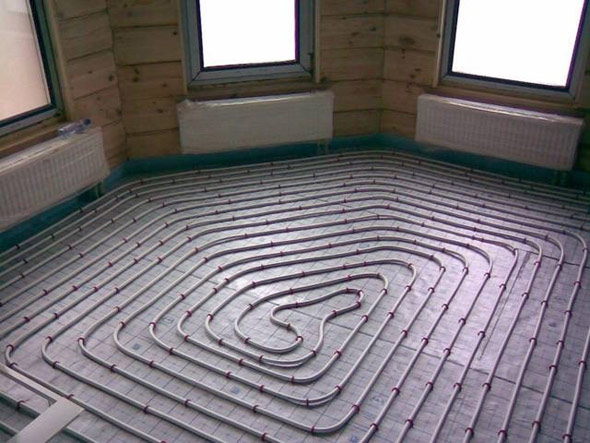
- Snail - involves laying pipes around the perimeter of the room, placing them through a row and leaving room for a return stroke. Each subsequent circle gradually narrows towards the center. Thanks to this type of laying, a decrease in the return temperature can be significantly compensated for by the high temperature of the flow pipe.
- Combined - combines elements of both schemes.
Scheme: underfloor heating installation systems
The installation scheme is created according to the principle of dividing the room into so-called fields, between which expansion joints are provided. The division into sections allows you to compensate for thermal expansion.
The area of one plot with an aspect ratio of 1:2 can be a maximum of 40 m2. Expansion joints are gaps between adjacent sections of the screed, as well as adjacent walls.
Attention: The pipe laying spacing is a standard parameter and it is 15, 20 or 30 cm. By making it a little wider, you can get the effect of a "thermal zebra" in which cold and warm stripes are clearly distinguished on the surface.
In a smaller step, pipes are laid only in rooms on the ground floors of the house and in areas of premises adjacent to the outer walls of the house, which have the greatest heat losses. When drawing up a wiring diagram, two adjacent steps can be combined.
When installing water heating systems, the role of the coolant is played by water, which wastes heat with every meter. Therefore, the maximum length of each circuit should be no more than 100 m, but the size of 60-80 meters is still considered optimal.
Underfloor heating under concrete screed
In this case, the boundary value of the area covered by one circuit can be no more than 50 m2.
Tip: For an area of \u200b\u200b60 m2, it is better to make two such circuits, since it will be much easier for the pump to serve two short circuits than one long one.
System installation methods
Water heated floor can be installed using "wet" and "dry" technology. The first involves the placement of heating elements laid along the contour under a concrete screed. The second is carried out by arranging the flooring on wooden or polystyrene foam plates.
Making a concrete screed
Installation of a warm floor in a concrete screed is carried out in several stages:
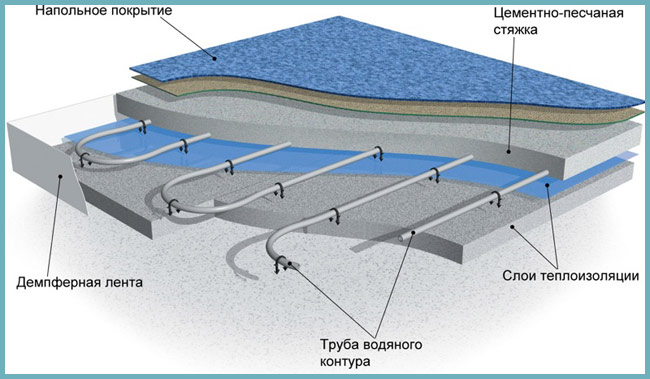
Scheme: components of a warm floor
- Foundation preparation. When planning to install a water-heated floor with your own hands, the first step is to clean the surface of debris and dust. Then check it for height differences and eliminate irregularities.
- Insulation. In order to prevent heat losses “to the floor”, a substrate is laid on the prepared base - a layer of porous insulating material. The function of an insulator can be performed by foam sheets with a thickness of 30-50 mm, polystyrene or penofol. The thickness of the insulating substrate is selected, focusing on the thermal load parameter: the higher the temperature of the pipes, the thicker the insulation layer is made. the resulting thermal expansion of the screed between the sections and along the perimeter of the heated room line the damper tape to the entire height of the future structure.
- Reinforcement. It is performed using a grid measuring 150x150 mm and a bar section of 5 mm. When laying out the reinforcement, intersections with the damper tape should be avoided. Some masters advise to carry out reinforcement after the installation of pipes, believing that this will make it possible to more evenly distribute the load on the structure.
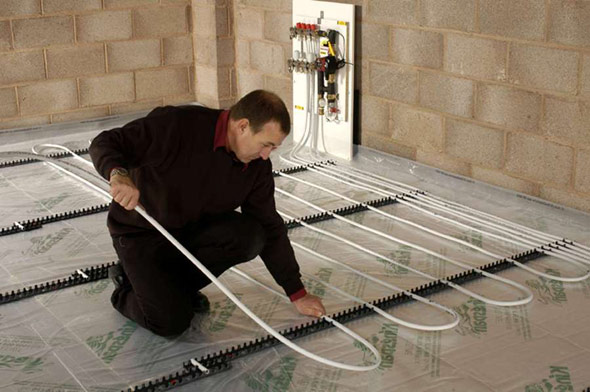
- Pipe laying. First of all, the pipe is brought to the outlet of the supply manifold, and only the field of this is laid out along the contour according to the wiring diagram.
Video: waterproofing device and pipe installation
The heating elements are attached to the reinforcing mesh by means of clamps or a clip. But the fastening should not be rigid, since the pipe can expand during the heating process. On average, with a step of 20 cm, 5 linear meters of pipes are used per 1 m2 of area.
Having laid the pipes along the entire length, they are brought to the outlet of the receiving manifold.
Tip: To prevent damage to the heating elements in the places of compensated seams, it is better to put on corrugated sleeves on them.
- Connecting to the system and checking the functionality. Depending on the design solution of the system, the connection scheme can be parallel or series. For apartments where central heating is used as a heat source, it is worth choosing a parallel scheme. Although it is not very efficient, it does not provoke a decrease in pressure in the heating system. The laid pipes are connected to the collector. In this case, the free ends of all circuits are connected by means of compression fittings to the supply outlet, and the end of the pipeline is connected to the return outlet in the same way.
Video Tutorial: Hydraulic System Test
- Upon completion of the installation, pipes are pressure tested, revealing expansions and mechanical damage to products. It is performed under a working pressure of 0.3-0.4 MPa for several hours.
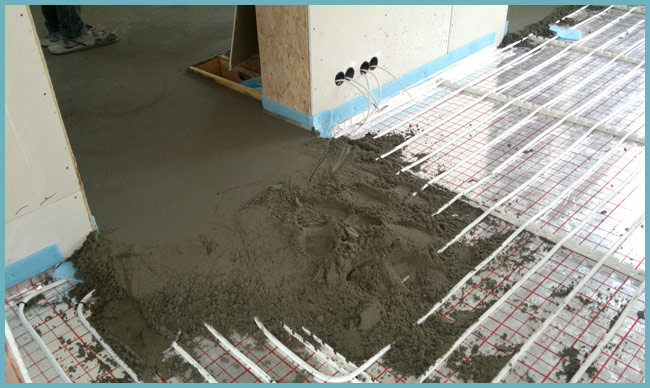
- Screed filling. After making sure that the system is functioning correctly and without lowering the pressure in it, the concrete screed is poured. Both a special mixture and M300 sand concrete are suitable for the mortar, which can be purchased at construction centers. The thickness of the pour should be 2-3 cm higher than the reinforcement and can reach 40-70 mm. .e not earlier than in a month. Attention: To speed up the hardening process, the concrete screed must not be forcibly dried, otherwise it will crack.
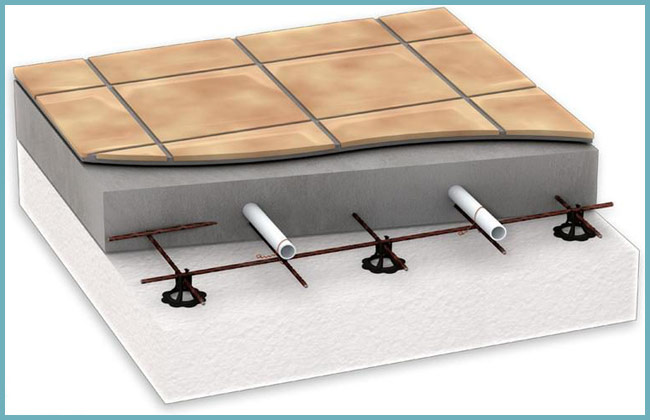
Arrangement of the flooring system
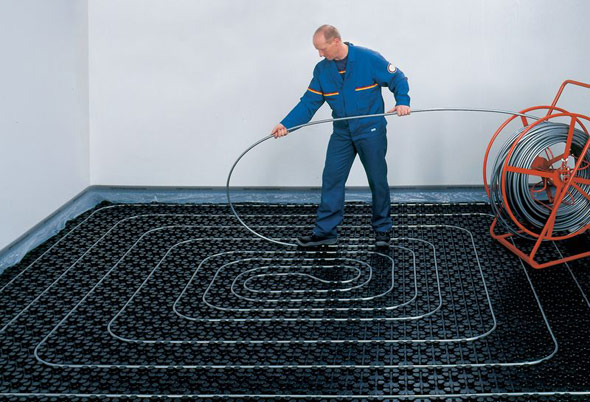
This system is easier to install because it does not involve the use of "wet" processes. As a coating, polystyrene plates with a size of 300x1000x30 mm are often chosen, in which grooves are provided for fixing aluminum plates. They are located at an equidistant distance along the entire area of the plates. Pipes are simply snapped into these heating plates.
After laying the pipes, check the performance of the system. The surface is covered with soundproofing material and a fine finish is performed.
Arrangement of a coupler over a heat-insulated floor
By the same principle, installation in the grooves of wooden plates is also performed. The only difference is that before installing wooden boards, a substrate is necessarily made, laying a layer of insulation.
You can fill the system with tap water or distilled water. But this must be taken into account at the design stage.
As a decorative finishing coating, it is better to use a laminate, traditional parquet or a wooden board. When planning to decorate the floor with ceramic tiles, using material up to 30 mm thick, or laying linoleum, it is advisable to additionally lay 10 mm GVLV plates before finishing.
How to make a warm water floor with your own hands: video
Warm water floor: photo