How to fix a toilet flush
If you are installing new plumbing in your home, including a toilet, be sure to pay attention to the correct and reliable connection of all components of the equipment. The uninterrupted operation of the device depends on the tightness of the connections of the nodes.
A well-functioning toilet brings a high level of comfort to your home. However, any plumbing can break. Especially often troubles occur in older devices. Poor water quality has a devastating effect on the components of the toilet drain system. Hard water with foreign impurities gradually disables equipment. Every homeowner should know how to fix a toilet cistern.
Drain tank device
At first glance, the toilet flush system looks quite simple - it is a faience or plastic container that automatically fills with water, which is then used to flush sewage.
The main components of the toilet bowl
- Fittings responsible for filling the tank with water
- The mechanism that initiates the draining of water from the tank (rod / lever or one- / two-mode button).
Such basic elements of the drain tank are available in almost all models, even in old devices of the Soviet period. They may differ in materials of execution and in appearance, but their main tasks: controlling the set and initiating the flow of water remain the same.
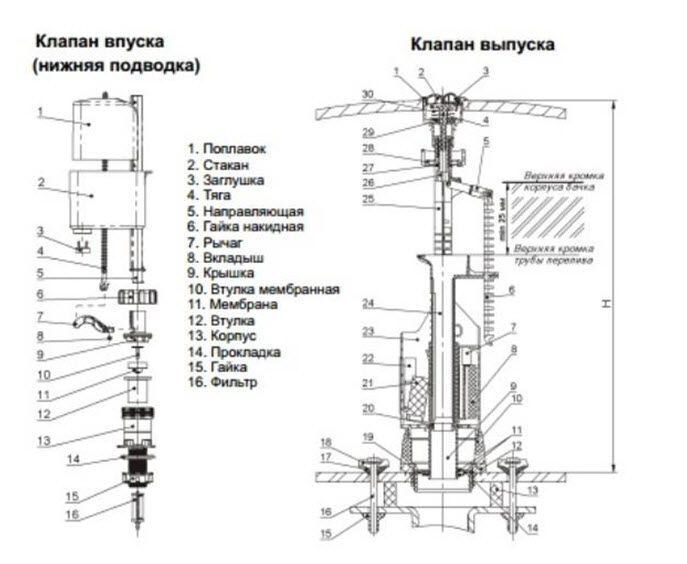
The main types of cisterns for the toilet are the float mechanism and the drain column.
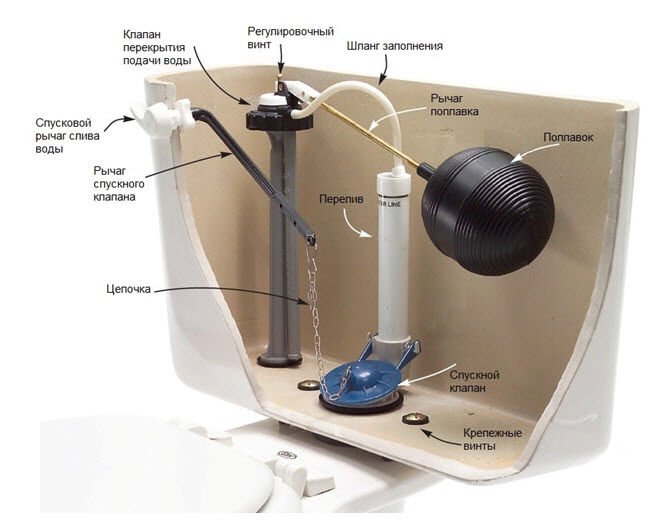
The figure below shows the design of a classic cistern with a float mechanism. Such internal fittings were completed with drain tanks of the Soviet period and continue to be used at the present time on devices with a side drain lever.
All main nodes of the drain tank are interconnected. Damage to one element can cause failure of the entire equipment.
Repairing the float mechanism
One of the most common breakdowns of the mechanisms of the toilet bowl is the constant flow of water. The reason is a malfunction of the float device, which should turn off the water supply to the tank when a certain level is reached.
The main reasons for this behavior of the float mechanism may be the following factors:
- breakdown of the water inlet valve into the tank;
- incorrect position of the lever responsible for turning on the drain mechanism;
- float not working properly.
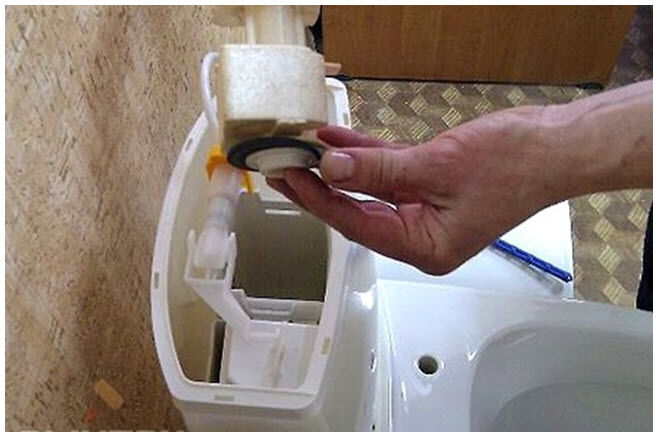
In older models, inspect the float. This is a hollow plastic container. From prolonged use, cracks may form in it. Then water from the tank penetrates inside the float, and it sinks. Such an assembly is easiest to replace - the float is usually mounted on a screw with a nut.
In modern models of drain tanks, there is no hollow plastic float. The inlet valve is closed by another node - a drain column, which is easier to replace as a whole. Some models of drain columns have an adjustment mechanism that determines the filling level of the tank and the amount of water drained.
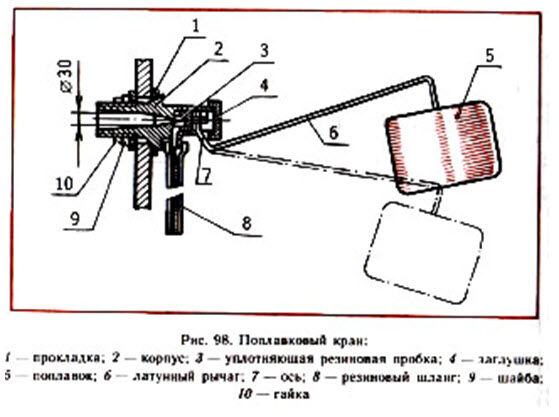
Checking the operation of the inlet valve of the tank
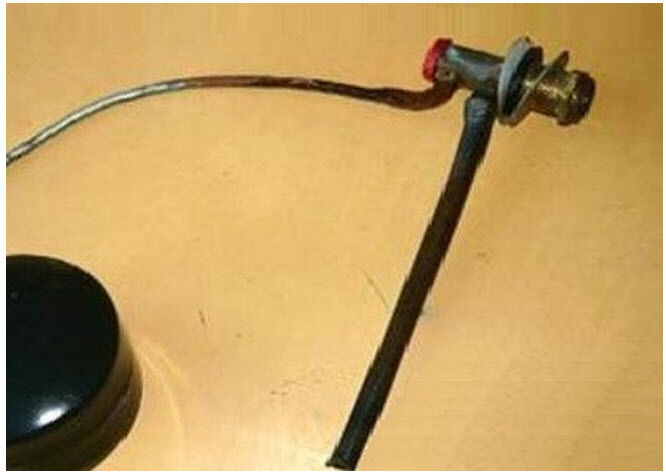
- To understand how correctly the valve closing mechanism in the tank works, examine the lever located next to the valve.
- Flush the water and watch the tank fill up.
- Move the rocker arm.
- When the lever is placed in a certain position, it should close the inlet valve. If the lever is bent during operation, correct its configuration.
- If the knot that provides the movement of the lever is jammed, replace it.
Another reason for constant draining may be intake valve failure. In this case, despite the correct operation of the float mechanism, the tank is constantly filled with water and constantly drained. Valve failure can occur due to water pressure surges in pipelines. In this case, the valve is easiest to replace - it is a fairly simple device that can be found in almost any hardware store. Dismantle the valve and purchase a similar one. TO ak, you can read in our article.
A constant flow of water from the tank into the toilet can also occur cause of valve failure. This device is not worth repairing, it is better to replace it entirely with an identical one. If, after dismantling the outlet valve, it is found that the siphon rubber gasket has worn out, then it should be replaced. This item is not expensive.
What to do if the toilet cistern makes a loud noise?
The noise of water filling the drain tank can cause discomfort to your household. Typically, this problem occurs with toilet cisterns with an upper water supply. This problem can be easily fixed in two ways.
- In some tank models inlet diameter can be adjusted. Reduce its cross section. The tank will fill up more slowly, but it will not make annoying sounds.
- It is also possible to have several modify the internal fittings of the tank:
- find a plastic or rubber tube about 30 centimeters long;
- install it in such a way that one end of it is dressed on the inlet, and lower the other to the bottom of the tank.
Now the water will not arrange a "waterfall", but will silently fill the tank capacity through the tube.
Replacing bolts in a leaking toilet
Most toilet flush cistern models are attached to the shelf with bolts that go through the bottom of the tank. Metal bolts are susceptible to corrosion and can rot after a while. Water in this case will seep through the holes, drip onto the floor.
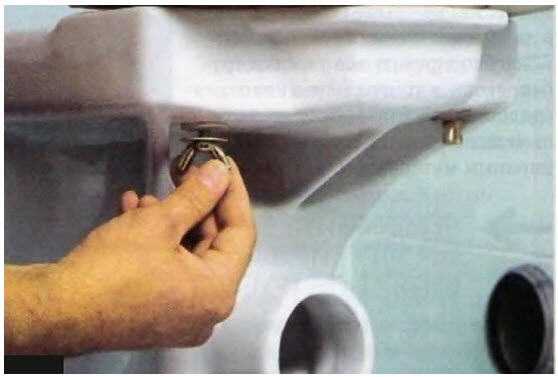
Bolt replacement algorithm
- Close the water supply valve to the tank.
- Drain the remaining water from the toilet bowl.
- Dismantle the inlet valve of the tank.
- We dismantle both connecting bolts securing the tank to the toilet shelf.
- The tank is on a rubber cuff. Raise the tank and remove the cuff. If necessary, replace it.
- We clean the joints, free them from dirt.
- We assemble the equipment in the reverse order with the insertion of new bolts. When tightening the bolts, do not apply excessive force so that the sanitary ware does not burst.
- We check the operability of the tank and the absence of leaks.
No water enters the drain tank
There are three types of problems that can cause your toilet cistern to stop filling with water.
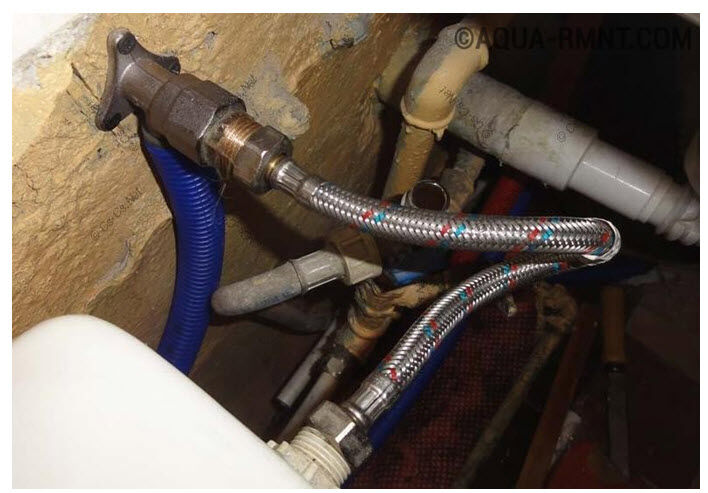
- At the initial stage check the condition of the flexible hose. To do this, turn off the water, disconnect the hose from the Basque body and open the shut-off valve slightly, directing the end of the hose into the toilet. Water will flow from a serviceable hose. If water does not flow, the flexible supply hose must be replaced with an identical one.
- Also, the reason for not getting water can be inlet valve clogged. It can become clogged with impurities contained in tap water. You can try to clean the valve hole with a thin long object.
- The inlet valve may, for one reason or another, completely fail.. In this case, in case of unsuccessful cleaning attempts, the valve must be completely replaced.
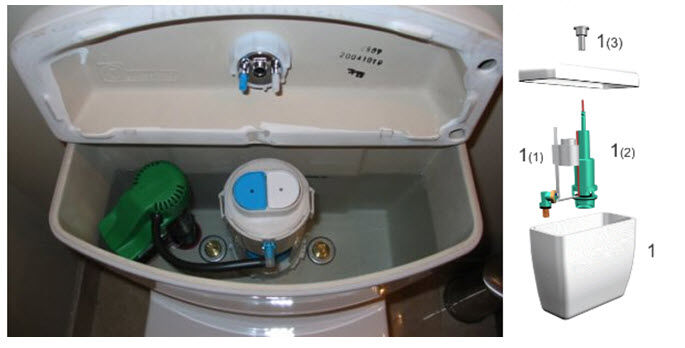
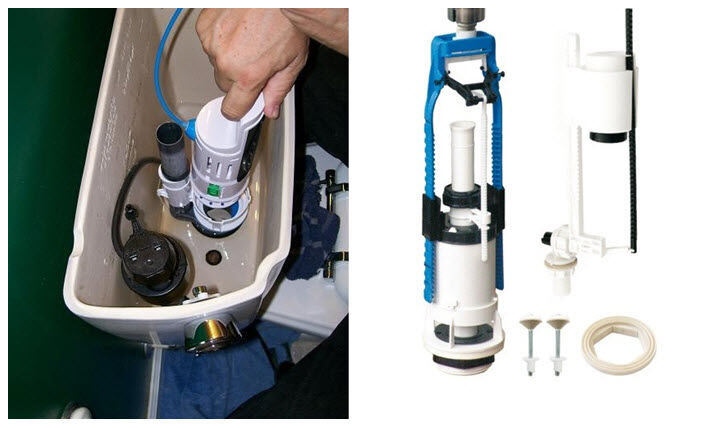
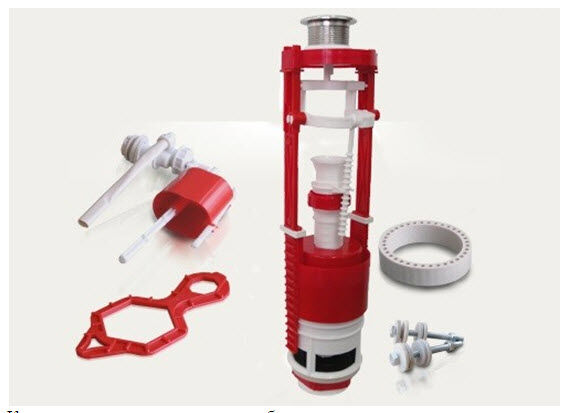
Change the internal fittings of the drain tank
Malfunctions in the fittings of the tank can occur like an avalanche. In this case, you can not change worn parts, but replace the entire internal fittings of the drain tank. Examine the device of the fittings available in your tank. Drain cisterns are available with various designs of internal fittings. In particular, toilet cisterns differ in the type of water supply - flexible hose can be connected to the top, side or bottom of the tank.
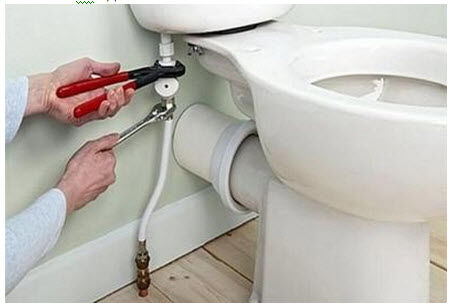
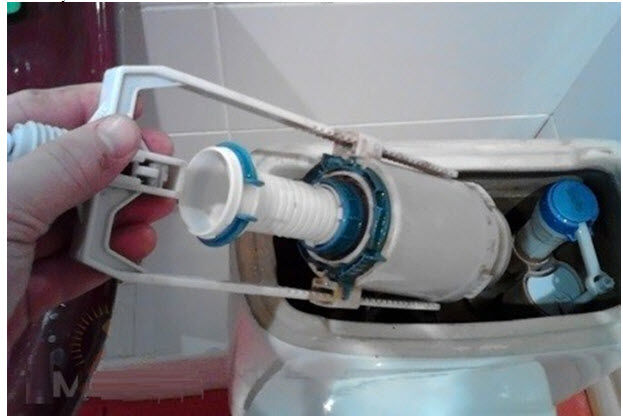
Let's figure it out how to replace the internal fittings on a tank with a bottom water supply. To carry out these works, a minimum set of tools is required: wrenches and pliers.
- Close the shut-off valve.
- Dismantle the water drain button. It can be unscrewed or fixed with clips.
- Remove the top cover of the drain tank.
- We unscrew the fastening of the inlet hose to the drain tank and disconnect it.
- Turning 90 degrees, remove the upper half of the drain column.
- We unscrew the bolts that secure the drain tank to the toilet.
- We lay the drain tank on the toilet.
- We unscrew the nuts securing the inlet valve and the drain column, dismantle the rest of the column.
- We install the internal fittings of the tank and assemble the equipment in the reverse order.
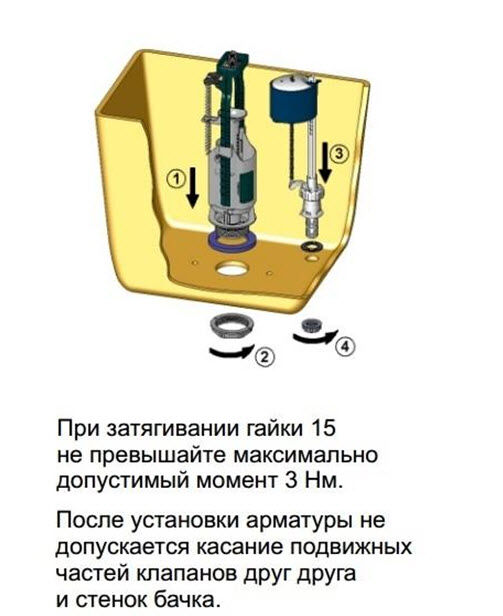
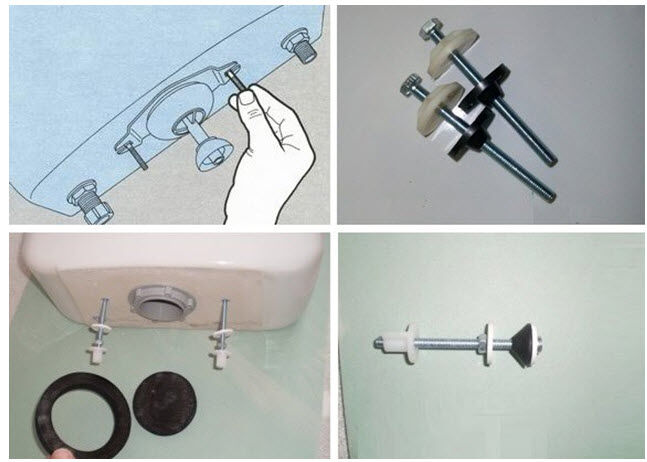
Installing a new column
- A drain column is placed in an empty tank. It is located above the outlet.
- From below, the drain column is fixed with a threaded cuff.
- An inlet valve with a filling adjustment mechanism is located above the inlet.
- The inlet valve is fixed with a threaded cuff from the bottom of the tank

Eliminate leaks in the drain tank
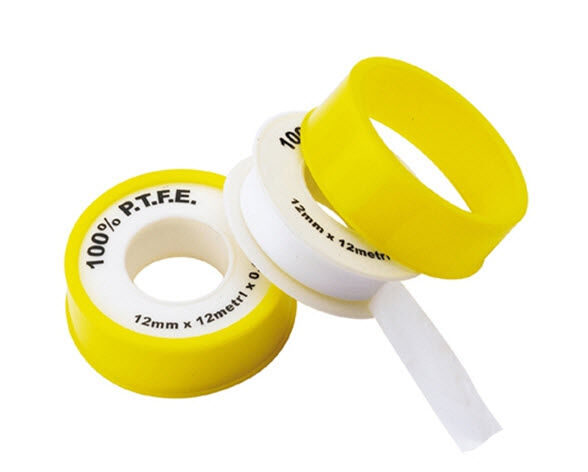
To eliminate leaks in the tank, it is necessary to carefully check all places of threaded connections. You can put pieces of toilet paper or paper napkins under them, on which even the smallest drops will be visible. If leaks are detected, the junction of the pipelines is assembled again using additional sealing tape.
Replacing the drain tank
Any internal components of the toilet cistern can be replaced. But this can only be done if you find an identical device.
Every year tanks with new designs of internal fittings appear on the market, which may not be compatible with previous generations. In this case, after running around the shops, you can decide to buy a new tank. It is easier to solve this issue if the tank and the toilet bowl are made as separate structural elements in your toilet. There are models of sanitary equipment in which the tank and the toilet bowl are made as a single unit.
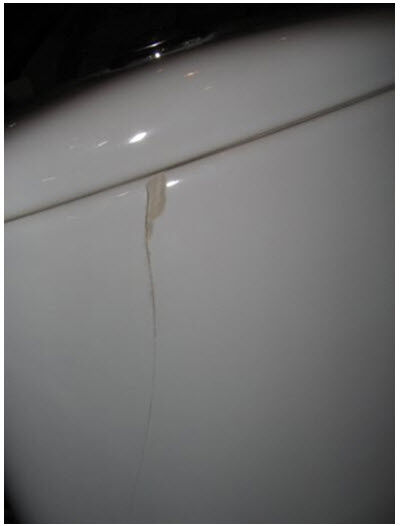
The toilet cistern is also subject to replacement if cracks are found in the sanitary ware. In this case, no repair will help the cause, the process of destruction is irreversible. A temporary measure may be to dry the tank and apply a thick layer of silicone sealant to the cracked area.
As you can see, the cost and duration of repairing a toilet cistern depend on the nature of the damage. Some malfunctions can be eliminated by replacing the internal fittings. If cracks are found in the body of the tank, or it is impossible to purchase suitable fittings, you will have to change the drain tank, and possibly the entire toilet bowl set.