How to make a warm water floor under the tiles with your own hands?
In many private houses, for the main and additional heating, they begin to make a water-heated floor under the tiles. The system allows you to get rid of extra pipes and registers that spoil the interior. It can be connected to existing heating, it is quite possible to mount a warm floor with your own hands. At the first stage, a warm floor should be made in a small room, for example, in a bathroom.
The base can be concrete or wood. A rough screed is made to obtain a flat surface. Before pouring, you can first lay a waterproofing film with an overlap of 5-8 cm and glue the seams with tape.
Finished underfloor heating as a new space heating system is best combined with porcelain stoneware and tiles for the following reasons:
- high strength and durability of the coating;
- no harmful emissions from heating;
- high heat capacity.
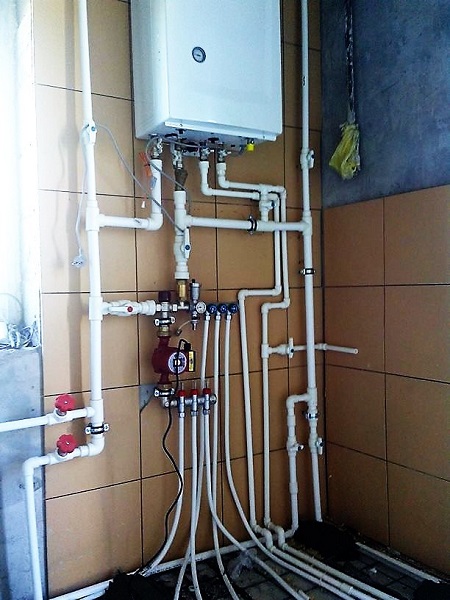
Connecting heating through the floor to centralized heating in high-rise buildings is strictly prohibited. Technically, this is possible through a separate system. Some regions allow you to connect a warm floor to heating, but this requires expertise and obtaining permits. The figure below shows a diagram of connecting a warm floor to risers. Hot water supply pipes are marked in red, return pipes are marked in blue. The collector is mounted in a cabinet on the wall.
Warm water floors for tiles are made by hand, mainly in individual houses.
Mounting methods
The most common use of concrete screed. Pipes under the water floor have a much larger diameter compared to the electric cable; it is impossible to hide them in a layer of tile adhesive. In addition, with a thickness of 16 mm, they must be poured from above with a layer of at least 30 mm.
The screed can be made thinner by laying the pipes in the grooves made in the expanded polystyrene sheets (fig. below). To improve heat transfer, the pipes are covered with aluminum sheets.
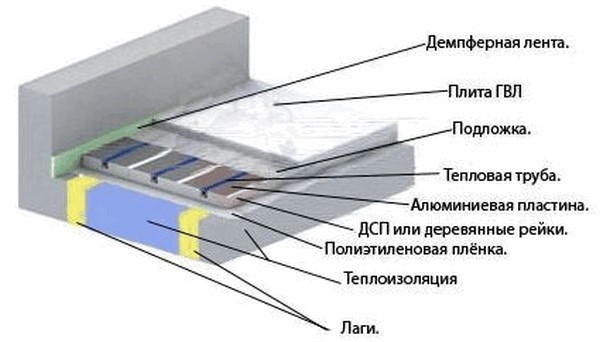
Thus, two tasks are solved simultaneously: insulation from below to reduce heat loss and reduce the load on the ceiling. The method is suitable for tiles if it is glued to GVL.
Types of pipes for underfloor heating
- Made of cross-linked polyethylene. The advantages include heat resistance, high strength and preservation of properties when the liquid coolant freezes. Fittings that form one-piece connections by crimping are also reliable. The disadvantage is straightening when heated. Pipes must be securely fastened during installation.
- Metal-plastic. The properties are not inferior to products made of polymer. When heated, they retain their shape and structure, and are also durable. High technical performance is ensured by the presence of an aluminum foil layer located inside two layers of cross-linked polyethylene and connected to them with an adhesive. Pipes have an affordable price, and the system has a high efficiency, which makes their application the most effective option.
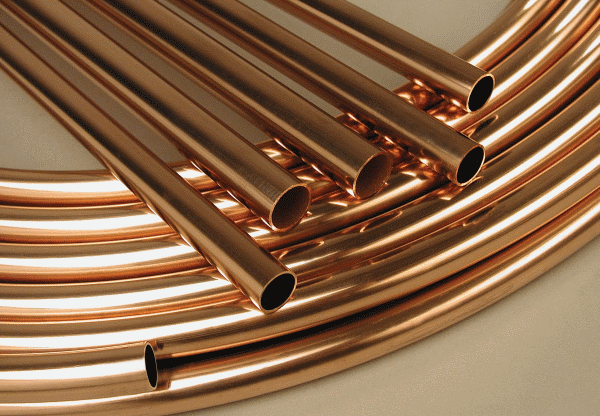
- Copper (fig. below). The material has a high thermal conductivity, but is rarely used due to the high cost. In addition, the pipes must be protected from contact with the screed, as they do not tolerate the effects of alkalis.
- Polypropylene pipes. Characteristics are high, but rarely used due to the large bending radius. For this reason, the distance between the turns during laying exceeds 320 mm, but this is not enough for uniform heating.
Thermal calculation
Before buying materials, you first need to draw a diagram with the exact location of the contour in order to know the location of the pipes during repairs. In places where plumbing or furniture will stand, laying a warm floor is not done.
On an area of about 15 m 2, a contour 100 m long is created with a pipe diameter of 16 mm. If you take a pipe of 20 mm, the length of the circuit can be increased to 120 m. You should not take more, because the resistance to fluid movement will be too great.
Along the length, the contours are selected close to each other. There are several of them in a large room. The optimal pitch is 15 cm, and in regions with severe frosts it is reduced to 10 cm. In order to save money, you can reduce the distance between the turns only near the walls. The pipe warms up 10-15 cm of the surface in both directions. In the north it is necessary to install additional radiators.
The calculation of the power of a warm floor is usually done by specialists, since it is necessary to take into account many factors: wall material, type of insulation and flooring, boiler power, pump performance, pipe diameters, etc.
The optimal difference between the water temperature at the inlet and outlet of the circuit is maintained within 5-10 0 С. The coolant does not heat up above 55 0 C. Walking barefoot on hot tiles is not very comfortable.
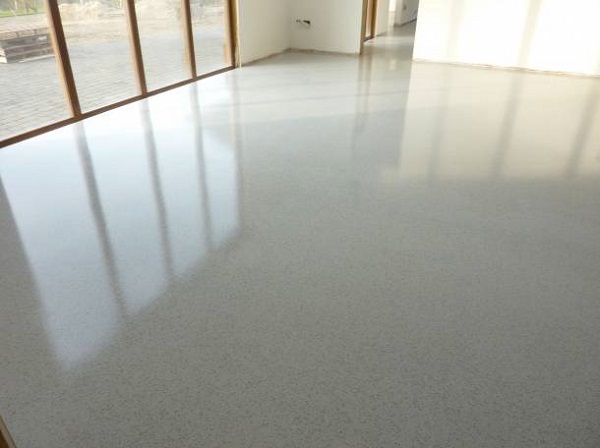
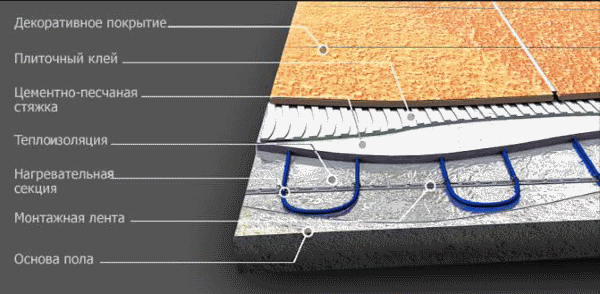
Underfloor heating under tiles
The kitchen, bathroom, toilet and hallway are tiled. It is better to take a tile smooth, as it increases the uniformity of heat transfer. For the bathroom, rough tiles are better suited, which are less slippery when water gets in.
Manifold cabinet installation
The water floor device provides for a control system. To do this, a recess is made in the wall above the floor, up to 12 cm deep, and a box is inserted in which a collector with control devices is located, connected to a heat supply source and heating circuits. A supply pipe from the boiler and a return pipe, collecting chilled water, are brought into the cabinet.
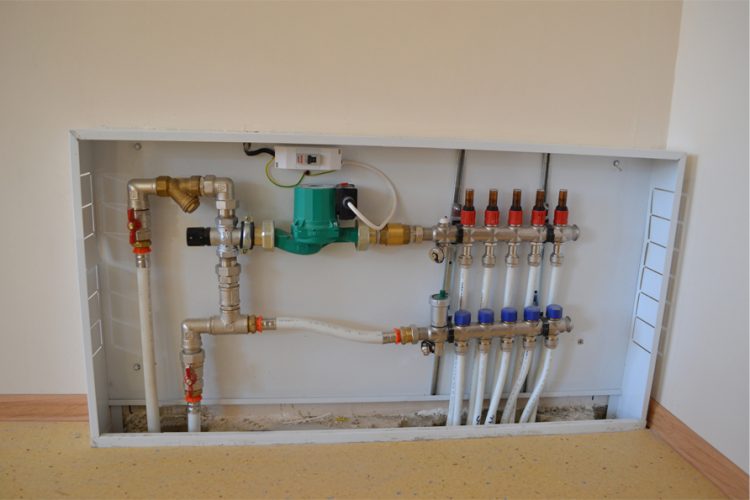
All circuits are connected to the collector and it should have enough outputs for this. The cheapest design contains one shut-off valves, while expensive models are equipped with coolant flow regulators. It is recommended to purchase only them, since an unregulated system will later create problems with the uniformity of heating of the circuits. Any device contains a drain fixture and an air vent.
Water from the boiler may enter the collector at a higher temperature than is required for underfloor heating. This situation usually occurs when heating radiators are additionally used. The temperature of the warm floor should not be higher than 30 0 C. Hot water is mixed with cooled water in the mixing unit, and then diverges along the contours.
Water system installation
First of all, water heated floors require the creation of an even base. With differences in height, heating will occur unevenly, and the pipes will bend.
A layer of waterproofing is placed on the base with overlapping laying of the canvas, after which the joints are connected with adhesive tape. The cheapest material is polyethylene. A damper tape is glued around the perimeter of the room to compensate for the thermal expansion of the future screed. A layer of insulation made of expanded polystyrene or polystyrene is laid on the waterproofing. The layer thickness is 25-30 mm, and at least 100 mm is made on the ground floor.
The pipes of the circuits are installed in different ways:
- guides are attached to the floor, and a pipeline is attached to them;
- a metal mesh is laid on the floor, and pipes are fixed on it with clips or clamps;
- pipes are placed in grooves made in the insulation.
The pipes are fixed to the floor without rigid fixation with an interval of 1 m. First, the pipe is connected to the collector, and then it is laid in loops in 15 cm increments. The second end of the circuit is connected to the return collector. Laying a water-heated floor under a tile can be serpentine or spiral.
The system is checked for operability before pouring the screed. It starts and must work for at least 15 minutes at a pressure one and a half times higher than normal. The tightness of the connections is checked, as well as the uniformity of heating in all places.
Due to heat loss, it is difficult to ensure uniform heating of the room. This is especially noticeable in large areas. In places of supply, the temperature of the coolant will be higher, then it decreases as it moves away from them.
To ensure uniform heating of the room, a double helix scheme is used, when the supply and return pipes of the coolant run side by side and in parallel (Fig. below). As a result, there are no cold zones.
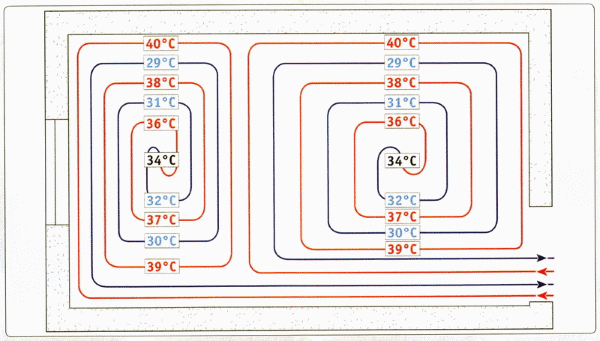
In large rooms, two or more contours of the warm floor are laid. They are separated from each other by an expansion joint using a damper tape. It should be crossed with pipes as little as possible. If necessary, the pipe at the intersection is placed in a corrugated pipe.
Filling the screed
Reinforcing mesh is first laid under the pipes. The distance between them is 4-5 mm due to spacers. The mesh is attached to the base with dowels through the insulation. It also serves to more securely fix the pipes.
Especially for underfloor heating systems, dry mixes of “self-leveling floor” are sold in stores. They are more expensive than conventional solutions, but they are much easier to apply due to their good spreadability.
The screed is poured when the pipes are under pressure. Hardening takes 20 days, after which you can lay tiles.
When it is unacceptable to increase the load on the floors of the building, flooring made of polystyrene plates with ready-made grooves for pipes is used. Dry screed is laid on a flat area. Pipes are placed in the grooves and fixed on top with aluminum plates. Gypsum-fiber sheets are laid on top, and then covered with laminate, parquet or floorboard.
If it is necessary to make a ceramic coating, another layer of gypsum-fiber sheets is laid on top, and tiles are glued on them. Underfloor heating under tiles requires a sufficiently solid base. Similarly, a wooden-modular system is made from chipboard with a selection for pipes and aluminum plates.
Laying tiles
First of all, you should pay attention to the features of the ceramic coating:
- time costs and the cost of equipment are determined by the area of \u200b\u200bthe room;
- coatings are made on the same level with the floor of the remaining rooms;
- the thicker the screed layer above the pipes, the more uniform the heat dissipation over the surface;
- tile lasts for decades. Choose a neutral color for it. Then it will go well with the interior, which can change.
When laying tiles with a notched trowel, glue is applied to the screed, the tile is fixed and leveled, then the next one is adjusted, and the process continues. In this case, the level is constantly checked. Trimmed parts will be laid out near the walls.
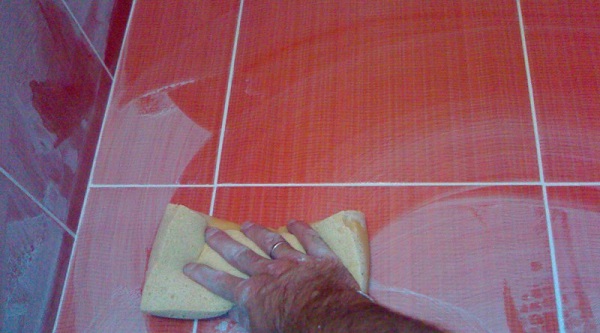
After 3-5 days, they begin to grout the tiles. It is needed to protect against dirt, mold in the seams and chipped edges. Joints are processed with a special grout.
The inclusion of a warm floor is possible only 21-25 days after laying the tiles, when the screed and tile adhesive are completely dry. If you turn on the underfloor heating prematurely, the tiles will begin to peel off.
Video
Your own warm floor in a private house is needed to create comfortable conditions. It is difficult to equip it, this requires experience. If you understand the installation features, you can do a warm water floor under ceramic tiles with your own hands without errors, with high quality and durability.