How to make a warm floor for tiles: laying rules + installation guide
Installation of underfloor heating is possible in rooms with high ceilings. Most often they are mounted in the bathroom, but underfloor heating under the tiles can be installed over the entire area of the apartment. There are several heating methods that need to be chosen individually, depending on the height of the ceilings, the condition of the wiring and the water pressure in the apartment or country house. The most popular are heating mats, which are easy to install.
Before choosing a floor heating system, you need to consider that they have limitations. Despite the fact that heating systems can completely replace the heating in an apartment, this cannot be done according to the norms of Russian legislation.
These restrictions are due to a number of reasons:
- It is allowed to use only electric underfloor heating in apartments, and the massive use of such systems in the house leads to an increase in the load on the electrical network.
- A massive or partial transition to electric heating leads to an imbalance in the heat supply system in the house.
Since the floor will not be used as the main source of heat in the apartment, you can save on its installation. Savings consist in laying a heating cable or film only in those places that are free from furniture.
This will reduce the consumption of thermal energy, which will make it more economical in the long run, as well as at a time, when purchasing building materials and installation
In a private house, the possibilities of using this technology are much wider. Depending on the available energy sources, you can choose an acceptable option between water and electric heating. If the house is equipped with autonomous sources of electricity, such as wind generators or solar panels, it is undoubtedly worth making a choice in favor of electric ones, i.e. cable or infrared, heating systems.
If electricity is supplied through power lines, then using the electric option for heating a private house will be very expensive. In that case, it is better to make a choice in favor of a water-heated floor. It will last about 35 years, after which it will require replacement.
Basic rules for installing underfloor heating
Despite the different principle of heating, there are several basic principles for installing all types of underfloor heating under floor tiles. The first general rule is to remove the old screed after the direct dismantling of the coating. This will allow you to win a few centimeters of room height, which is especially important in apartments with low ceilings or if heating is installed in only one room.
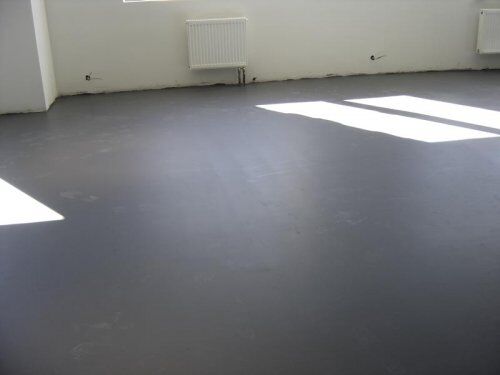
The second basic rule is surface leveling. Any depression or bulge will eventually bring out and build a warm floor. All debris must be removed and cracks and holes sealed. Only after that you can proceed to waterproofing
For waterproofing, you can use special compounds, such as liquid glass or bitumen. Particular attention should be paid to bathrooms. If moisture gets through the screed, this will lead to the gradual destruction of concrete. This is true for private houses and apartments.
After waterproofing, you need to make thermal insulation. Its thickness is determined individually, depending on the height of the ceilings and the level of pilaf difference between the rooms. The thinner the insulation layer, the greater the heat loss.
Another rule is the need to reinforce the floor under the tiles. For this, ready-made reinforced meshes with a wire thickness of not more than 6 mm are used.
Mixtures with a gypsum base cannot be used for pouring floor screed under tiles. They are too fragile and not suitable for pressure. In addition to fragility, they do not have the properties necessary for adhesion to tile adhesive.
It is necessary to use leveling compounds such as self-leveling floor. They give the best effect, since the surface is smooth and suitable for laying tiles with a minimum consumption of adhesive solution.
Rules for laying electric floor heating
Before installing new equipment that will create a load on the wiring in an apartment or house, you need to make sure that the wiring will withstand it. First you need to make a markup where the electric mats will run.
When planning in an apartment, it is necessary to exclude laying in the locations of permanently installed large furniture without legs, plumbing fixtures and household appliances. This is due to the fact that electricity creates a magnetic field that will interfere with household appliances.
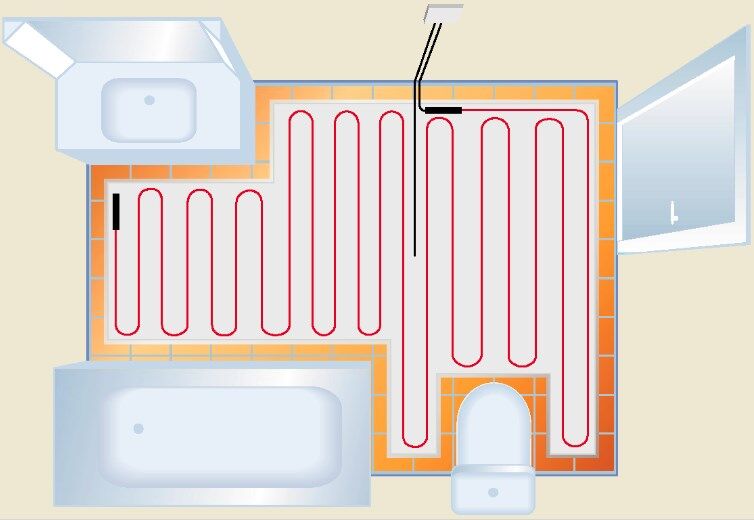
It is impossible to carry out laying of a warm floor under a tile where the bathroom, a bathroom and a shower cabin is installed. In these places, there is a high risk of moisture and short circuits.
When planning, it is also impossible to lay electric heating at the locations of water and gas pipes.
Determination of power, cable cross-section and wiring in the house
The minimum distance from each wall should be at least 10 cm. You also need to exclude areas where furniture is installed. The area for installation of mats is calculated by subtracting from the total area the sum of square meters where installation will not be carried out.
The resulting number must be multiplied by 140 W if the floor will not be used as the main source of heat supply. If you plan to use only the floor for heating, then you need to multiply by 180 watts. Based on the data obtained, you can purchase a cable or electric mats for underfloor heating.
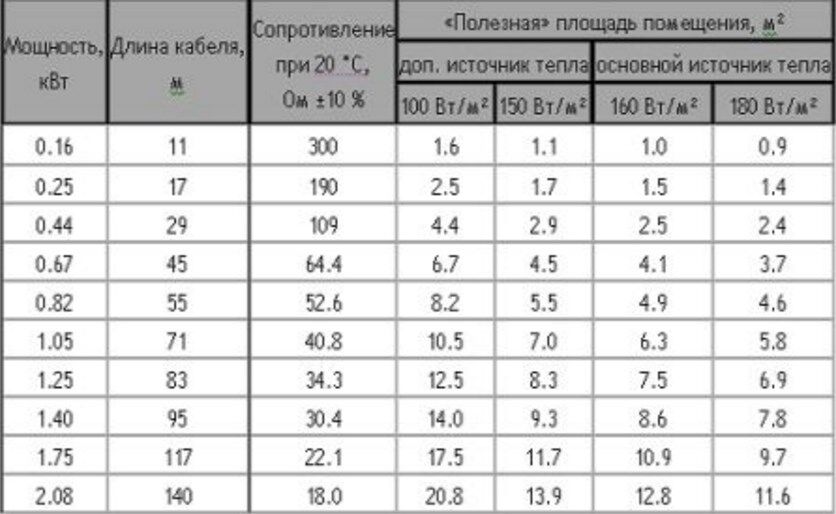
The resulting total power must be corrected by multiplying by a factor of 0.8. This is an amendment to the fact that all appliances will not work in the apartment at the same time. Based on the data obtained from this table, you can determine the desired cross section of the copper cable
Aluminum is not suitable for house wiring where a floor heating system is to be installed. This is because copper has better thermal conductivity. According to the table, you also need to determine the current strength and put the machines on the electricity meter.
If the wiring in the apartment does not meet the required specifications, it must be replaced before installing the heating cable or mats. If this is not done, then the electricity will periodically turn off in the apartment, and then the sockets will start to melt. Ultimately, this will lead to a short circuit and a fire. This is dangerous and you should not save on safety, especially if the house or apartment is made of combustible materials.
Installation of mats and installation of the control system
The process of installing electric mats is easier and faster than installing a cable. It is enough to place them on the heating area, which was determined when drawing up the scheme.
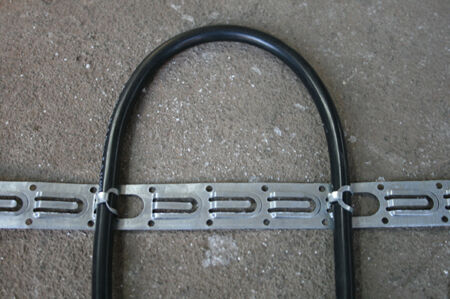
The cable will have to be laid on a mounting tape, which is a metal fastener that is fixed in the floor screed. When laying the cable, it is necessary to make turns of the same width
This will ensure an even level of heating of the floor surface. During installation, it is not recommended to break the cable.
After laying the cable, you need to install a thermostat. It performs an important function - maintaining the desired temperature of the floor covering. This allows you to reduce energy consumption, since periodically the heating will be turned off when the set temperature is reached. If the temperature sensor detects a decrease in the mode set by the user, the heating will automatically turn on.
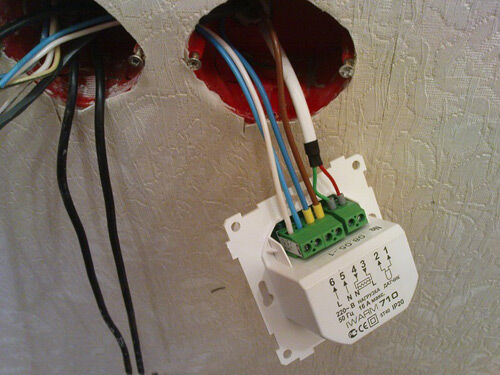
To install the control unit in the wall, drill a hole of the required diameter. There must be a source of electricity near the installation site of the unit. It could be an outlet.
The hole should be located above 30 cm from the floor surface. A vertical channel is punched down from the hole, where the corrugation for the temperature sensor will be installed. The opposite end of the corrugation should be located between the turns of the heating cable at an equal distance. If you do not follow this rule, then the sensor readings will be too high.
When connecting the heating cable to the control unit, you must follow the instructions from the equipment manufacturer. Before connecting, you need to check the resistance of the wires with a special device.
Rules for laying infrared floor heating
The infrared heat-insulated floor is mounted also simply as electric mats. But there is a difference between them. When connecting a film heater, not a serial, but a parallel connection is used. From a constructive point of view, this is a more reliable method, since if a separate module fails, the rest will continue to function.
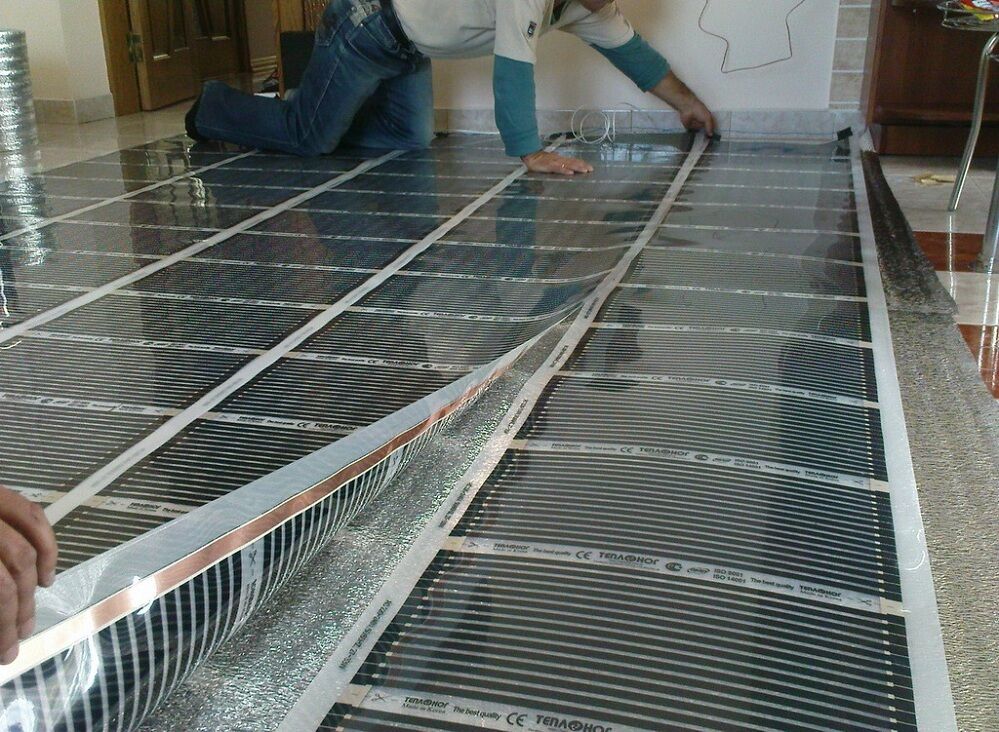
Such a floor has the advantage of reducing energy consumption due to its reduced consumption compared to electric mats. The film is sold in rolls and purchased in the quantity required for the heating area. The film can be cut, but only in those places where it is allowed by the manufacturer
The film must be laid with a slight overlap, strictly following the markings. The modules are held together with adhesive tape. This is a temporary method of fastening, since after pouring with a self-leveling floor, the need for fastening will disappear.
Installation guide for electric underfloor heating
The quality of the coating depends on the condition of the base on which it is to be laid. Work should begin with the dismantling of the old coating. Everything must be dismantled, including the old screed.
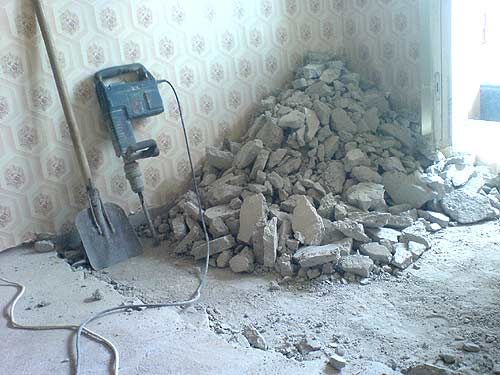
You will need a blower to work. It is also necessary to think in advance how to transport and where to take out the old concrete. Dumping construction waste into garbage bins is prohibited
After removing the old coating, it is necessary to remove all small debris and dust. After that, you need to inspect the floor area and, if there are cracks, they must be repaired. When the floor surface is prepared, you can proceed to waterproofing and insulation.
Installation of insulation under the electric floor
Insulation must be laid on the prepared base. It is preferable to use cork sheets. They have sufficient density and do not sag under the weight of the screed, as happens with polystyrene foam. The use of low density insulation will lead to the need to dismantle the finished floor due to material depreciation.
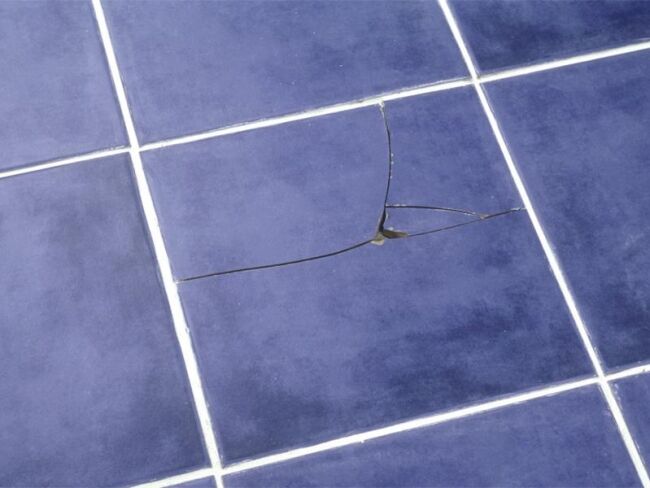
Cheap polystyrene foam causes the screed under the tile to crack. This inevitably leads to peeling and damage to the tile. First, small cracks appear, and then the tile peels off.
The insulation is fastened to the surface by gluing onto bituminous mastic. Due to the use of this material, not only the fixation of cork sheets is achieved, but also waterproofing. The service life of underfloor heating also depends on the quality of gluing. After waiting 5-6 hours, you can proceed to pouring the screed. The thickness of the screed must be at least 3 cm.
When using a self-leveling floor, there is no need for leveling with a rule, as is the case with self-mixed cement mortars. After work, you need to leave the surface to dry completely, for about 3-4 days.
Laying heating mats
After hardening of the bulk solution, you can proceed with the installation of a warm floor under the tile. First you need to outline with chalk the places where mats will not be installed. This will help you navigate and avoid overspending material.
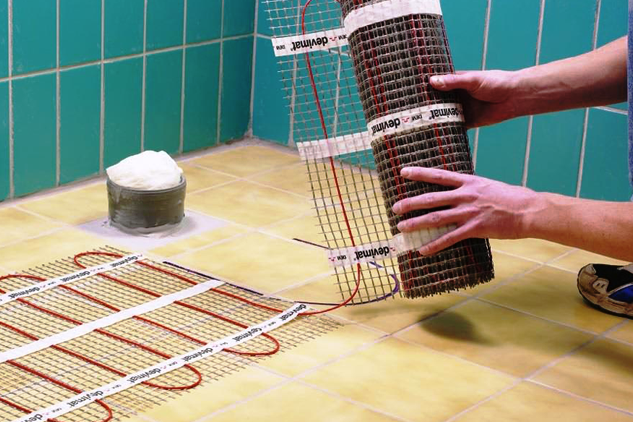
After marking, you need to take the roll and start laying it, rolling it on the floor. In those places where the mat needs to be deployed, it is necessary to cut the mesh, but do not touch the wire. The service life of the entire structure depends on the integrity of the cable
After mounting the mats, you need to proceed with the installation of the control unit and temperature sensor. It is necessary to connect the control unit in strict accordance with the diagram and color marking of the wires, which are provided by the manufacturer.
A special corrugation is laid down from the control unit, where the temperature sensor will be placed. The end of the corrugation, which is located between the heating mats, must be tightly sealed.
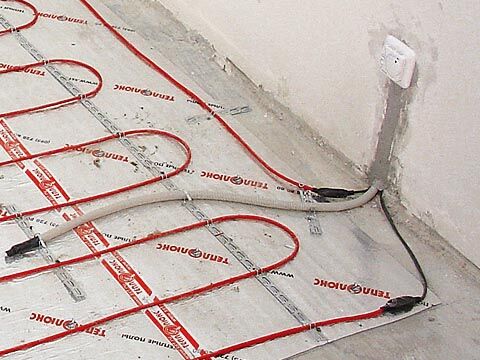
If this is not done, then during pouring the solution will penetrate inside, harden and render the sensor unusable. In addition, the mixture frozen in the corrugation will make it difficult to replace the sensor.
When the installation of the electronics is completed, you need to turn on the system and check its performance. If there are no defects in the operation of the heating system, you can start pouring the last layer of the screed. The required fill level should be marked on the wall to make it easier to navigate.
The minimum thickness of the screed is 4 cm. When pouring the self-leveling floor, it is necessary to monitor the uniform distribution of the liquid. A roller can be used to move excess mortar. After pouring, you need to wait a few days until it dries completely. At this time, you need to control the air temperature in the apartment. If the air is dry and hot, then there is a risk of cracking the screed. The laying of tiles can only be started after the complete drying of the self-leveling floor.
How to cut floor tiles
A manual tile cutter is excellent for working with floor tiles. To work with it, you need to prepare the tile in advance. The tile is pre-soaked if specified by the manufacturer. If there are no such recommendations, then it is enough to wipe the tile with a damp cloth. This is necessary to clean the surface on which the cutting element of the tool will move.
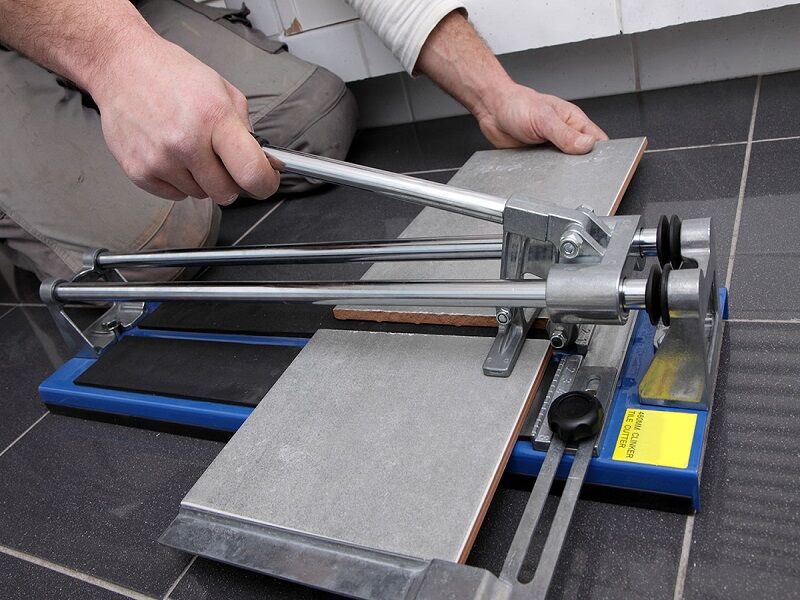
There is no need to pre-cut the tiles. This is done as needed, because if the sides of the walls have a slight discrepancy, then the tile will have to be cut again.
This is done as needed, in places where the masonry approaches a wall or corner. If plumbing or heating pipes come out of the floor, then it will be necessary to make figured holes in the tile. For this, a hand cutter is used. Holes made with it may have jagged edges. To eliminate an aesthetic defect, it is necessary to process the edges with sandpaper.
How to lay tiles on underfloor heating
It is necessary to start work on tiling the floor with markings, which are largely determined by the type of masonry. The most common tile laying options are diagonal and straight. Which method to choose depends on the interior design and the geometric features of the room.
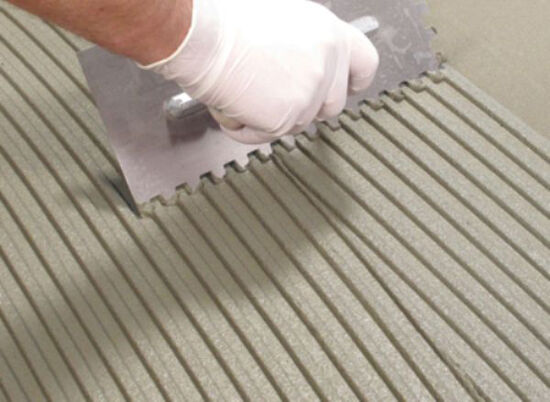
After marking, you need to dilute a small amount of glue in a container with water. The adhesive mixture must be heat-resistant. The adhesive is applied to the prepared base with a notched trowel. There should be no voids under the tile, as these places will be vulnerable to point pressure, which will render the tile unusable
A tile is placed on top of the adhesive solution and leveled. Periodically it is necessary to check if there is any inclination. This is done using the building level. The level should not be longer than 60 cm, since with a longer length, the reading error increases. To maintain an equal distance between the tiles, you need to use plastic crosses.
Their standard size is 2 mm. If the tile is large, you can use a larger size. The crosses that regulate the height are removed, and those that border on four tiles are not dismantled after laying, but are hidden when grouting. For grouting, special compounds are used, painted to match the lined surface. Grouting work can only be done after the adhesive solution has hardened.
Lacquering finished tiled floor
To keep the tile in its original form, you need to take care of varnishing. This simple procedure will prevent the need to replace the tile. Lacquering is especially relevant for matte tiles, which are often used for bathroom floors, as they do not slip.
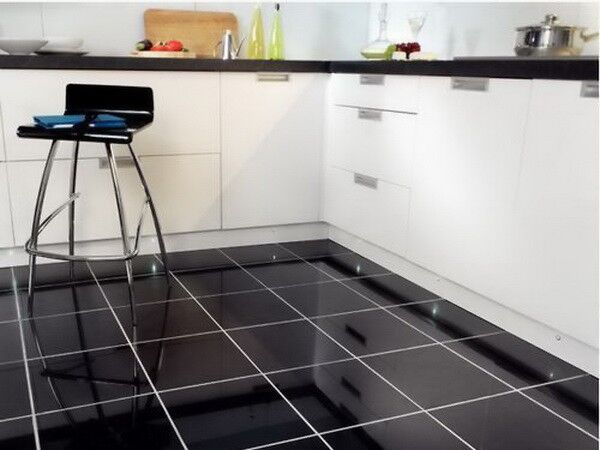
Lacquer should be applied with a piece of fabric that does not leave thread torn. When applying, avoid the appearance of bubbles and streaks. You need to start from the corner of the room farthest from the entrance.
When the first layer of varnish is applied, it is necessary to open the window in the ventilation mode, and also close the door to the room. After complete drying, which occurs after 6-8 hours (depending on the composition of the varnish), it is necessary to repeat the procedure again.
Video about the rules for installing underfloor heating
How to mount the control box:
How to lay underfloor heating in rooms with little heat loss:
What happens if you do not fix the insulation:
What to look for when designing a house:
Proper laying of underfloor heating systems under laying floor ceramics will significantly extend its service life. Most often, electronics fail, which is easy to replace and continue to use underfloor heating. It is necessary to carefully choose the manufacturer of heating systems. In the event of a control unit failure, it will be difficult to get a new one if the manufacturer stops producing heating systems. Temperature sensors are easier to match as they are interchangeable in many models.


