How to choose and install a toilet installation
Our idea of a “good repair in the bathroom and toilet” is changing very rapidly. A few years ago, they figured out which of the toilets is better - compact or with a separate tank, today - they install wall-hung toilets and other plumbing and argue which installation for the toilet is better.
What is a toilet installation and what are they
Recently, hanging toilets and bidets have been increasingly installed. The structure on which they are mounted is called the installation. In addition to the weight of the sanitary bowl, the installation also holds sewer and water inlets, and some models also hold a water tank. The tank is made of polymer, access to it is limited, as it is then closed with tiles or other exterior finishes. After installation, only adjustment with access via the drain button is possible. It is for this reason that it is better to choose good quality plumbing of this type - in case of problems, you will have to redo everything - knock down the finish, change the tank, then do everything in a new way, and this is far from cheap.
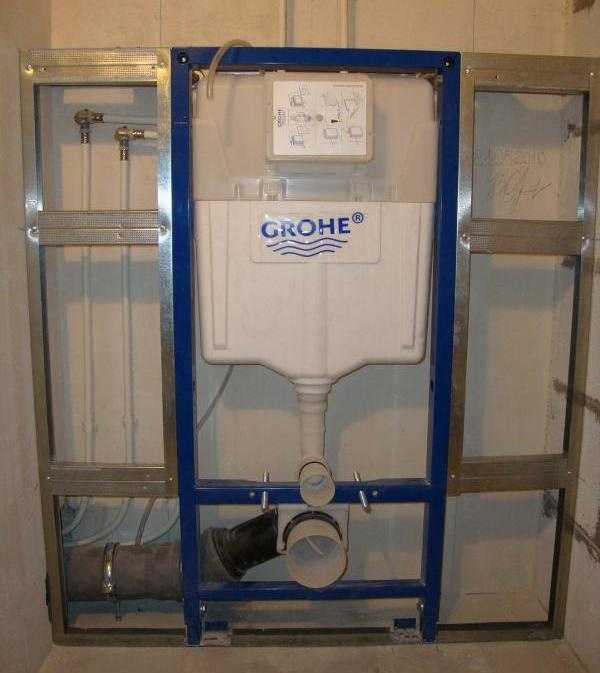
There are two types of installations: block and frame. Block ones can otherwise be called attached - they are attached to the main wall (pictured below). That is, for their installation, a wall with sufficient bearing capacity is required.
Frame installations can be attached to the floor and to the wall, they can have only two points of attachment to the floor. They differ in that they do not require a reliable wall - their frame is more massive and always rests on the floor. The frame installation for the toilet bowl can be installed even in a plasterboard wall.
Regardless of the type, the process of installing a toilet installation is a messy business, so work must begin before finishing the walls in the bathroom or toilet. The frame installation for the toilet is generally installed at the stage of creating a partition or mounted in a prepared niche.
What to look for when choosing
Installations under the toilet bowl are sold both as a set with a bowl and separately. It's easier, of course, to buy everything in the kit. Then all sizes will exactly match. If you already have a bowl, you will need to look at the dimensions of the frame and the distance between the fasteners - it must match the mounting holes in the toilet.
It is very useful if the frame has the ability to adjust in height - you can set the bowl to the level you need. Pay attention also to the type of coloring. The best option is powder coating. It is reliable, creates a tough durable film that adheres well to metal. All other types of paint hold up worse.

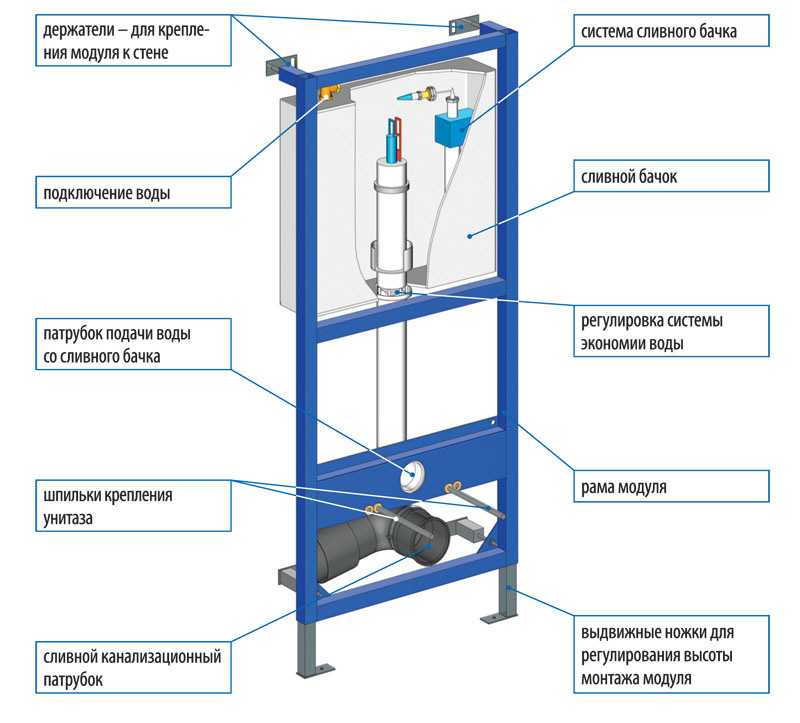
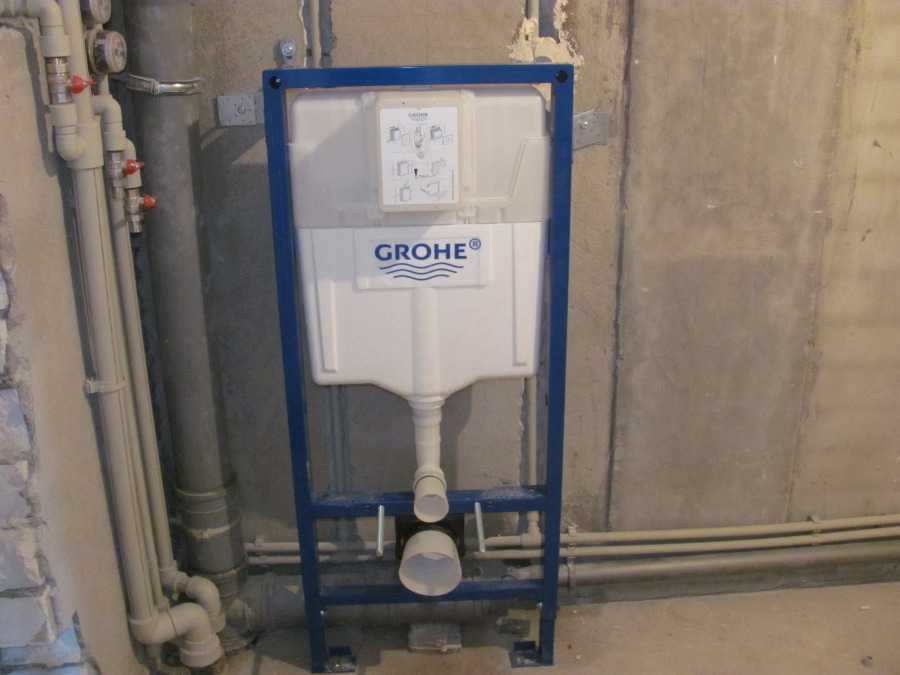
Installation dimensions Grohe Rapid Sl (Germany)
When choosing an installation for the toilet, you should pay attention to the package. Usually, fastening elements come with the frame - for hanging the toilet bowl, fittings for fixing sewer and water pipes. Some firms also include a tank and a drain button in the basic package. Drain, by the way, can be dual-mode. It is more economical, because when you press a large button, 6-9 liters are drained, a small one - only 3-4 liters of water. It is good if the drain is adjustable - the volume of flushed water can be adjusted to the specific shape of the toilet bowl.
Which type is better?
Which of the types of installations under the toilet and bidet is better? A frame structure is considered more reliable - it usually uses thicker metal, but it also costs more. In any case, when choosing a frame for a hanging toilet, pay attention to the strength of the structure - it should not stagger, its elements should not sag. Inspect the welds and the quality of the paint - there should not be even small flaws.
And a little about the manufacturers. The best toilet installations are made in Germany and Italy. But their plumbing is expensive. Equipment for bathrooms and toilets is no worse in quality in the Czech Republic and Bulgaria, and the price range for their products is average. The cheapest installations and hanging toilets are Chinese, but it is risky to mess with them - they can work fine, or they can quickly fail.
Toilet installation installation
Installation begins after the floor has been leveled. If the block type of installation is selected, then the walls must also be aligned. As already mentioned, the installation of a block installation is possible only on a wall with good bearing capacity. Usually these are load-bearing walls, as ordinary partitions can collapse.
First of all, you need to decide on the installation location of the toilet. Depending on the type of installation, you will need to fix it to the floor or to the wall. It is necessary to bring sewer pipes and water to the proposed installation site. The branch pipes of these systems must be located in the immediate vicinity of the selected installation site.
Attaching the frame to the floor
Then we put the frame in the place where it should stand, check the verticality, horizontality. Then, with a pencil or marker, we make marks at the attachment points - there are holes in the frame.
Having moved the frame along the marks, we drill holes - according to the size of the fasteners. When installing in concrete, dowels with hex caps are usually used. After the holes are made, the frame is put in place, the dowels are inserted and twisted.
We set the required installation height of the toilet bowl
Most toilet installation frames are height adjustable. When choosing, the height is calculated from the level of the finished floor - in fact, from the level of the laid floor covering. If there is no coating yet, its thickness must be added to the required height.
To set the height, the legs of the frame are made adjustable. They are fixed with clamping bolts. To adjust, loosen these bolts (located at the bottom of the frame on legs), set the desired height, check the horizontality of the upper bar, and then tighten the bolts again.
Fasten to the wall
Adjustable screws are included for wall mounting. With one end they are attached to the upper corners of the frame, with the second they are fixed on the wall (with dowels of a suitable type).
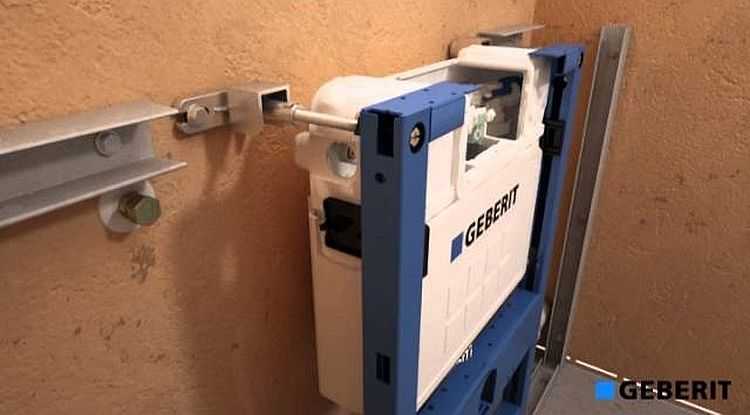
After that, the installation for the toilet is set strictly vertically. A building level is applied to the side posts, turning the nut on the fastener changes the position of the frame relative to the wall.

The procedure is important, but not difficult. We expose everything with maximum accuracy, we check several times in all planes. Everything should be perfectly level. After adjustment, the movable tongue on the fastener (in the photo it is under the finger) is pressed. He clamps the screw, the frame is rigidly fixed.
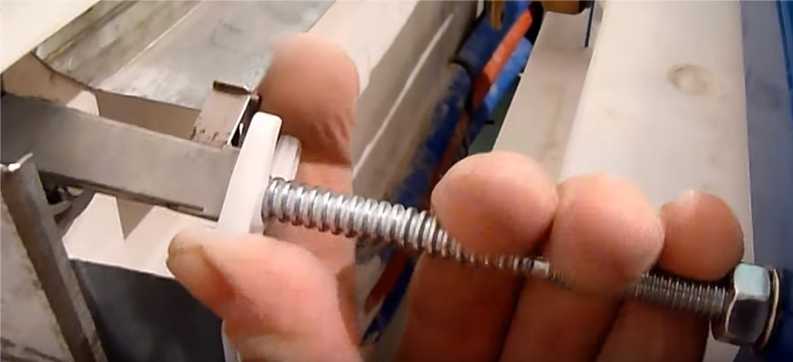
The Groch company also has an additional retainer - a plastic bracket that clamps the thread. We install it near the checkbox (pictured).
Sewerage and water connection
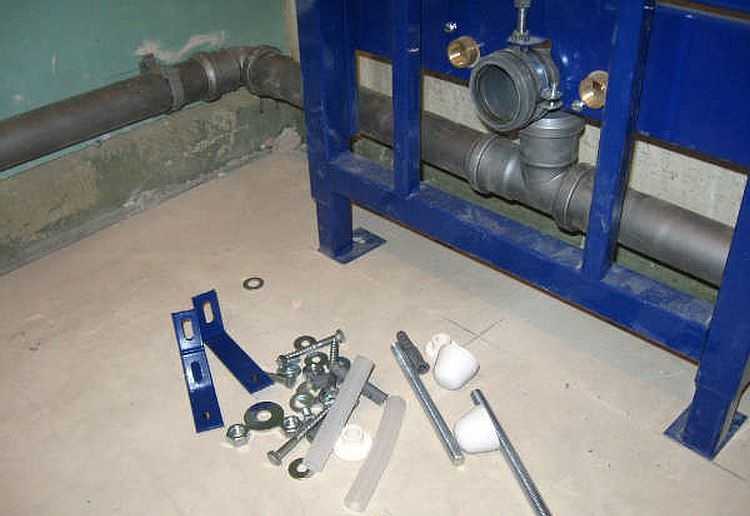
The next stage is the connection of the pipe, fixed on the frame, with the sewer outlet. Some kits have factory elbows, if they are not available, you will have to look for a suitable one or install a corrugated plumbing pipe.
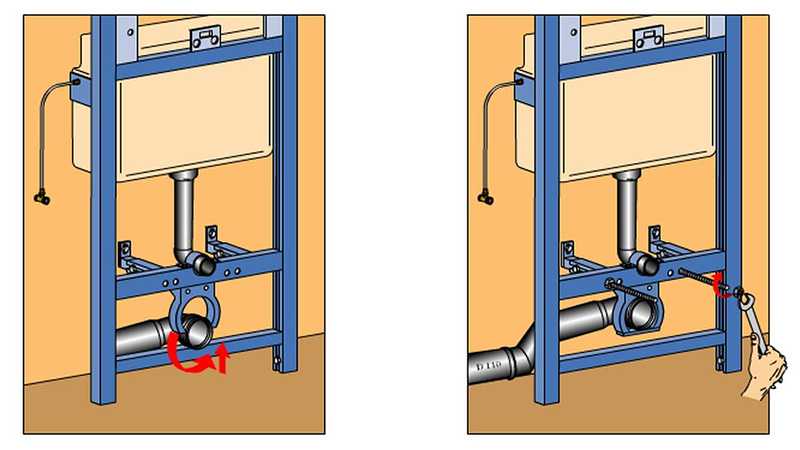
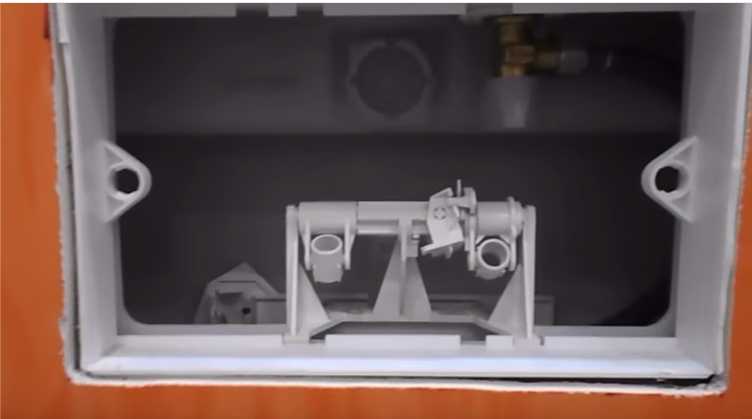
Another option is that there is a plastic clamp on the frame, into which the sewer pipe is inserted (pictured above). In this case, the cross section of the pipes is clearly specified.
Cold water is connected to the pipe on the tank. You can bring any pipe, but it is important to make the connection reliable. Therefore, it is not recommended to use metal-plastic pipes with press fittings - they require periodic tightening, which in this case is problematic. That is, there are not many options left - polypropylene, copper pipe, polyethylene pipes connected by soldering.

We connect the adapter and the entrance to the tank with a flexible hose. Also choose it carefully, preferably in a good stainless steel braid. Ideally, buy a branded hose.
Finishing work
Since any installation for the toilet requires the presence of finishing, the entire installation process is divided into two parts - before finishing and after. The first is finished, then the finishing follows.
Usually the installed frame is sewn up with drywall. According to the instructions, two sheets are required. First, all dimensions are transferred to the wall, a profile is mounted along the applied contour, and drywall sheets are already attached to it.
Before starting work, it is necessary to install a box under the button on the frame. For the period of finishing work, it will protect the inside from dirt. It is necessary to cut several holes on the sheets: for the button, sewer outlet and water inlet from the tank, two studs for hanging the toilet bowl. To do this, the sheet cut to size is put in place, then all the necessary elements are circled with a pencil. Holes are cut along the outlined outline. Having prepared two sheets, they are installed and attached to the previously mounted frame. After installing the GKL, the tiles are laid on the glue.
Setting the button and hanging the bowl
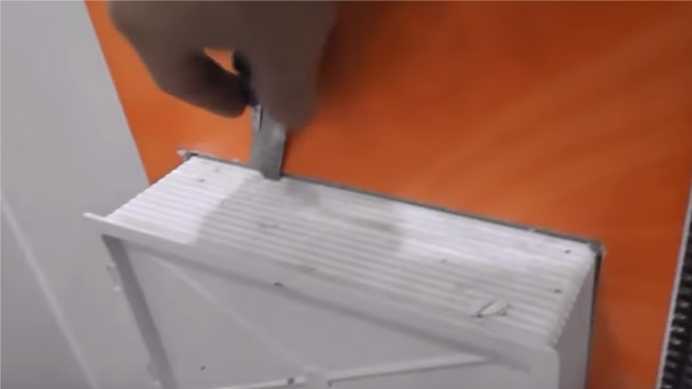
After finishing, the box for the button is cut off - its edges should be flush with the tile. The cut off cover reveals two bolt holes. It is on them that the drain button will be held.
Before installation, a hose is connected to the button (if the drain is pneumatic) or a cable (if the drain is mechanical). Then it is installed in place and tightened with two bolts (at the corners in a diagonal or as in the photo opposite each other).
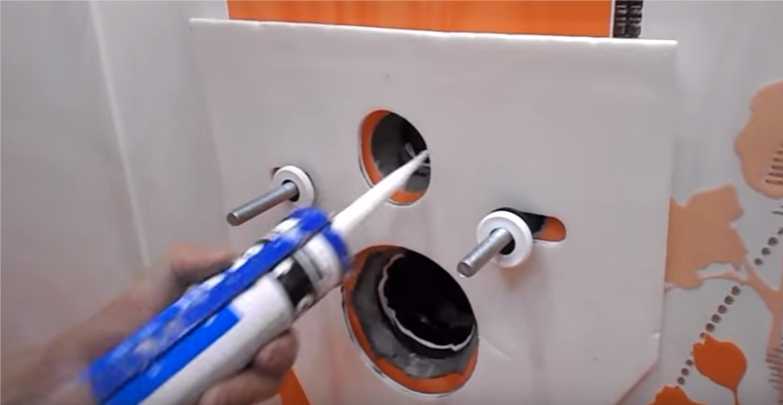
The installation of the bowl begins with the installation of the gasket. She is put on studs. Holes for sewerage and water drainage in a circle are treated with sanitary silicone.
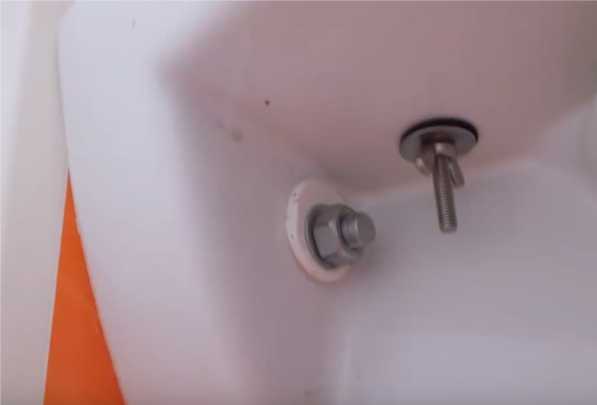
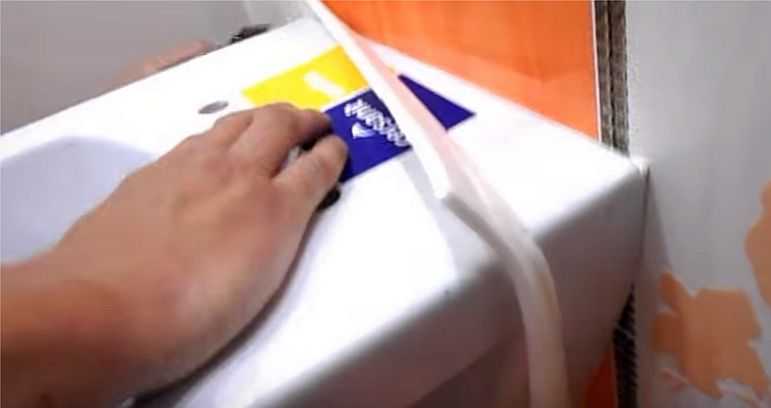
For better sealing, the joint is coated with silicone. Having laid the strip, it is immediately leveled, the excess is immediately erased. It is better to level with something smooth and rounded, for example, with the handle of a teaspoon. That's all, you can check the work.