Arbor made of reeds. Pergolas with a reed roof DIY gazebo decor from reeds
A gazebo made of reeds is a dream come true for many owners of their plots. Reed is an excellent material at hand, which is not afraid of such phenomena harmful to buildings as dampness, rain, mold or fungus, and also has environmental cleanliness.
The roof of it prevents the penetration of sunlight, the color of the material goes well with the base of the wooden building. The article will tell you how to make a gazebo out of reeds on your site.
In the construction of country arbors, reeds are increasingly used as a building material. It is an annual plant belonging to the coastal-aquatic genus of plants of the sedge family. Its stem can reach three meters, it can be in the form of a cylinder or has three faces.
Conventionally, the plant is divided into:
- Stem. It is the main part used in the construction of gazebos from reeds. Its diameter reaches 25 millimeters, and its strength is comparable to that of a reed vine. It has good elasticity and resilience.
- Leaves. Their sizes are up to 80 centimeters in length and up to 10 centimeters in width.
If you need to build a gazebo with your own hands from reeds, it is better to give preference to plants with the following characteristics:
- The stem is 1.5 to 2.5 meters long.
- The cross section of the stem with a diameter of up to 6 millimeters.
At the same time, the specific gravity in the assembled state of the reed coating with a thickness of 30 centimeters per square meter is 40 kilograms of dry mass.
Before you make a gazebo out of reeds, the material should be properly prepared. When to start harvesting reeds, what tools will be needed and how to plan the whole process, the video in this article will tell.
When using reeds, safety regulations must be observed and preventive measures taken into account.
These include:
- Before covering the gazebo with reeds, it is necessary to increase its fire resistance with modern means. For this, special flame retardant impregnations are used, which effectively counteract fire.
Tip: Impregnation of the roof with flame retardant should be repeated after a few years. The reagent may be gradually washed out by rain.
- When installing the barbecue inside the gazebo (see), a higher chimney should be provided. This will extinguish the flying sparks until they come into contact with the reed cover.

- The roof of such a gazebo under the reeds needs to be cleaned of fallen leaves, which will prevent it from forming a substrate that can lead to grass growth.
- To protect the roof from bird nesting, laying on top or under a small layer of stems with a thin metal mesh with a small cell allows.
The advantages of building a gazebo from reeds with your own hands are:
- Environmental friendliness of natural material.
- An opportunity to get away from the monotonous traditional materials for construction.
- Creation of trendy unique building designs.
- The stability of the structure to strong gusts of wind, precipitation.
- The service life of arbors is several decades.
- The construction of enclosed spaces allows you to create a stable, comfortable regime in them.
Despite the seemingly low cost of raw materials, the price of reed roofing is quite high. This is a rather exotic roofing material that needs proper installation, which is very painstaking, requiring a certain amount of experience, and there are not so many craftsmen who have such skills.
How to prepare the foundation for a gazebo
To begin with, a place for installing a gazebo is determined. It is better if it is closer to the house, so as not to run across the entire territory of the site if necessary to bring something.
But it is impossible that noisy feasts interfere with people in the house, or acrid smoke from the barbecue enters the dwelling, so the gazebo should not adjoin it closely.

Tip: A reed gazebo fits well into the landscape, but the location should be chosen so that the massive structure does not spoil its appearance. The area for the gazebo should be flat, preferably slightly raised, which will prevent the accumulation of water.
Foundation instructions include:
- Digging holes wide for a shovel and up to 50 centimeters deep under each corner of the gazebo.
- Posts are placed in the holes.
- The height of the columns is aligned by one level.

- The base is tied with sleepers.
- Several sleepers are laid across the form.
- All laid elements are fastened with nails and leveled.
- Fits in.
Tip: To increase the operating time of the gazebo, the boards must be covered from below with a special protective agent.
- Boards are nailed to the base of the sleepers.
- The edges are aligned, polished with a grinder and covered with a protective varnish.
- Holes are drilled in the corners of the gazebo from reeds, pins with a diameter of about 10 millimeters are inserted into them.
- Holes are made in the logs, which are put on pins sticking out of the boards.
- On top of the pillars, bars of 10x10 centimeters are laid out.
- Scarves are made and installed from the same beams, up to 50 centimeters long, which increases the strength of the structure.
How to make a gazebo
After preparing the base for the gazebo, the procedure for further operations will be as follows:
- Railings are made around the perimeter of the entire building.
- The roof is being built.
Reed roof laying technology:
- The sides are sheathed. For this, any boards are used. The bark is removed from each side of the board.
- The gazebo remains until winter without a roof. At the same time, it is covered with a protective awning.
- In winter, you can start assembling the reeds for the future roof.
- The reed is cut with a sharp shovel and folded into small piles.
- In the spring, the processing of reeds begins. To do this, beams with a diameter of 10 centimeters are formed, and their edges are cut off to obtain even blanks, about one meter long. The received nodes are connected.
- Roof laying is best done with a partner.

The order of laying the structure:
- The lower slope is laid out in bunches.
- The entire row is pressed against a five-millimeter diameter galvanized wire, which is attached to a wooden plank attached to the roof.
- The wire is tightened in two stages:
- the first - the material is pre-tightened;
- the second - the ropes are cut and the bundles are leveled.
- It is knocked down from below and the butt is aligned. In this case, the material will need to be tightened tightly.
- Screws for winding the wire are installed in increments of 20 centimeters or through two bundles. This is the first row of the roof.
- All subsequent layers are also made.
- The ridge of the roof is made of iron and ondulin.
- If necessary, steps are made.
Inside the gazebo equipment is carried out at the request of the owner.
On gazebos, a reed roof is the best solution in terms of price and quality. Our ancestors used this material many centuries ago due to the fact that it perfectly retained heat and did not let moisture through. Therefore, even heavy rains and hail will not lead to damage to the reeds used when laying the roof. Nowadays, natural and artificial straw is confidently mounted on gazebos and country houses due to the fact that it serves for decades without the need for repairs.
Fact: reed roofing is the best option for gazebos, because during outdoor recreation you can easily hide from heavy rain and the scorching sun. At the same time, the quality of protection will depend on what installation technology the roofers use, and what materials were chosen.
The ROOFREED company creates roofing coverings of the highest quality according to SNiP standards and guarantees compliance with the agreements. The roof of the straw gazebo is created from reeds that have passed a rigorous selection. We select only thin and flexible stems that are 100% healthy and unaffected by fungus and mold. That's why we give a 50-year roof warranty. To learn more about material properties, watch the video on this page.

Is reed roofing flammable?
Often people refuse this solution due to the fact that the roof of the gazebo made of reeds can easily ignite. But this is a delusion, since new installation technologies completely exclude the possibility of fire spreading. Firstly, this is due to the high packing density. This avoids air circulation in the internal sections of the roof, which makes it difficult for the fire to spread. Secondly, the materials are carefully treated with imported flame retardants, so they do not ignite.
Note! The high packing density leads to another advantage - the complete exclusion of the reproduction of rodents and birds, as well as insects and bacteria. Therefore, you do not have to treat materials with protective compounds every year.


Why reeds?
- Reed grows in rivers, seas and lakes. It is for this reason that it is not afraid of exposure to moisture, so you will save on creating a waterproofing layer. Roof leakage is excluded even during heavy rains (moisture penetrates only 3 cm).
- This is a unique solution that can complement your landscape design and add variety. In addition, it is possible to carry out laying on structures of any complexity.
- This is an environmentally friendly material that does not contain chemical impurities. Therefore, if you are allergic or have small children in your family, then you can completely relax.
- The roof is protected from mechanical damage, so you can save on maintenance.
- The material is universal and retains its positive qualities both in hot summer and cold winter.
But you need to remember that the roofing must be certified, and installation can only be performed by experienced professionals. You can insure against force majeure with the ROOFREED company. More than 500 projects have been implemented, so we give a 50-year quality guarantee. To place an order, call us right now.
Recently, summerhouses have become an integral part of life in a private house. Many try to jump above their heads and build something, not like everyone else. Everyone knows the "golden" rule that the simpler - the better and more reliable. Plus, this is a great chance to do everything with your own hands, without asking for help from specialists.
Making simple, and most importantly beautiful gazebos with your own hands is much easier than you think. Of course, you can take the path of least resistance, pay a lot of money to the masters of their craft, and in the end get what you expected. But still, sometimes you want to prove at least to yourself that your hands have grown from the right place and it is possible to create a dream creation from improvised materials or for minimal investment.
We can prove that even the simplest do-it-yourself gazebo will delight you for many years and bring warmth and comfort to your family. In this article, we will look at a variety of types of gazebos that we can build ourselves at no extra cost. You can already start arming yourself with the most popular tools and go in search of materials for a future vacation spot. But before that, we recommend reading a little theory, and boldly proceed to practice.
Do-it-yourself gazebos from reeds
What to make a garden gazebo from? The first thing that comes to mind is that the gazebo should be budget-friendly and made from the most environmentally friendly materials. One immediately hears in the head: “a tree is what we need.” To make a boring wooden gazebo unusual, you can add a reed roof to this design. Let's try to make a beautiful gazebo out of reeds with our own hands. Now we will take a step-by-step look at how to properly make such an arbor.
STEP 1: foundation. Since the gazebo made of reeds has a fairly small weight, we make the foundation columnar. You can make a tape, but it's useless. At the corners of the gazebo, we dig holes 40-50 cm deep and concrete the foundation pillars.
STEP 2: floor. First you need to connect all the foundation pillars with each other with lags.
 Bottom trim
  Floor
Floor
To protect the logs from rapid decay, you need to open them with a special tool (antiseptic). You can take a solution of copper sulfate and process the boards well.
After the lower trim is ready, we proceed to the floor overlap. As a floor covering for a gazebo made of reeds, you can use boards 15 mm thick (this will be enough).
STEP 3: frame.
We proceed to the manufacture of a reliable frame of the entire structure. It is not necessary to make a powerful frame, because the roof of our gazebo will not exert enormous pressure on it. A 75x75 timber or a small log will be quite enough. We fix this case on the bottom strapping, and we connect the top of our simple gazebo for a summer residence. 
STEP 4: roof. The highlight of our entire structure will be the roof. Now not many people use reeds as roofing. Therefore, a gazebo with a reed roof cannot go unnoticed on your site. But first you need to make a roof frame. For this type of gazebo, a hipped roof is perfect. But it is unlikely that we will be able to do it right. Therefore, it is easiest to make a gable or shed roof. The slope of the roof must be at least 40 degrees. If there is less, then moisture will accumulate in the reeds and this will lead to the rapid decay of our roof. 
In order to properly make the roof of our gazebo from reeds, it is necessary to collect reeds in bundles with a diameter of about 20 cm and tie it with wire. The edges of the beams must be made even. So that the reed dust does not fall on the head, we make a good crate from the lining. Bunches of reeds are laid on the roof in one or two rows. We fix the bundles to the slope with 5 mm wire and 3 mm wire to the crate. 
The roof of our gazebo is almost ready. It remains only to fix the iron ridge at the top (if it is a gable roof). If desired, you can sheathe the railing around the perimeter of the gazebo with the remaining boards and open the frame with an antiseptic.
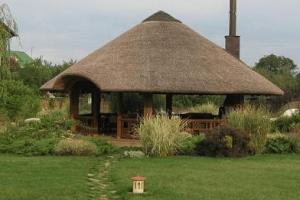
This is how our gazebo will look like. Looks pretty good too.
Do-it-yourself wicker gazebos
Let's continue the topic of ecology and consider another of the popular types of country arbors. To make a wicker structure, you do not need to have a black belt of the country's chief foreman and buy some expensive materials - we stock up on vines and patience, and proceed to the grandiose construction of the most elementary, but beautiful wicker gazebo for a summer residence. First, let's start studying the theoretical material, and only then you can safely go and translate everything into reality.
STEP 1:
sorting. The first step is to sort the vine by length and thickness. We leave thicker branches on the base of the gazebo, because we need to make it as reliable and durable as possible. 
STEP 2: foundation. Since a wicker arbor does not exert almost any pressure on the ground, you can get by with an ordinary columnar foundation. It will be enough for the gazebo to stand securely for decades. We take a drill and make recesses under the pillars. It will be enough 50 - 60 cm. We insert our pillars, and fill everything with a solution with rubble. 
STEP 3: weaving. Consider the chess technique of weaving. Between the main concreted pillars of the wicker gazebo, we will have auxiliary posts, between which we will weave the vine. If the length of the branch is not enough to complete the row, then you need to add the next branch to it, and fix it with wire. After the section is ready, we fix the ends of the vine on the last column with wire, rope or a construction stapler. It was the simplest vine weaving technique. There are many more different beautiful methods, but this is not about that now. 
STEP 4: roofing. Having chosen the shape of the future roof, you can begin to manufacture it. It is best to do this on the floor, and then place the entire frame on the gazebo. In the role of roofing material for a wicker gazebo with your own hands, you need to use light materials: polycarbonate, corrugated board, reeds or straw. 
Such gazebos fit very harmoniously on the green area. You can make small flower beds around the gazebo and plant bright flowers. Also, you can equip the gazebo with exquisite wicker chairs and a table.
Simple wooden gazebos
We turn to heavier artillery - a gazebo made of wood. These are no longer toys for you, here you need to initially calculate everything and make a reliable foundation that will not allow the entire gazebo to warp. We buy all the necessary materials, find our abandoned tool and go to battle! Consider a brief step-by-step instruction on how to make a simple wooden gazebo with your own hands.
STEP 1: foundation. For a wooden gazebo, we will use a foundation in the form of brickwork. We pick up a shovel, and make a square hole about 50x50x50 in size. We fill the bottom of the pit with concrete and begin to lay bricks in a checkerboard pattern. Two along, two across, and so on until the masonry reaches ground level. Then we lay two more rows of bricks so that the future wooden base of the gazebo does not come into contact with the ground. 
STEP 2: floor. We sheathe the floor of our simple gazebo with ordinary boards. How much easier!
STEP 3
: frame. We begin to build a frame from the bottom strapping. When it is ready, we proceed to the construction of walls and the upper trim. To increase the strength of the wooden structure, we reinforce each corner with an L-shaped fastener (of course, all this is done with self-tapping screws). 
STEP 4:
roof. We make an ordinary gable roof frame (it is better to do it on the floor), and mount it in its rightful place. Here you need to use longer screws and reliable metal corners so that the roof does not fly away to warmer climes with the first gust of wind. 
STEP 5: roofing. Since our simple gazebo for a summer residence already has a solid foundation, you can choose heavier roofing materials, for example: flexible tiles or metal tiles. For such a coating, you need to make a special crate.  You can read more about construction in a specialized article on our website.
After the construction of a gazebo made of wood, you can start decorating and arranging the structure. Just before that, you need to varnish the frame and the floor of the gazebo. This will help preserve the wood and protect it from corrosion, and in addition emphasize the unique structure of the wood.
Do-it-yourself gazebo from PPR pipes
Quite common are the designs of plastic pipes. Country gazebos are no exception. The main advantage of a gazebo made of polypropylene pipes is the ease of assembly and the lightness of the whole structure. You can easily assemble the gazebo and put it into operation in 1 working day. We go to the store for pipes and fittings (straight, angled and tees) for their connection and a special soldering iron for plastic pipes. Let's look at how to make a simple gazebo from polypropylene pipes with your own hands.
STEP 1: concreting pipes
. To fix the future frame of a gazebo made of plastic pipes, you need to securely fix an iron or plastic pipe of a larger diameter in the ground. For this case, we need a small drill. We make 4 recesses in the ground, somewhere around 50 - 60 cm. We prepare the desired pipe - we measure and cut it off so that it is flush with the ground or a couple of centimeters above ground level. We insert it into the recess and fill it with concrete around the perimeter. 
STEP 2: assemble the frame.
In order to make an even frame, it is necessary to cut the required number of longitudinal and transverse pipes, and connect them through special adapters (fittings) to each other using a soldering iron for PPR pipes. After the entire frame of our simplest gazebo is assembled, we insert it into pipes that are concreted in the ground. It would be a shame if you did not pick up pipes of the required diameter and a small inconsistency turned out. 
STEP 3: "walls". A gazebo made of polypropylene pipes is a summer version of a place to relax, so it needs to be made as “easy” and relaxed as possible. An excellent option would be to hang a light canopy. You can also sheathe the gazebo with polycarbonate. 
STEP 4: roof. Since our gazebo turned out to be simple, then the materials for the roof must match. We make a gable roof from the same PPR pipes. We cover everything with polycarbonate and you're done! 
STEP 5: floor. The floor of the gazebo made of plastic pipes can be covered with gravel or laid out with square slabs. But the best option would be ordinary lawn grass. It will be pleasant to be in such an arbor, and it will be wonderfully combined with the surrounding design of the summer area.
Here we have such a simple design. Of course, you can make a more complex gazebo of a different shape, with a different type of roof, but our article is not about that at all.
"Live" willow gazebo
Not everyone knows that a gazebo does not have to be built, it can be grown. Interesting? Then we will tell and show how to do it.
Organic architecture is actively gaining momentum. This direction is now quite popular in the West, and in Russia it is just beginning to gain momentum. Consider how to make a simple willow gazebo with your own hands.
STEP 1:
markup. You need to start the "construction" of such a gazebo in the fall. We mark the territory of the future gazebo. We plant willow branches around the perimeter. The length of the branches varies from 2 to 3 meters. 
STEP 2: connect them. Next, you need to tie the tops of the branches. In the end, we will get a kind of frame for the future "live" gazebo.
STEP 3: gazebo maintenance.
Now it remains only to wait and from time to time cut the willow shoots that will grow inside the gazebo. 
That's basically it. After 2 - 3 seasons you will get a full-fledged "live" design. One hundred percent that your neighbors and acquaintances will be very surprised when they see such a simple and beautiful gazebo in your area.
That's all we have! I hope you liked our options for ordinary arbors. Naturally, these are not all types of gazebos that exist. But we will definitely return to this topic later. Stay tuned for new articles and build with us!
Garden gazebo: why build it? Weird question. It is so pleasant and easy to hide in it from the scorching sun in the summer heat, to have a solitary date or a friendly family tea party. From the point of view of country design, a wooden gazebo, especially entwined with vines, with a reed roof is just a godsend. And for how many musicians and poets the garden arbor has become a wonderful creative stimulus.
A gazebo made of reeds will not only save you money, but also serve as a real decoration of the site.
The do-it-yourself gazebo is beautiful because it does not constrain the imagination of the architect. Only finances, materials and time can limit it.

Reed is an environmentally friendly material, but it ignites easily, so it is not advisable to use it for gazebos with barbecue or barbecue.
Without a doubt, now you can buy or order gazebos of various sizes and configurations. The absolute truth is the statement that a wooden gazebo made by oneself with a wonderful reed roof will bring a special personality to the garden plot, and special comfort to the people resting in it. After all, even the smallest carnation will carry a trace of the energy of the creator of the gazebo, his dreams and personal attitude. This is a very valuable property of all objects created by one's own hands.
So why are reed gazebos popular? Now this can be called excellent environmental properties, but in the old days people simply knew that a properly made reed canopy would protect the rays of the sun from the scorching heat even in extreme heat, and would not let water through even during a thunderstorm.
You can build a rectangular, round, square or hexagonal gazebo. You can imagine any form you like.
First of all, you need to plan the best place for a reed gazebo, choose its shape. In the completed state, the garden gazebo will have a tangible weight, which means that it will not be possible to do without a foundation.
Necessary tools for building a gazebo from reeds

- hammer;
- shovels - bayonet, shovel;
- electric or chainsaw;
- Master OK;
- axe;
- pliers;
- electric drill;
- screwdriver;
- water level.
Back to index
Starting building
The columnar foundation is the most economical. Of course, you can also make a small strip foundation, for example, only materials, which means that more money will be spent on it. And the garden gazebo still cannot be compared with a building even on two floors. Therefore, in the place intended for the gazebo, according to the shape of the future structure, it is necessary to put pegs and, for example, draw a contour with a nylon cord.

In the corners of the proposed contour of the gazebo, it is necessary to dig holes 50 cm deep and 25 cm wide for foundation pillars. Based on the selected dimensions and configuration, up to 9 posts may be needed. If the area under the garden gazebo has an uneven surface, the cast foundation pillars should be leveled. This should be done in compliance with the clearance between the ground and the proposed floor of the gazebo at 10 cm.
Having finished the construction of the foundation pillars, the logs are installed. It is good to make logs for the future floor of a garden gazebo from a board 150 mm wide. To prevent rotting, they should be carefully treated with a solution of copper sulfate. Taking a five percent solution, apply several layers. To improve waterproofing, it is possible to place pieces of roofing material under the logs on the foundation pillars when laying.
It is very important to line up all the logs in a perfectly horizontal plane. This is achieved by placing pieces of roofing material in the necessary places (under the logs). And the ideality of the horizontal is measured by the level.
It is necessary to protect the floor boards of the gazebo from moisture. To do this, they must be treated with an antiseptic. The width of the boards to prevent future deflection should be 40 mm. Connect boards with joists with nails 100 mm long.

Having completed the arrangement of the floor, holes are prepared in the corners where the pins will be inserted. The optimal diameter would be 10 mm. Now we move on to the logs. It is possible that it was not possible to purchase processed logs. Ordinary ones will also fit, you just need to cut down all the knots on them and remove the bark. Then, with the help of fine sandpaper, the trunks are sanded, achieving the necessary smoothness to the touch.
Holes are made in the logs prepared in this way. It is in them that the pins prepared earlier will enter, so the diameters of the holes must match. Wooden bars (50x70 mm in size) are attached to the logs from above. The same bars are suitable for making spacers of equal length (about 50 cm), two pieces for each log post. At a 45° angle at the spacers, the corners are cut, leaving the long side intact. Spacers are attached at one end to a log pole, the other - to a bar. A gazebo designed in this way will be stable and durable.
Back to index
Arrangement of a reed roof
A reed gazebo is a very interesting idea. However, without having accumulated sufficient experience in the construction of buildings with a reed roof, it is unlikely that it will be possible to remarkably perform a complex version of the roof, for example, in the form of a tent. It is more reliable and much easier to make a gable roof or a regular canopy. Any version of the gazebo roof begins with the execution of the frame. For its construction, the same bars will fit. The angle of inclination of the reed roof is made at least 35 ° so that moisture does not accumulate. The frame and rafters are much more convenient to assemble section by section on the ground. They are fixed with screws, then the roof frame is assembled.

Reeds can be used not only to cover the gazebo, but also for a residential building.
Reeds are collected in bunches. The thickness of one beam is maintained at about 20 cm. The edges of all beams are cut off so that there is a smooth edge, then they are tied. The crate to which the reed canopy is attached is best made solid. Such a roof for a gazebo is easier to install, and during the rest, reed waste will not fall on people's heads. The crate is easier to make from lining, screwing it from below with self-tapping screws to the roof frame.
The slope of the roof of the gazebo is laid out with reed bundles. For a simple canopy, one length of reeds may be enough, i.e. cover the entire slope in one row. But if the reed stems are shorter, or to give the canopy a more interesting look, you can lay the reeds in two rows. The laying technology will be the same, only in the latter case it is necessary to overlap the upper reed layer on the lower one by 30 cm.
The laid bundles of reeds must be pressed against the roof slope with galvanized wire 5 mm thick. Usually pressed in three places: in the middle, as well as retreating 15 cm from the upper and lower edges of the slope. Further, this wire is attracted to the crate with a stainless steel wire (usually 2 mm thick), fixing the latter to the crate by the screw head. The puff is divided into 2 stages. First, the reed bundles are pressed and tightened, then the ropes that tighten the reed bundles are cut, the stems are leveled and screwed to the crate. The screws where the wire is attached must be tightened at a distance of every two bundles. And, of course, a garden gazebo should have an iron skate on the roof.
Next, you need to equip the railing around the perimeter of the gazebo and sheathe the sides. For this, all the remaining logs and boards from the construction are suitable. It is important that they do not have bark. It is also important not to forget to equip the entrance and steps. The reed gazebo is ready.
How to make a reed roof with your own hands - Step by step instructions + Video. A long time ago, people began to use natural materials for housing construction. Today, reed has become something special, popular and in demand, as it is an environmentally friendly and versatile material.
Such an original roof is suitable for anyone and you can easily do it yourself.
You need to start harvesting in winter. Mowing the reeds begins as soon as the reservoirs are covered with a solid surface of ice. After that, the plants are placed in the form of sheaves and dried.
Note, that after the natural raw material reaches a moisture content of 18%, the sheaves must be turned upside down with butts, and so stored until the start of production.
After that, the reeds and leaves are removed so that the plant does not rot.
Manufacturing technology
Finding materials on the market is not difficult, as there are many types of plants on sale, and you can choose the one that you like the most.
A do-it-yourself reed roof can be made using different technologies, and it depends on the variety:
- Danish.
- English.
- American.
- Polish.
- Dutch.
Attention! It doesn't matter which method you choose, any technology involves fixing the beams with an overlap.
To make the finished product durable, use stainless steel wire.
- According to Dutch technology, roofing with reeds involves laying plants up to 2 meters in length. In this case, the thickness of the stem should not be more than 6 cm.
- According to Danish technology, the stems should be no more than 1 m long and 0.4 cm thick. This technology is the most time-consuming.
- Polish technology is the creation of a loose structure, the spikelets should not fit snugly against each other. This option is suitable for a reed roof for a gazebo.
There is a certain division of technologies into 2 main groups:
- Closed.
- Open.
When erected using open technology, the beams should be laid on the crate in such a way that the inner surface is also the ceiling. This method is perfect for cafes, bars and restaurants.
Flaws:
- Too high price.
- Labor intensity.
- Ugly (reed fluff can fall into the plates of visitors).
With a closed technology, wooden lattices are made on which plants will be attached.
Advantages:
- Moderate price.
- Beautiful appearance.
- High level .
- Small investment in time and labor.
Advantages of natural material
Reed is classified as a natural raw material, and it has a lot of positive qualities, making it easy to work with:
- Resistant to high levels of humidity.
- The material is resistant to decay.
- Soundproofing characteristics are also on top.
- No allergens.
- Excellent waterproofing.
note , that when arranging the roof, plants that grew in salt water should not be used.
Coating Benefits
A do-it-yourself reed roof has good characteristics: it is not afraid of temperature changes and high levels of humidity. A fungus will not form on the surface, the roof is not subject to the process of decay, since under natural conditions the plant grows in a humid environment.
Even such a roof system has natural ventilation and no additional finishing with heat-insulating materials is needed. Thanks to the tubular structure of the stem, the under-roof space is reliably protected from external noise. The term of such a roof is from 50 years.
In addition to the attractive appearance, I would like to note that the reed roof is unique and exquisite in its kind. After installing a natural material roof, it will be golden in color, and gradually the color will appear even more strongly. So, the adjacent territory and the facade will be complemented by a beautiful shade, which will make the perception of the house even better.
Laying technology
 Method number 1. This method involves laying sheaves in rows. First you need to make a cornice overhang, and place the plant the way it grew in its natural environment - root down, panicle up.
Method #2. The bottom row should be placed with the root down, and the other rows should be placed so that the root is pointing up.
Method number 3. You can throw material on the roof in any order and press it with a load (for example, wooden poles).
In modern construction, it is the first method that is often used, since thanks to the stitching with steel wire and fastening with self-tapping screws, the sheaves are laid neatly, and in the end it remains only to “comb” them.
When laying the roof without violating the technology, a beautiful view is obtained. If you make a dense laying of the roof of reeds with your own hands, then the roof will also be fireproof.
Interesting, that to improve fire safety, the roof should be coated with a fire retardant. This treatment should be repeated periodically.
To form the ridge of the roof, you can use boards, heather branches or inverted sheaves, which should be laid in “pairs”, In Holland, real tiles are used for this. The roof can also be additionally covered with wire mesh to prevent nesting.
Terms of use - characteristics

Now in construction they prefer profiled sheets, tiles and slates, and they forget that there are natural raw materials. But it is reed that is the safest and best material for roofing in human housing.