Grouting drywall joints: - do-it-yourself installation instructions, how to cover up, jointing, price, photo
Grouting drywall: materials and work technique
When sheathing walls and ceilings with drywall, gaps inevitably remain between the sheets of material. And so that these gaps do not appear under paint or wallpaper, it is imperative that the drywall seams be processed with a special putty.
Sealing gaps in drywall is not particularly difficult, but at the same time it requires careful execution. In the article, we will describe in detail the sequence of grouting operations, and also focus on some of the nuances that affect the quality of the final surface.
Grouting on the ceiling
Preparatory work
Tools and materials for GKL putty
Before you begin work on preparing the skin for finishing, you need to decide how to cover up the drywall seams, as well as purchase the necessary tools.
The most commonly used for this operation are:
gap filling material
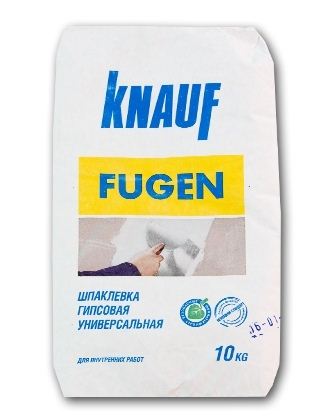
- Putty for drywall. The most widely used materials are Fugenfüller, Uniflot, Fugenfitt, etc.
They provide reliable fastening of the edges of the plasterboard and prevent cracking of the seam under the finish after the putty dries.
Note!
If you plan to apply interior paint over drywall sheathing, then it is better to use more expensive compositions to seal gaps and uneven walls.
To level the wall for wallpapering or decorative plaster, you can use compounds whose price is in the cheaper segment.
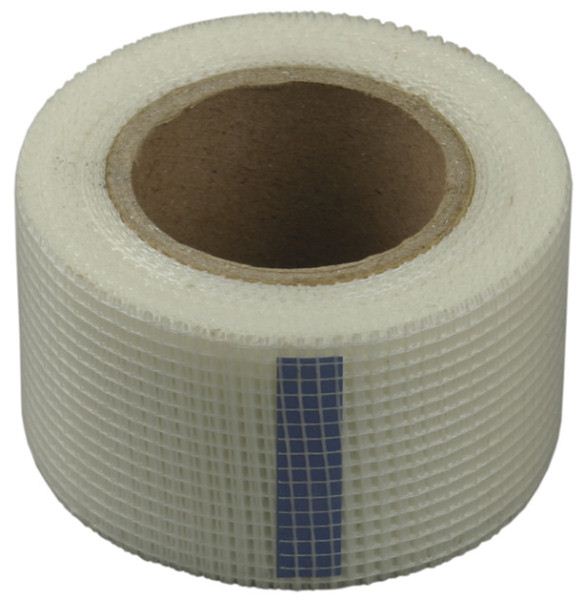
- Reinforcing tape-serpyanka. It is used for gluing the seam and preventing its damage.
- Metal corners. They perform the same function as the serpyanka, but protect the edge of the GKL more reliably.
What plasterboard seams are covered with, we figured it out, now you need to pick up the tools to complete this task:
- We perform the procedure of filling the seam with a spatula. It is better to have several spatulas of different sizes on hand - this way it will be possible to carefully fill in small irregularities and process a large area.
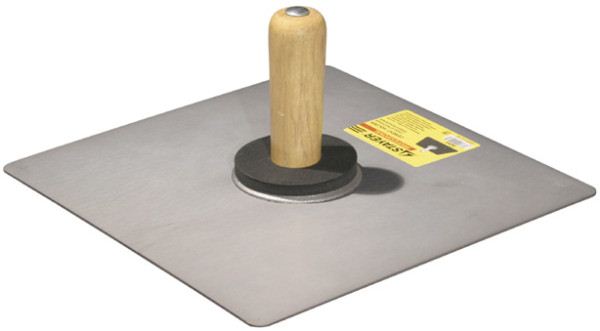
- To work with seams and crevices on the ceiling, we need a falcon - a special plate with a handle on the underside.
On this plate, you can lay the putty mass, and gradually pick it up with a spatula to fill the cracks.
- To grind the worn surface, a grater with an abrasive mesh is used.
- To control how well we apply putty, we need a level. In this case, it is better to take an ordinary level with an air bubble, since a laser one is practically not suitable for this purpose.
So, we have something to overwrite the drywall seams, the necessary tool is ready - which means it's time to get to work.
Preparing seams for grouting
Before grouting the seams on drywall, they must be prepared in a special way - otherwise the grout will not penetrate the seam, which means it will not provide sufficient adhesion to the drywall sheathing material.
Ideally, preparation for grouting joints is carried out at the stage of sheathing:
- After trimming, the edge of the drywall board is carefully processed with a peeling planer for drywall. This is done in order to ensure the most dense docking of the plates with each other.
- When the edges are processed and leveled, we lay the slab on a flat surface and use an edge planer to chamfer at an angle of 45 0. The width and depth of such a chamfer should be from 5 to 10 mm, depending on the thickness of the plasterboard.
Chamfering with a paint knife
- We fix the chamfered slabs to the drywall frame with self-tapping screws, making sure that each slab is securely fastened.
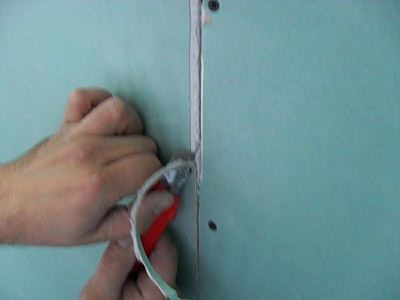
The greater the “free play” of the edge of the slab, the more difficult it is to fill the joint with high quality and the higher the likelihood of its cracking. - If we need to close up the cracks in the wall already sheathed with gypsum board, then the plasterboard joints are made using a paint knife. Having set the blade at the selected angle, we process the edges of the sheathing sheets, forming a v-shaped recess.
After the chamfers at all joints have been removed, it is necessary to treat the surface of the wall or ceiling with a primer. Of course, you can do without this component, but a high-quality primer provides more effective adhesion of the putty to the gypsum core of the sheathing sheets.
- When the primer is completely dry, glue all the joints with sickle tape. As a rule, fiberglass tape is produced with a self-adhesive coating, so its application should not cause any difficulties.
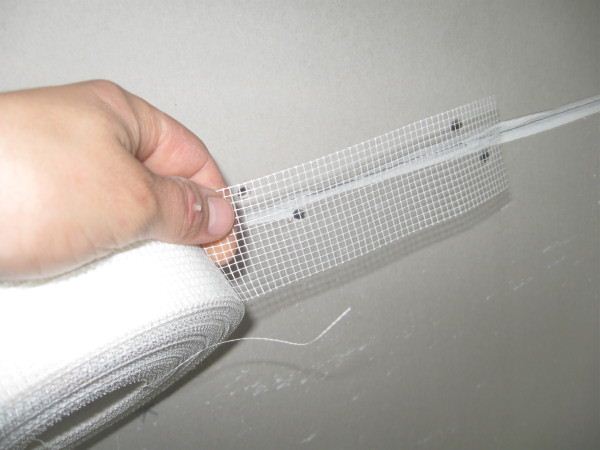
Gluing an embroidered seam with a sickle
- The sickle is glued exactly in the middle of the joint, while sagging sections of the tape should not be allowed. The connection of several tapes must be overlapped, and the edges must overlap each other by at least 4-5 mm.
Advice!
Instead of a sickle tape, you can glue the joints with strips of gauze or paper. In this case, of course, the quality of the surface will be significantly lower.
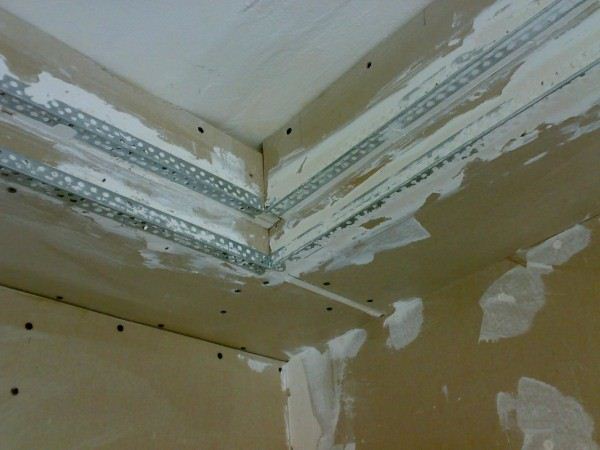
- Also, at the preparation stage, we glue all the internal and external corners of our drywall construction with a sickle.
An alternative to sickle, as we noted earlier, can be a perforated metal corner (pictured).
Processing joints of plasterboard sheathing
Putty preparation
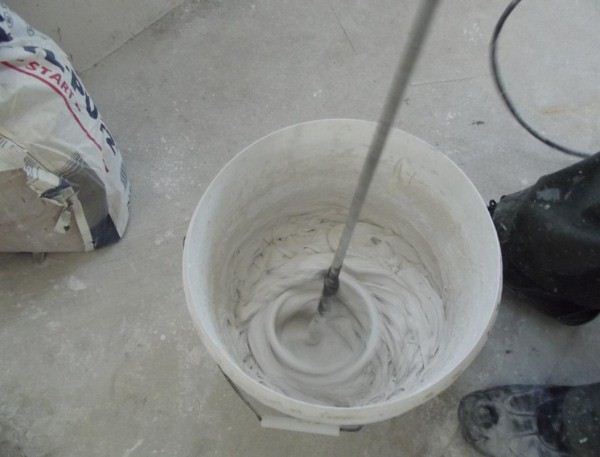
- In a clean container (it is best to purchase a box specially reassigned for this), we pour tap water in the amount indicated by the instructions from the manufacturer of drywall putty.
Water should be at room temperature. - Pour the dry component of the mixture into the water and mix the composition thoroughly using a drill with a special nozzle. The speed of rotation of the drill should not exceed 600 rpm.
- Leave the mixture for 5 minutes, then mix again. The time of using the putty prepared in this way is about 2 hours, therefore, with large volumes of work, it will be more rational to prepare the composition in several steps.
Note!
After the putty mixture has dried, adding water with repeated mixing of the composition is not allowed!
Seam putty
When the grout composition is ready, proceed to its application:
- First, we put a sufficiently large amount of putty mass on the falcon - so as not to run every minute to the box for a new portion.
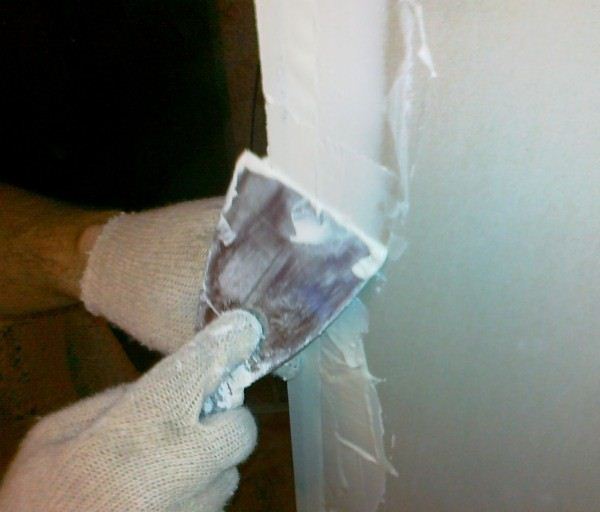
- Having typed a small amount of the composition from the falcon with a spatula, we rub it into the gap between the drywall plates. In this case, it is necessary to ensure that the mixture is forced through the sickle cells. You can study the technique of performing work on grouting the seam using the materials on the site.

Gap grouting on sickle
- We continue to fill the gap between the GCR until the entire seam has been processed in its entirety. After the putty begins to set, take a wide spatula and remove the excess, leveling the layer.
- Separately, we process irregularities in drywall sheets, their damage, as well as the places where self-tapping screws are attached to the frame.
After applying the putty, let it dry, and then repeat the operation, applying the finishing layer. In the presence of significant irregularities or sufficiently wide gaps between the plates, the number of layers of putty can reach three, and sometimes four.
We level the finishing layer with a wide spatula, after which we necessarily control the surface plane with a level.
Corner and seam processing
The method of processing internal and external corners, as well as joints and junctions of drywall to walls and other load-bearing elements, practically does not differ from processing the gaps between the plates:
- Before covering the seams on drywall in the corners and at the joints, we control the quality of gluing these sickle elements. For greater reliability, a small amount of putty can be applied under the sickle - so the angle will be more reliable.
- We putty the corner pasted over with reinforcing tape using a special corner spatula. The working part of the spatula should be moved at an acute angle to the wall surface, pushing the grout through the stack cells or perforation of the metal profile.
- As in the case of filling gaps, we putty the corner in two stages: first we apply a primer layer, after which we perform a leveling grout.
Surface grinding
The last thing we need to do is sand the putty surface with our own hands.
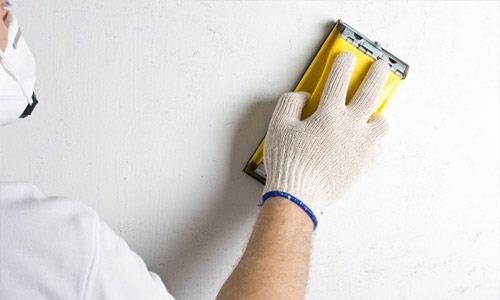
Grating surface treatment
- Before grinding, we illuminate the leveled surface with a powerful lamp or a small spotlight. This will allow us to identify possible irregularities and eliminate them.
- Grinding is carried out after complete drying and polymerization of the putty. The polymerization time is indicated in the instructions from the manufacturer of finishing materials.
- For grinding, we use a special grater with an abrasive mesh. We level the areas treated with putty in a circular motion, trying not to damage the GKL cardboard base.
- After grinding, we clean the entire surface of the skin from dust, and then we process it with a primer. The type of primer depends on which finishing method we choose.
Finally
We hope that the instructions in this article clearly demonstrate how to grout drywall joints and prepare drywall sheathing for finishing. There are no particular difficulties in performing this task, but if you want to get a perfectly smooth and beautiful surface, then you still have to try!