Do-it-yourself birdhouse from a plastic bottle - photo. How to make a birdhouse from a five-liter plastic bottle
Making crafts is a time well spent not only for children, but also for their parents. Children will be able to learn how to do something new, and parents will be happy to spend their free time helping their children to have fun with benefit. Why not combine fun and helping the birds? Quite suitable for this craft is a birdhouse. In the end, our birdhouse will turn out to be very beautiful, similar to a village house. In which a bird will gladly settle. It can be hung both in the forest and in the garden in the country.
To make a birdhouse we need:
- plastic bottle 5 liters;
- two bottles 1.5 - 2 liters;
- double-sided tape + glue;
- brushes;
- paints;
- marker;
- a piece of cardboard or paper 10-10 centimeters;
- linen rope 1 meter + small elastic band;
- penknife or scissors;
1. Remember, creative work should not be in a hurry. Accuracy is the key to beauty.
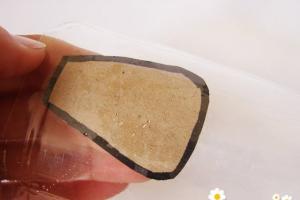
2. On cardboard, draw a trapezoid rounded at the corners and cut it out, this is a blank.

3. We apply the blank to a 2-liter bottle, outline and carefully cut it out.


4. You should get 25-30 pieces.

5. In the middle of a 5-liter bottle, draw a circle (the entrance for the birds) and cut it out very carefully so that there are no sharp corners. A puncture in a plastic container is easy to make with a kitchen knife.

6. A little lower we cut out a circle for the perch on which the bird can stand.

7. We attach trapeziums from 2-liter containers to adhesive tape. From top to bottom, in 4 rows as shown.

8. Insert the birdhouse perch into a small hole and fix it with glue.


9. We paint the birdhouse, as in the photo.

10. We circle the rope around the neck and finish painting the roof with not very wet paint.


11. Let's make a decorative fence around the birdhouse. We cut the sticks to a length approximately equal to each other. We stretch the elastic band on the bottom and insert sticks between it and the bottle. Then we wrap the rope at the level of the gum, as in the photo.


12. Let's make a beautiful entrance to the birdhouse. Glue the sticks around the large circle.


13. Having wrapped a twig with a cord, we will make a comfortable perch.


14. We wrap the perch with a rope. We also wrap the recesses of the bottle with it. You can also add decorations: leaves, flowers or, like me, ladybugs.

Such a fascinating master class will instill in children a love of nature and make their horizons wider.
If you find an error, please highlight a piece of text and click Ctrl+Enter.
Do you think that in order to help nature, it is necessary to manage a charitable foundation?
This is wrong!
Everyone can contribute by building a birdhouse with their own hands.
To do this, you only need instructions and a minimum set of tools. The last one is up to you, and you will find the guide below.

Do-it-yourself birdhouse: necessary materials
Bird houses are usually made from boards or plywood. Such birdhouses are more attractive to birds, but it is not always possible to get suitable material. Therefore, it is much more convenient to use improvised means.
To make a cool birdhouse, you need one or two plastic bottles and a little imagination. The amount of material and the list of tools depend on the method of manufacturing the structure.
Specifically, for our example, you will need:
- two plastic bottles - 2 liters and 5 liters;
- gouache paint;
- glue "Second";
- straight wooden stick;
- acrylic lacquer;
- sackcloth.
Note: a five-liter bottle should be intact, because the birdhouse will be blown out due to extra holes, which will scare away the birds.
A set of tools for making a birdhouse can be found in any home.
All you need is large scissors, a utility knife, a marker, and a few brushes for applying paint and varnish.
How to make a birdhouse with your own hands from a bottle
After the material is collected, proceed to manufacture. First, we will make a blank with our own hands, and then we will deal with fine-tuning and decorating the birdhouse.
For convenience, we divide the process into several stages:
Stage number 1. We make a roof.
At this stage, it is necessary to make a "tile" for a decorative roof. Don't worry, you don't need clay or a kiln. We cut out all the elements from a two-liter bottle.
Cut off the neck and bottom. Cut across the middle and unfold. Using a marker, apply the contours of the "tile" to the plastic and cut them out with scissors.
Note: to make it the same size, use a cardboard stencil.
Stage number 2. Birdhouse base.
At the top of the five-liter container, draw an even circle with a diameter of 4-5 cm. Next, cut a hole along the contour.
Down from the entrance, at a distance of 2-3 cm, make two intersecting short cuts. In the resulting hole, use glue to fix a wooden stick.

Important! Glue the burlap to the inside of the bottle. This is necessary so that the birds can get out. If you ignore this step, because of the slippery walls, the birdhouse will not become a house, but a death trap.
Stage number 3. We lay the "tile".
Start gluing the roof elements from the bottom edge and gradually move towards the neck of the bottle.
Do not forget that the lower part of the roof should act as a canopy, so do not glue these parts completely.

Stage number 4. The final.
For arranging nests, birds prefer shady places, so it is necessary to darken the plastic bottle.
Cover the base with light paint, and the “tile” with dark. When the gouache is completely dry, treat the birdhouse with acrylic varnish. This is necessary so that the gouache is not washed away by the first rain.

The birdhouse is ready, it remains to make it more attractive.
How to decorate a birdhouse
When decorating a birdhouse, try to make it look like a natural object that birds will prefer.
For decoration, use wooden sticks, twigs, twine, decorative leaves, insects, etc.
Wrap the rope around the perch to make it easier for the birds to sit. Paint the bottle cap under the chimney, and hide the places where the “tile” adjoins with the same twine.

Make an impromptu fence at the bottom of the birdhouse. To do this, glue sticks around the bottle and tie with felt. If desired, cover the decorative hedge with paint or varnish.
Cover the entrance to the birdhouse with branches in a circle in the form of a nest. Tie them with a rope and secure with glue.
The result is a cozy home, for which the birds do not even have to take out a mortgage.
To protect birds from predators, fix the birdhouse as high as possible from the ground. Poles are not the best choice for this, so give preference to trees.
Surely everyone knows about the huge benefits that birds bring to the garden. To attract them, a person creates a birdhouse - a birdhouse. Often this is a traditional rectangular structure, which is usually made of wood. But you can safely experiment with materials for the house, for example, make a birdhouse out of plastic bottles ... Such a creative birdhouse, in addition to bringing benefits, will also become a spectacular decoration of the garden!
This master class describes in detail the process of making a birdhouse from plastic bottles with your own hands.
To do this, you will need tools and materials such as:
Two plastic bottles of 5 liters. for the house, as well as 2l. for cutting "tiles";
- wooden perch;
-scissors;
-marker;
- glue or double-sided tape;
-brush;
-paints;
-acrylic front lacquer;
- burlap for the interior decoration of the birdhouse;
- various decorative elements (small sticks, flowers, butterflies, bells, ladybugs, etc.).
Making a birdhouse begins with cutting out the “tiles” on the roof of the house according to the pattern. A template is applied to the inside of 2l. bottles, the contour of which is transferred with a marker to plastic, and then cut out.


Below the entrance, there should be a perch. It is attached very simply, a mark for the cut is drawn on the bottle with a marker, an incision is made along the lines and a perch is inserted.

Through the notch of the birdhouse, burlap is glued to the inner walls of the house! On the smooth walls of the bottle, the chicks will not be able to get out of the house, so their surface should be rough and textured.
After, with the help of glue or double-sided tape (not essential), the “tile” is laid over the entire area of the roof of the birdhouse.
In the end, this is such a wonderful workpiece!

Then the birdhouse is painted. Birds prefer dark and secluded places, so the house is completely painted over. You can use acrylic paints or even gouache, since after painting the surface of the birdhouse is varnished!
When painting a bird house, the creativity and boundless imagination shown will make the birdhouse very original.
The main thing is to let each layer of paint dry properly!
Gradually, the workpiece takes on a finished look.
The top of the bottle is painted to look like brickwork. And then, in order to hide the end of the last level of the tile, a rope is wound over it.
The “tiled” roof, with the help of different shades, is given a “live” look.
After painting, you can start decorating the birdhouse, the final stage in creating a birdhouse.
With the help of sticks, a fence is created. The sticks are first glued in a bottle, and then tied with a rope until the glue dries completely.
The resulting fence, if desired, can be painted.
Also, in addition to the fence, the entrance (notch) of the birdhouse is decorated with branches and an edge is created around the house.
Decorative ladybugs, evenly distributed throughout the house.
The perch is wrapped with a rope, having previously secured it with double-sided tape or glue.
The end of the perch is decorated with a bell.
That's actually all!
A fabulous birdhouse made of plastic bottles is ready!
The final look of the craft. Photo 1.
The final look of the craft. Photo 2.
Now it remains to attach it to one of the trees in the garden, and soon a perky bird chirp will be heard from such a house. And realistic lilies of the valley made of plastic bottles will help us to complement the fabulous view of the garden.
Not all birds leave their native lands for the winter. Sparrows, titmice, crows, magpies remain, bullfinches arrive. It is difficult for them to feed themselves. Therefore, in every garden or park it is necessary to hang feeders for feathered inhabitants. And in the spring, when the starlings return, they need houses for breeding chicks. Most people in the cold season try to help the birds by creating a birdhouse with their own hands from plastic bottles.
First model
To make a birdhouse you will need:
- plastic containers of 5 and 2 liters;
- wooden stick for the perch;
- adhesive composition;
- marker, brush, scissors, paints;
- facade varnish;
- fabric for the interior lining of the house;
- decoration elements - sticks, artificial flowers, butterflies, etc.
You must first cut out the individual elements of the "tile" for the roof of the birdhouse. To do this, you need to cut the bottle to a smaller length and, applying the template to the back of the material, circle it with a marker. Cut the resulting blanks with scissors.

At the top of a large bottle, you need to cut a hole for a bird - notch. In diameter, it should not be more than 5 cm. It is better to cut an even hole with your own hands along the outlined contour with a blade or a clerical knife. Under the entrance, you must definitely attach a perch. It should be tightly attached to the wall of the birdhouse. Just below the hole, a small incision is made and a stick is inserted into it. Its length is about 10 cm.
The inner walls of the house must be pasted over with burlap or other loose fabric. This is done so that the grown chicks can get out. clinging to fabric with claws. This is painstaking work, but it is also necessary to cover the inner walls with a cloth because this will help keep the heat in the plastic house.

Tiling blanks are glued with glue or double-sided tape to the top of the bottle. The roof will protect from the scorching sun and decorate the house.
For incubation of chicks, birds choose darkened secluded places. The house should be painted over with acrylic paints or ordinary gouache. The walls and roof are covered with paint completely. A protective layer of acrylic varnish is applied over the coloring layer. It will protect the paint from exposure to rain and sun.
You can paint a birdhouse made of plastic bottles in the most creative colors with your own hands. The house outside can be plain or multi-colored. For this process, you can involve the artistic imagination of the child. The top is drawn like a brickwork, and the last tier of tiles is fixed and masked with a rope.

You can decorate the house of a feathered tenant with a fence made of sticks. They are glued to the bottom of the bottle with glue and wrapped around with twine for strength. The notch can be decorated with twigs with your own hands so that it looks like a natural wooden structure. Decorative butterflies and bugs are distributed over the surface of the walls and roof. So that the perch is not slippery, it must be wrapped with twine, after wrapping the stick with double-sided tape. You can hang a bell on its end. The final step is to secure the birdhouse to a tree out of the reach of cats and other pests.

Second model
To make it, you need a rectangular bottle. It will be placed horizontally. Birdhouses made of plastic bottles are often attached to the facades of houses, to gazebos. For such houses, you need a base - a board on which the bird house will be attached. The stand should match the length of the house.

It is better to find an opaque container of dark green or brown color. The birdhouse should be dark and quiet so that the female incubating eggs is not disturbed by light or movement from outside. If the bottle is transparent, it must be painted dark in several layers. And on top of the paint layer, varnish for strength and beauty. For such a house, the roof can be made of multi-layer tiles, also covered with paint. We cut out the tiles with our own hands from the plastic of another bottle. The roof will protect the inhabitants of the birdhouse from the heat.
The wide mouth of the container will be an entrance for birds. If the stand is slightly longer than the bottle, then the perch can be omitted. Through the neck at the bottom of the house, you need to place hay, twigs, cotton wool and other material that will be needed to build a nest. Plastic is a slippery material. In order for the birdhouse to turn out comfortable and cozy, it is necessary that the birds do not slip in it, and the chicks, clinging to rags and twigs, can get close to the hole.

To make the house look like a wooden one, it should be painted in the colors of the tree, the inlet should be decorated with twigs or blades of grass rolled in a circle and fixed in this position.
The base can be decorated with a fence. Sticks of the same length must be glued to the walls of the bottle in the lower part, and the birdhouse itself must be fixed with twine or tape to the base.
In order not to attract the attention of predators to the structure, you should choose green and brown shades for coloring plastic.
Third model
For small birds, a small birdhouse is built from a 2-liter plastic bottle.
At a height of 4-5 cm with a blade or a sharp knife, you need to cut a neat round hole. This is a birdhouse. Then glow a long thick nail and make a hole just below the notch. A thick dowel is inserted into it so that it sits tightly. This is the perch that the birds will sit on.

Next, paint the plastic in several layers of dark paint. Inside the house should be twilight. Then the starlings will feel calm and will definitely choose such a shelter for hatching chicks. Let the paint dry well and cover it with varnish so that the rain does not wash it off. Through the inlet, you can put pieces of cotton wool, rags, straws inside so that the floor does not slip and is warm. This material will be useful for residents to build a nest.
For protection from the sun and for credibility, it is necessary to make a roof near the house. To do this, from a large bottle, you need to cut off the upper part so that it gives a shadow to most of the birdhouse. It should not go down to the letka.
In order for the roof to sit tightly on the house, it is necessary to cut off the neck and put on a birdhouse. For strength, you can put the bottle on the glue. It is better to decorate the roof under a tree, and the house itself can be painted in bright colors. Then this building will be not only functional, but also a decorative decoration of the garden.
It remains to make the mount. To do this, drill two holes in the lid of a 2-liter bottle, insert a wire into them and make a strong loop. The last step is to hang the birdhouse on the tree by its loop.
In winter, it is difficult for birds to find food and shelter from bad weather. Therefore, a birdhouse from a plastic bottle will come in handy. It does not take much time, and the material is at hand for everyone. But starlings and other birds will appreciate it.
Step by step manufacturing process
To proceed to the manufacture of a birdhouse, it is recommended to prepare the following materials:
- A 2-liter water bottle, but a 5-liter container is also suitable;
- marker or marker;
- a circle cut out of cardboard for a template;
- drill;
- wooden dowels;
- pliers;
- knife for artistic cutting;
- paint, preferably acrylic;
- sponge for applying paint;
- paint brush;
- wax paper;
- CDs;
- heat gun;
- scissors;
- the wire;
- rope for hanging a birdhouse;
- glue;
- scotch.
When making a bird house, first free the container from stickers and labels. Stepping back from the bottom of the bottle 3 cm, using a template and a marker, draw a circle of the required size. After that, you need to drill a hole in the bottle with a drill and insert a wooden dowel into it, fixing it with glue. This is a finished bird perch.
The next step is painting the birdhouse. To do this, pour some brown paint on wax paper and dip a sponge into it, while applying paint to the surface of the bottle until it is completely painted.

Make a hole on the lid of the container, thread the wire into it so that you get a loop on which you will hang the birdhouse from the bottle. From the inside of the lid, twist the edges of the wire with round-nose pliers.
Prepare the window stencil in advance. It can be drawn both on paper and plastic. Paint of a different color is applied with a sponge to the surface of the bottle through a stencil.
Tiles are made from CDs. They are heated with a heat gun and carefully cut with scissors. If the disk cracks, it means that it is not heated enough. Put the resulting pieces on the glue. And then stick duct tape over them. To make the bird house look natural, then layer the pieces of discs on top of each other like a real tile looks.
Second option
This time, a container of 5 liters is taken. A circle is cut in the middle - a hole for birds. So that its edges do not injure the birds, they are pasted over with adhesive tape or adhesive tape.
The hanging loop is made as follows: a strong strip of fabric is clamped with a bottle cap. If you want to insulate the birdhouse, then wrap it with felt or wide tape. Dry straw is laid at the bottom of the product or bird food is simply poured.
You can decorate the birdhouse as you like. Above were the options with a stencil and CDs. You can paint a birdhouse or decorate it with decorative elements.
The bottom of a homemade bird house is laid with various improvised materials. This is done to make the room more comfortable. The following tools are being used:
- rags;
- tree branches;
- cotton pieces;
- hay.
Before starting work, you must protect yourself from possible injuries. In order not to splinter your hands, put on gloves first. When you are about to paint the birdhouse, think about the fact that birds are afraid of bright colors. Therefore, choose a coloring matter of a dark, discreet color.
One more point should be taken into account when choosing a place for do-it-yourself bird houses: birds love it when the birdhouse is located at a considerable height from the ground. The branch on which the bird house will be must be strong. The birdhouse should not be conspicuous, so as not to disturb the birds once again when the chicks appear. In addition to the tree, the house and bird feeder are also attached to high poles.
There are many options for making a birdhouse from plastic containers, all you need is imagination. Now you know how to make a birdhouse with your own hands.
Surely everyone knows about the huge benefits that birds bring to the garden. To attract them, a person creates a birdhouse - a birdhouse. Often this is a traditional rectangular structure, which is usually made of wood. But you can safely experiment with materials for the house, for example, make a birdhouse out of plastic bottles ... Such a creative birdhouse, in addition to bringing benefits, will also become a spectacular decoration of the garden!
This master class describes in detail the process of making a birdhouse from plastic bottles with your own hands.
To do this, you will need tools and materials such as:
Two plastic bottles of 5 liters. for the house, as well as 2l. for cutting "tiles";
- wooden perch;
-scissors;
-marker;
- glue or double-sided tape;
-brush;
-paints;
-acrylic front lacquer;
- burlap for the interior decoration of the birdhouse;
- various decorative elements (small sticks, flowers, butterflies, bells, ladybugs, etc.).
Making a birdhouse begins with cutting out the “tiles” on the roof of the house according to the pattern. A template is applied to the inside of 2l. bottles, the contour of which is transferred with a marker to plastic, and then cut out.


Below the entrance, there should be a perch. It is attached very simply, a mark for the cut is drawn on the bottle with a marker, an incision is made along the lines and a perch is inserted.

Through the notch of the birdhouse, burlap is glued to the inner walls of the house! On the smooth walls of the bottle, the chicks will not be able to get out of the house, so their surface should be rough and textured.
After, with the help of glue or double-sided tape (not essential), the “tile” is laid over the entire area of the roof of the birdhouse.
In the end, this is such a wonderful workpiece!


Then the birdhouse is painted. Birds prefer dark and secluded places, so the house is completely painted over. You can use acrylic paints or even gouache, since after painting the surface of the birdhouse is varnished!
When painting a bird house, the creativity and boundless imagination shown will make the birdhouse very original.
The main thing is to let each layer of paint dry properly!
Gradually, the workpiece takes on a finished look.


The top of the bottle is painted to look like brickwork. And then, in order to hide the end of the last level of the tile, a rope is wound over it.

The “tiled” roof, with the help of different shades, is given a “live” look.

After painting, you can start decorating the birdhouse, the final stage in creating a birdhouse.
With the help of sticks, a fence is created. The sticks are first glued in a bottle, and then tied with a rope until the glue dries completely.

The resulting fence, if desired, can be painted.
Also, in addition to the fence, the entrance (notch) of the birdhouse is decorated with branches and an edge is created around the house.

Decorative ladybugs, evenly distributed throughout the house.


The perch is wrapped with a rope, having previously secured it with double-sided tape or glue.


The end of the perch is decorated with a bell.

That's actually all!
A fabulous birdhouse made of plastic bottles is ready!

The final look of the craft. Photo 1.

The final look of the craft. Photo 2.
Now it remains to attach it to one of the trees in the garden, and soon a perky bird chirp will be heard from such a house. And realistic lilies of the valley made of plastic bottles will help us to complement the fabulous view of the garden.